Tesla Model 3: Actuator - Latch - Hood - Secondary (Remove and Replace)- Install
Tesla Model 3 2017-2024 Service Manual / Closures / Latches Strikers and Pinch Sensors / Actuator - Latch - Hood - Secondary (Remove and Replace) / Actuator - Latch - Hood - Secondary (Remove and Replace)- Install
Install
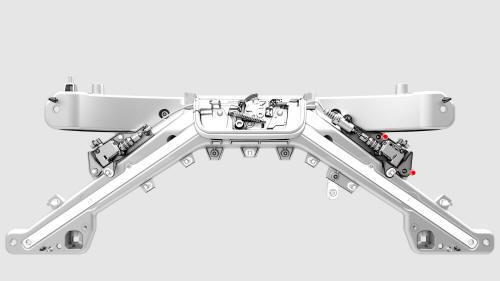
- Install the bolts that attach the secondary hood latch actuator to the
front end carrier.
 Torque 5 Nm
- Connect the electrical connector to the secondary hood latch actuator.
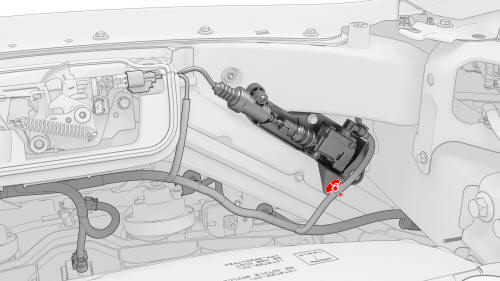
- Install the clip that attaches the secondary hood latch actuator to the front end carrier.
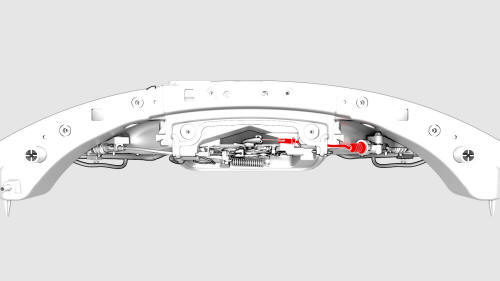
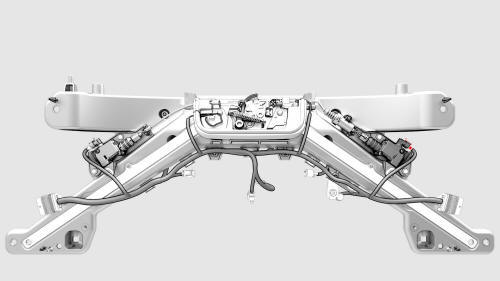
- Install the secondary hood latch actuator cable to the hood latch.
Note: Secure the cable end to the latch arm, and then attach the clip.
- Install the underhood storage unit. See Underhood Storage Unit (Remove and Replace).
- Install the hood latch cover. See Cover - Hood Latch (Remove and Replace).
- Install the cabin intake duct. See Duct - Cabin Intake (Remove and Replace).
- Install the rear underhood apron. See Underhood Apron - Rear (Remove and Replace).
READ NEXT:
 Latch - Door - Front - LH (Remove and Replace)
Remove
Remove the front LH door closeout panel. See Closeout Panel - Door -
Front - LH (Remove and Install).
Disconnect the electrical harness from the door latch connector.
Latch - Door - Rear - LH (Remove and Replace)
Remove
Remove the front LH door closeout panel. See Closeout Panel - Door -
Front - LH (Remove and Install).
Disconnect the electrical harness from the door latch connector.
Remove
Latch - Hood (Remove and Replace)
Remove
Remove the rear underhood apron. See Underhood Apron - Rear (Remove and
Replace).
Remove the cabin intake duct. See Duct - Cabin Intake (Remove and
Replace).
Remove the hood latch co
SEE MORE:
Steering Column
- Install
Install
Put the steering column in the vehicle for installation.
Install the nuts that attach the steering column to the
cross ca
Sensor - Relative Humidity and Temperature (Remove and Replace)
Remove
Remove the lower quad camera cover. See Quad Camera Cover - Lower
(Remove and Replace).
Remove the rear view mirror. See Mirror - Rear View (Remove and
Replace).
Remove the forward facing camera. See Camera - Forward Facing (Remove
and Replace).
Disconnect the electrical co
© 2019-2024 Copyright www.tmodel3.com
