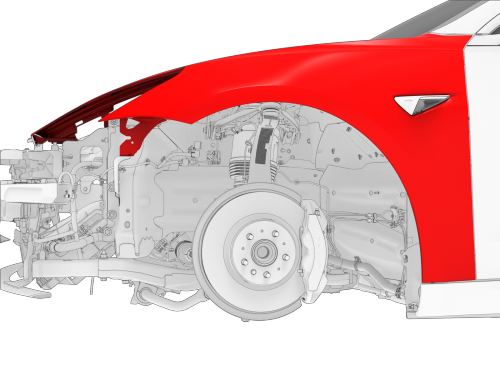
Tesla Model 3: Fender Assembly - Front - LH (Remove and Replace)- Remove
Tesla Model 3 2017-2024 Service Manual / Body / Body Panels / Fender Assembly - Front - LH (Remove and Replace) / Fender Assembly - Front - LH (Remove and Replace)- Remove
This procedure assumes the cowl screen carrier bracket, headlight grommet, and underhood storage unit clips on the fender assembly being replaced are undamaged. Inspect these components and if necessary, replace with new parts.
Remove
- Remove the rear underhood apron. See Underhood Apron - Rear (Remove and Replace).
- Remove the cabin intake duct. See Duct - Cabin Intake (Remove and Replace).
- Remove the hood latch cover. See Cover - Hood Latch (Remove and Replace).
- Remove the underhood storage unit. See Underhood Storage Unit (Remove and Replace).
- Remove the front fascia. See Fascia - Front (Remove and Install).
- Remove the LH headlight. See Headlight - LH (Remove and Replace).
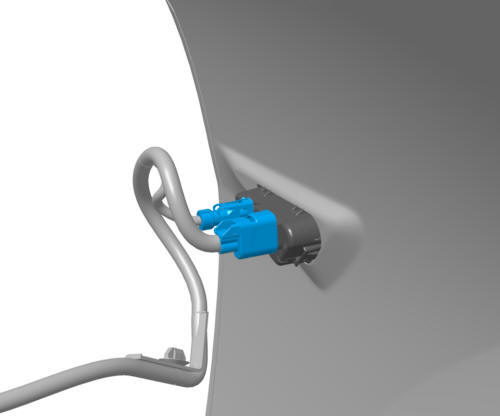
- Disconnect the electrical connectors (2x) from the front side repeater light.
- Remove the LH fascia side to fender bracket. See Bracket - Fascia Side to Fender - LH (Remove and Replace).
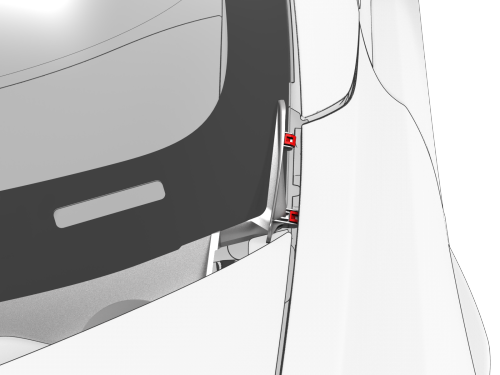
- Release the two leftmost clips on the cowl screen panel from the LH front fender bracket.
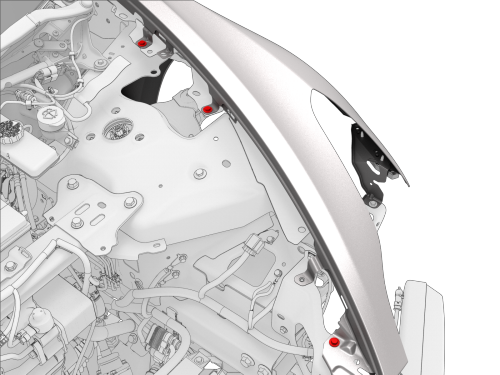
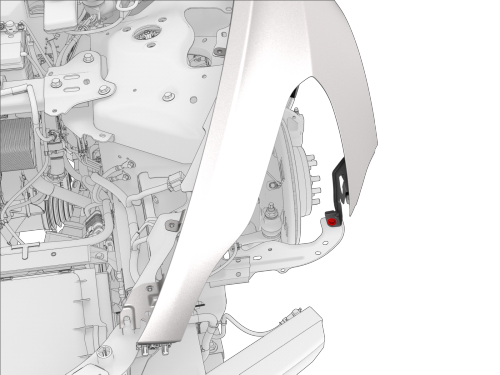
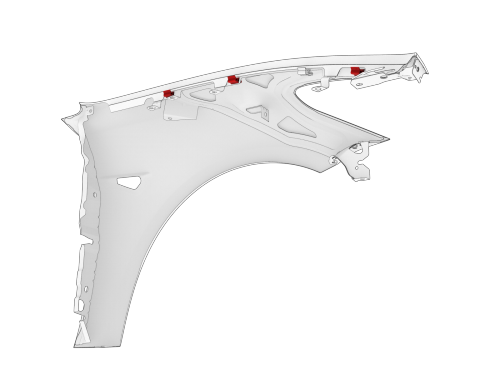
- Remove the bolts that attach the upper LH front fender to the vehicle.
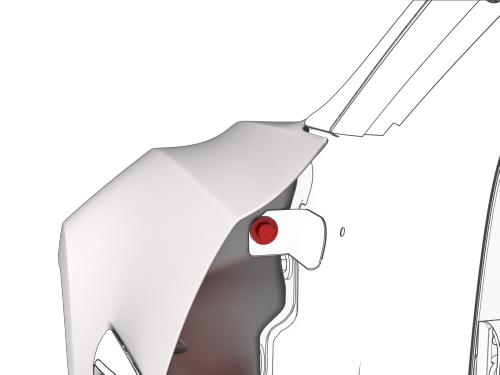
- Remove the bolt that attaches the lower LH front fender to the vehicle.
- Remove the bolt that attaches the rear LH front fender to the vehicle.
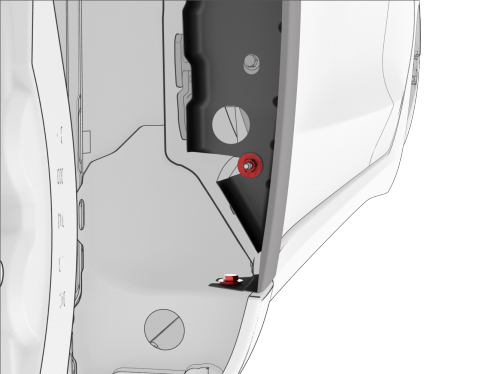
- Remove the bolt and nut that attach the lower LH front fender to the vehicle.
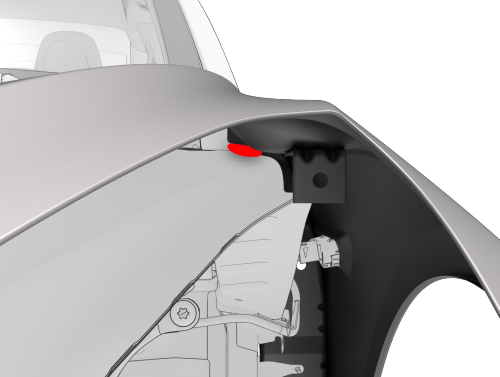
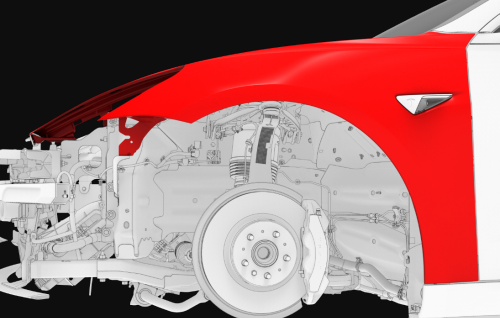
- Inspect the area between the upper LH front fender and the vehicle body for foam sealant. If present, carefully cut the sealant with a blade, and then separate the upper fender from the body with a plastic trim tool.
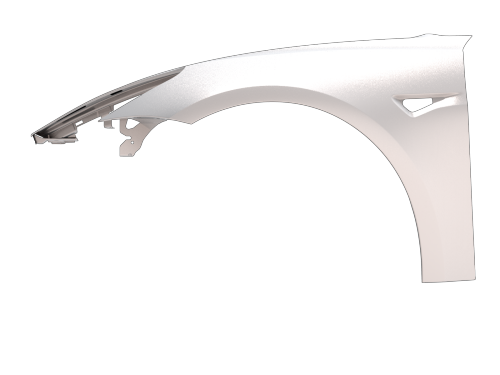
- Remove the LH front fender from the vehicle.
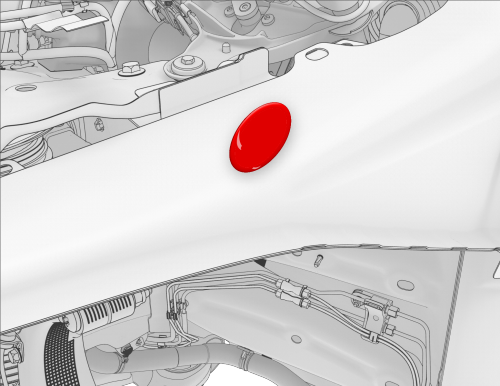
- Use a flat scraper blade and isopropyl alcohol (IPA) to remove the foam sealant from the LH outer shotgun panel. Any remaining sealant should be flush with the shotgun panel.
- Apply primer to the LH outer shotgun panel, completely covering the previous foam application area.

- Release the clip that attaches the LH cowl screen carrier bracket to the old LH front fender, and then remove the bracket from the fender.

- Remove the headlight grommet from the old LH front fender.
- Remove the underhood storage unit clips (3x) from the old LH front
fender.
READ NEXT:
 Fender Assembly - Front - LH (Remove and Replace)- Install
Install
Install the underhood storage unit clips (3x) on the new LH front
fender.
Note: Replace any broken or damaged clips.
Install the headlight grommet on the new LH front fender.
Hood (Remove and Install)
Remove
Remove the LH and RH hood gas struts. See Gas Strut - Hood - LH (Remove
and Replace).
Use tape to mark the mounting locations of the LH and RH hood hinges on
the hood.
Wit
SEE MORE:
Flood Ports - 2nd Generation (Retrofit)
Procedure
Note: This procedure destructively removes the 1st generation flood
ports and installs 2nd generation flood ports.
Connect a laptop with Toolbox 3 to the vehicle.
In Toolbox, click in the Search field, and then click Tools.
From the Tools menu, click Active Alerts.
Click Read Aler
Raise Vehicle - 2 Post Lift
DRAFT
Warning:
This procedure was derived from pre-production computer
models, and might not reflect the real-world situation. Warnings and cautions
might be missing. Follow safety requirements and use extreme caution when
working on or near high voltage systems and components. Do not redistri
© 2019-2024 Copyright www.tmodel3.com
