Tesla Model 3: Fuse - Cabin Heater - HV Battery- Install
Tesla Model 3 2017-2024 Service Manual / Battery System / HV Battery Electrical Components / Fuse - Cabin Heater - HV Battery (Remove and Replace) / Fuse - Cabin Heater - HV Battery- Install
Install
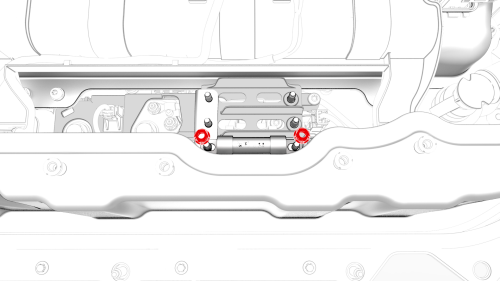
- Install the PTC heater fuse to the RH penthouse bus, and then install
new nuts to attach the fuse to the bus.
 Torque 2.5 Nm
.jpg) Generic Measurement - Actual busbars and fasteners might appear
different
Generic Measurement - Actual busbars and fasteners might appear
different
- Use the Hioki resistance meter to measure the resistance at the HV joint between the penthouse bus and the LH side of the PTC heater fuse body .
Note: The maximum acceptable resistance is 0.105 mΩ (105 μΩ). If the resistance is above this value, escalate a Toolbox session, as appropriate.
Generic Measurement - Actual busbars and fasteners might appear
different
- Use the Hioki resistance meter to measure the resistance at the HV joint between the RH side of the PTC heater fuse and the respective ring terminal plating.
Note: The maximum acceptable resistance is 0.145 mΩ (145 μΩ). If the resistance is above this value, escalate a Toolbox session, as appropriate.
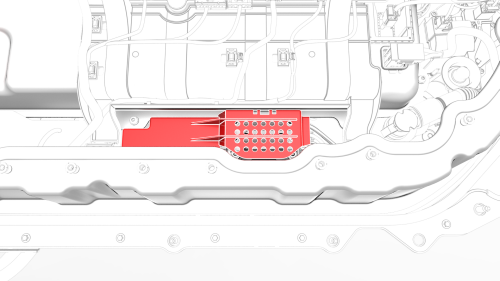
- Install the fuse access insulator on the RH penthouse bus cover, fasten the clips that attach the insulator to the cover, and lower the high voltage controller.
- Install the pyrotechnic battery disconnect into the penthouse. See Pyrotechnic Battery Disconnect (Remove and Replace).
READ NEXT:
 Fuse - Power Conversion System - HV Battery-
Remove
Fuse - Power Conversion System - HV Battery-
Remove
SPECIAL TOOLS
Ratchet, 1/4" Sq Dr, HV Insulated (1057602-00-A)
Ext Bar, Wobble, 1/4" Dr, HV Insulated (1057603-00-A)
Skt, 1/4" Sq Dr, 8mm, HV Insulated (1057604-00-A)
Magnet, Flexible, HV Insulated,
Fuse - Power Conversion System - HV Battery-
Install
Install
Install the power conversion system fuse to the RH penthouse bus, and
then install new nuts to attach the fuse to the bus.
Torque 2.5 Nm
Generic Measurement - Actual busbars and f
SEE MORE:
Using the Touchscreen
A thorough tutorial on using and navigating the center touchscreen display is given in this chapter. It includes all the necessary features, including media control, climate control, energy monitoring, customizable vehicle settings, navigation and maps, software update management, and touchscreen ge
Breather - Rear Drive Unit (Remove and
Replace)
Remove
Remove the rear subframe
assembly. See
Subframe Assembly - Rear (Remove
and Install).
Remove the breather from the
rear drive unit.
© 2019-2024 Copyright www.tmodel3.com
