Tesla Model 3: Harness - AC Inlet - HV Battery- Install
Tesla Model 3 2017-2024 Service Manual / Battery System / HV Battery Electrical Components / Harness - AC Inlet - HV Battery (Remove and Replace) / Harness - AC Inlet - HV Battery- Install
Install
- Use an IPA wipe to clean the mating surfaces of the positive ring terminal to the positive busbar, and the negative ring terminal to the negative busbar.

- Install the HV battery fast charge contactor cover onto the HV battery fast charge contactor, and fasten the clips (x8) that attach the cover to the contactor.
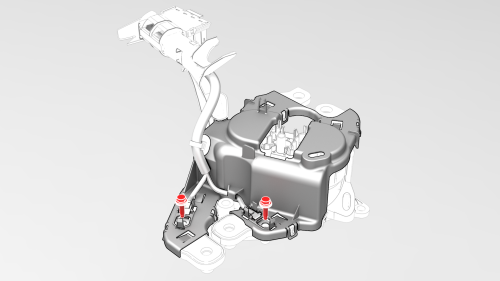
- Install new bolts to attach the positive and negative ring terminals to
the busbars, and then mark the bolts with a paint pen after they are torqued.
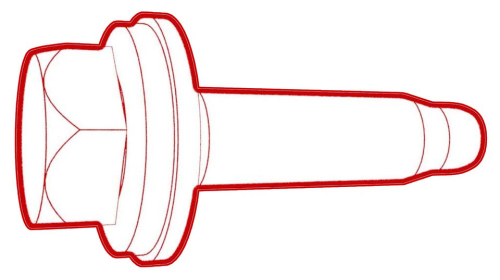 Torque 4.4 Nm
.jpg) Generic Measurement - Actual busbars and fasteners might appear
different
Generic Measurement - Actual busbars and fasteners might appear
different
- Use the Hioki resistance meter to measure the resistance between the copper portion of the positive ring terminal and the busbar to which that terminal is secured.
Note: The maximum acceptable resistance is 0.150 mΩ (150 μΩ). If the resistance is above this value, escalate a Toolbox session, as appropriate.
Generic Measurement - Actual busbars and fasteners might appear
different
- Use the Hioki resistance meter to measure the resistance between the copper portion of the negative ring terminal and the busbar to which that terminal is secured.
Note: The maximum acceptable resistance is 0.150 mΩ (150 μΩ). If the resistance is above this value, escalate a Toolbox session, as appropriate.
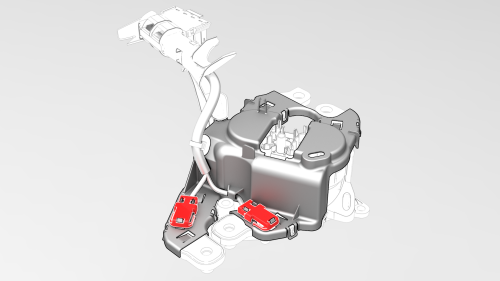
- Install the AC inlet terminal covers, and fasten the clips that attach the covers over the positive and negative ring terminals.
- Install the HV battery fast charge contactor. See Contactor - Fast Charge - HV Battery (Remove and Replace).
READ NEXT:
 Harness - Penthouse - HV Battery- Remove
SPECIAL TOOLS
Ratchet, 1/4" Sq Dr, HV Insulated (1057602-00-A)
Ext Bar, Wobble, 1/4" Dr, HV Insulated (1057603-00-A)
Skt, 1/4" Sq Dr, 13mm, HV Insulated (1057606-00-A)
Magnet, Flexible, HV Insulated
Harness - Penthouse - HV Battery- Install
Install
Lay the HV battery penthouse harness down inside of the penthouse.
Note: The large fast charge contactor connector goes on the LH side
near the LH passthrough to the HV battery.
Install
SEE MORE:
Actuator - Lower Mode (Remove and Replace)
Remove
Remove the HVAC assembly. See
HVAC Assembly (Remove and Replace).
Disconnect the lower mode actuator electrical connector.
Remove the screws that attach the lower mode actuator to the HVAC
assembly, and then remove the actuator from the HVAC assembly.
Install
Position th
Lumbar Support - Backrest - Driver Seat (Remove and Replace)
Remove
Remove the driver seat back shell. See
Shell - Seat Back - Driver (Remove and Replace).
Release the clips that attach the outboard side of the seat back
cover to the seat back frame, and then expose the air bag connector.
Disconnect the electrical harness from the dr
© 2019-2024 Copyright www.tmodel3.com
