Tesla Model 3: Harness - Penthouse - HV Battery- Install
Tesla Model 3 2017-2024 Service Manual / Battery System / HV Battery Electrical Components / Harness - Penthouse - HV Battery (Remove and Replace) / Harness - Penthouse - HV Battery- Install
Install
- Lay the HV battery penthouse harness down inside of the penthouse.
Note: The large fast charge contactor connector goes on the LH side near the LH passthrough to the HV battery.
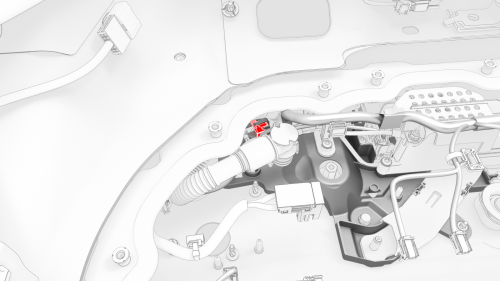
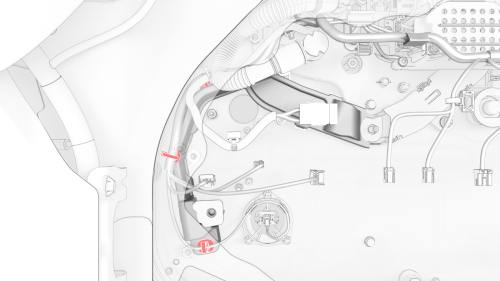
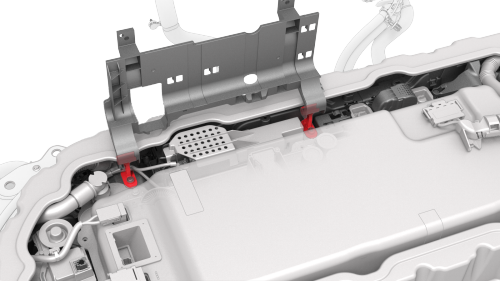
- Install the LH passthrough onto the posts at the LH penthouse floor, and then press the passthrough down to fasten the passthrough clips (x3).
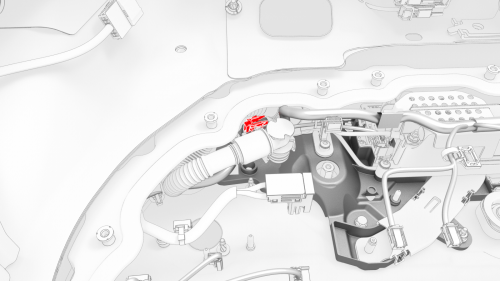
- Press the center of the LH passthrough to connect the passthrough connector to the HV battery module 1 BMS connector.
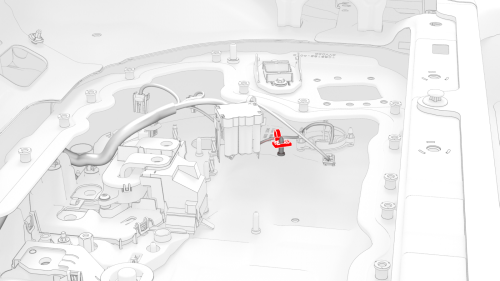
- Fasten the clip that attaches the HV battery penthouse harness to the post near the LH UFO.
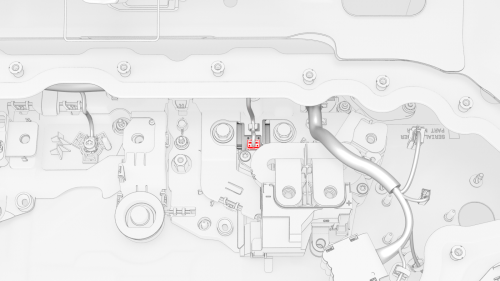
- If the vehicle is configured with dual motors, connect the HV battery penthouse harness to the front drive unit high voltage interlock loop connector, and then fasten the harness under the tab.
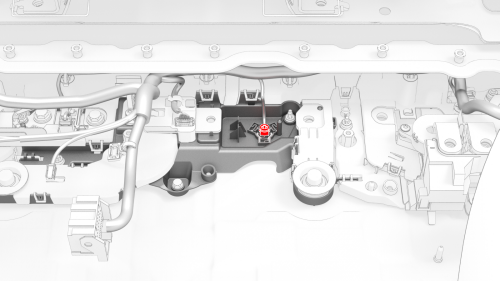
- Install the pyrotechnic battery disconnect connector into the penthouse floor, and then fasten the clips that attach the connector to the floor.
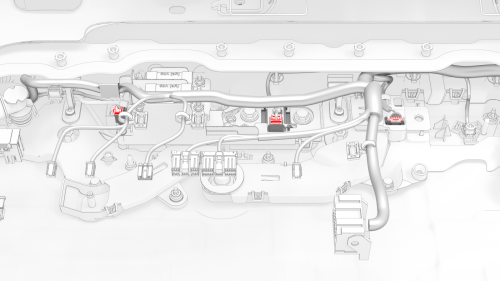
- Connect the HV battery penthouse harness to the shunt connector, the rear drive unit high voltage interlock loop connector, the A/C compressor and PTC heater high voltage interlock loop connector, and then fasten the harness under the respective tabs.
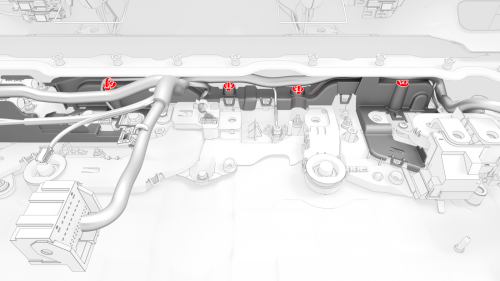
- Fasten the clips (x4) that attach the HV battery penthouse harness along the busbar insulator.
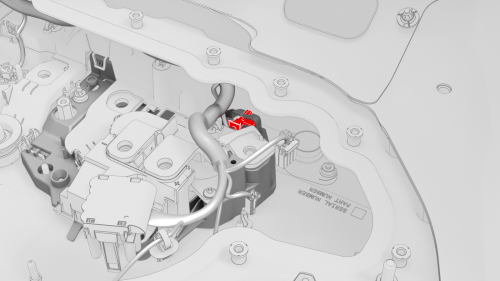
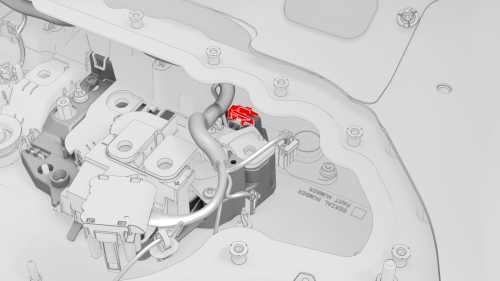
- If removed, install the shunt access insulator over the shunt, and then fasten the clips that attach the insulator to the shunt.
.png)
- Install the fuse access insulator to the RH penthouse bus cover, and then fasten the clips that attach the insulator to the cover.
- Fasten the RH Hall-effect sensor under the tab of the RH flood port cover.
- Install the clip that confines the RH Hall-effect sensor to the RH flood port cover above the RH flood port.
- Install new cable ties on either side of the RH Hall-effect sensor to attach the HV battery penthouse harness to the power conversion system DC bus HV harness.
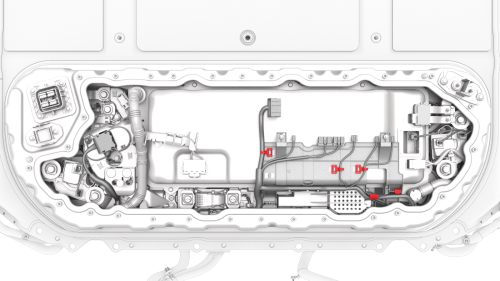
- Install the RH passthrough onto the posts at the RH penthouse floor, and then press the passthrough down to fasten the passthrough clips (x3).
- Press the center of the RH passthrough to connect the passthrough connector to the HV battery module 4 BMS connector.
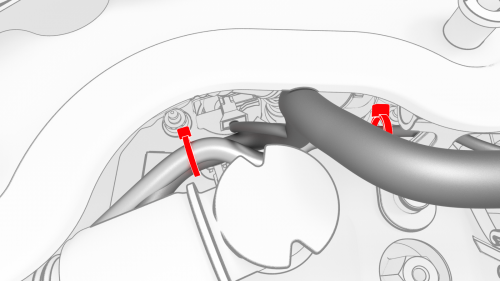
- Bring the positive DC link to the penthouse, and then fasten the clips that attach the HV battery penthouse harness to the positive DC link insulator.
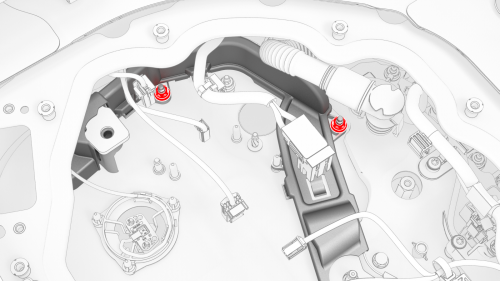
- Install the positive DC link onto the studs and posts of the penthouse
floor, and then install the nuts (x2) that attach the link to the floor.
 Torque 6 Nm
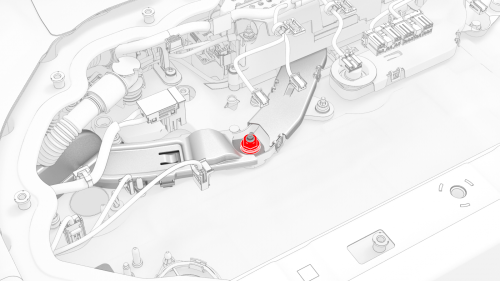
- Install a new nut to join the positive DC link to the positive busbar.
 Torque 9 Nm
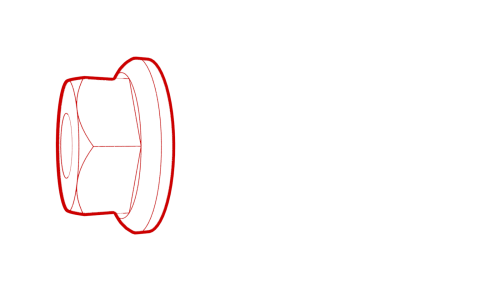
- Install the insulator cap onto the nut that joins the positive DC link to the positive busbar.
- Install the HV battery positive contactor. See Contactor - Positive - HV Battery (Remove and Replace).
- Install the 12V DC passthrough. See Passthrough - DCDC - 12V (Remove and Replace).
- Fasten the LH Hall-effect sensor under the tab of the LH flood port cover.
- Install the clip that confines the LH Hall-effect sensor to the LH flood port cover above the LH flood port.
- Install the HV battery fast charge contactor into the penthouse. See Contactor - Fast Charge - HV Battery (Remove and Replace).
- Install the HV battery DC input assembly. See DC Input Assembly - HV Battery (Remove and Replace).
- Install the HV battery negative contactor. See Contactor - Negative - HV Battery (Remove and Replace).
- Install the power conversion system, perform a penthouse coolant leak test, and refill the coolant. See Power Conversion System (Remove and Replace).
- Install the hinge tray vertically onto the hinges, press down on the tray at each hinge so that the tray attaches to the hinges, and then lower the tray.
- Fasten the clips (x5) that attach the HV battery penthouse harness to the hinge tray.
- Install the high voltage controller. See Controller - High Voltage (Remove and Replace).
- Install the pyrotechnic battery disconnect into the penthouse. See Pyrotechnic Battery Disconnect (Remove and Replace).
- Install the penthouse cover, perform a penthouse air leak test, and connect 12V power. See Cover - Penthouse (Remove and Replace).
READ NEXT:
 HV Battery Contactor Seize Check
SPECIAL TOOLS
Insulation Multimeter Fluke 1587 FC (1076921-00-A)
Warning: Remove all jewelry (watches, bracelets, rings, necklaces,
earrings, ID tags, piercings, etc.) from your person, and all obj
HV Header - HV Battery- Remove
SPECIAL TOOLS
Extractor, Battery HV Header, Model 3 (1140423-00-B)
Lever Lock, HV Connector, Model 3 (1140311-00-A)
Warning:
Only technicians who have been trained in High Voltage Awareness are
perm
SEE MORE:
Trim - Side - Trunk - LH (Remove and Replace) - Remove
Remove
Remove the 2nd row lower seat cushion. See
Seat Cushion - Lower - 2nd Row (Remove and Replace).
Remove the LH 2nd row seat side bolster. See
Bolster - Side - Seat - 2nd Row - LH (Remove and Replace).
Remove the LH 2nd row seat back. See
Seat Back - 2nd Row - LH (Remove and Install).
Seal - Outer Belt - Rear Door - LH (Remove and Replace)
Note:
This procedure was formulated using a release candidate or production
model. Follow safety requirements and use extreme caution when working on or
near high-voltage systems and components.
Remove
Open the LH rear door and lower the window.
Pry the outer belt seal from the rear do
© 2019-2024 Copyright www.tmodel3.com
