Tesla Model 3: Trim - C-Pillar - Rear - LH (Remove and Replace) - Remove
Tesla Model 3 2017-2024 Service Manual / Interior Trim / Pillar and Sill Trim / Trim - C-Pillar - Rear - LH (Remove and Replace) / Trim - C-Pillar - Rear - LH (Remove and Replace) - Remove
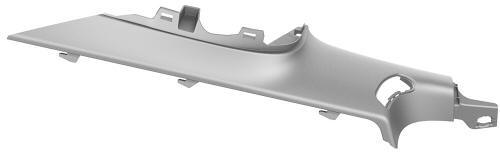
Remove
- Remove the 2nd row lower seat cushion. See Seat Cushion - Lower - 2nd Row (Remove and Replace).
- Remove the LH 2nd row seat side bolster. See Bolster - Side - Seat - 2nd Row - LH (Remove and Replace).
- Remove the LH side rail trim. See Trim - Side Rail - LH (Remove and Replace).
- Remove the LH upper C-pillar trim. See Trim - C-Pillar - Upper - LH (Remove and Replace).
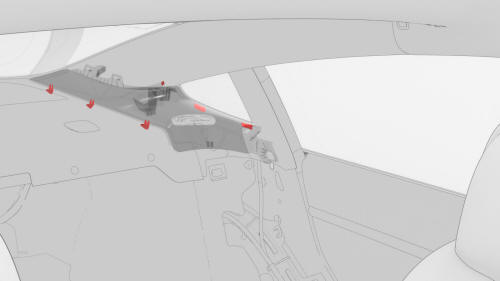
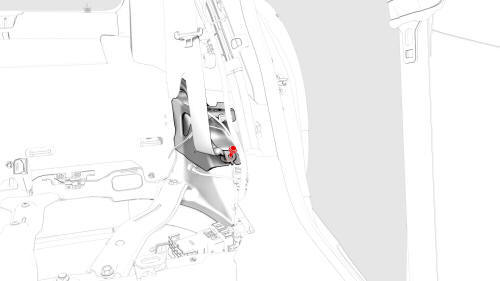
- Release the clip and tabs that attach the LH rear C-pillar trim to the body, and then set the trim aside.
- Remove and discard the bolt that attaches the lower seatbelt anchor to the vehicle.
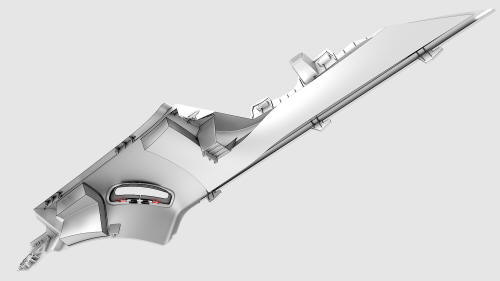
- Release the bezel clips that attach the seatbelt bezel to the LH rear C-pillar trim, and then slide the bezel off of the seatbelt.
- Move the seatbelt through the LH rear C-pillar trim, and then remove the trim from the vehicle.
Note: Remove any remaining LH rear C-pillar trim clips from
the LH C-pillar, and if the LH rear C-pillar trim is to be later installed,
remove all clips from the trim.
READ NEXT:
 Trim - C-Pillar - Rear - LH (Remove and Replace) - Install
Install
If reusing the same LH rear C-pillar trim, install new clips onto the
trim.
Move the seatbelt through the LH rear C-pillar trim.
Slide the seatbelt bezel onto the seat belt, and the
Trim - C-Pillar - Upper - LH (Remove and Replace)
Remove
Remove the 2nd row lower seat cushion. See
Seat Cushion - Lower - 2nd Row (Remove and Replace).
Remove the LH 2nd row seat side bolster. See
Bolster - Side - Seat - 2nd Row - LH (Remove
Trim - Side Rail - LH (Remove and Install)
Remove
Open the LH rear door.
Release the push clips (x2) that attach the LH side rail trim to the LH
side rail.
Tip:
Release the top clip first (closest to the coat hanger) and work t
SEE MORE:
Operating Navigate on Autopilot
Once enabled, the Navigate on Autopilot
button appears on the map's turn-by-turn
direction list whenever a navigation route is
active and the route includes at least one
controlled-access road. Touch this button to
allow Navigate on Autopilot to assist you on
your journey. When enabled, the Na
Latch - Hood (Remove and Replace)
Remove
Remove the rear underhood apron. See Underhood Apron - Rear (Remove and
Replace).
Remove the cabin intake duct. See Duct - Cabin Intake (Remove and
Replace).
Remove the hood latch cover. See Cover - Hood Latch (Remove and
Replace).
Remove the underhood storage unit. See Underhoo
© 2019-2024 Copyright www.tmodel3.com
