Tesla Model 3: Windshield (Remove and Install)-Remove
Tesla Model 3 2017-2024 Service Manual / Body / Windshield and Body Glass / Windshield (Remove and Install) / Windshield (Remove and Install)-Remove
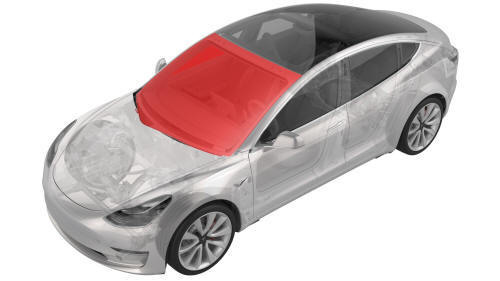
Remove
- Open all doors and lower all windows.
- Open the hood.
- Remove the rear underhood apron. See Underhood Apron - Rear (Remove and Replace).
- Remove the cabin intake duct. See Duct - Cabin Intake (Remove and Replace).
- Remove the hood latch cover. See Cover - Hood Latch (Remove and Replace).
- Remove the underhood storage unit. See Underhood Storage Unit (Remove and Replace).
- Remove the LH and RH wiper arms. See Wiper Arms (Remove and Replace).
- Remove the LH and RH shock tower covers. See Cover - Shock Tower - LH (Remove and Replace).
- Remove the cowl screen panel. See Panel - Cowl Screen (Remove and Replace).
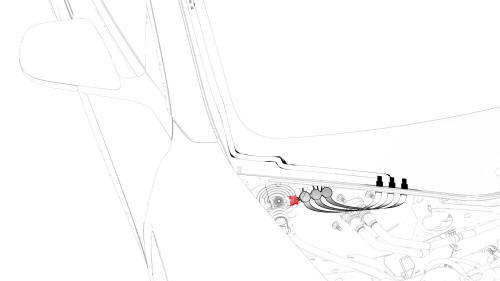
- Disconnect the electrical harness from the windshield heater connector.
- Remove the LH and RH side rail trims. See Trim - Side Rail - LH (Remove and Install).
- Remove the headliner. See Headliner (Remove and Install).
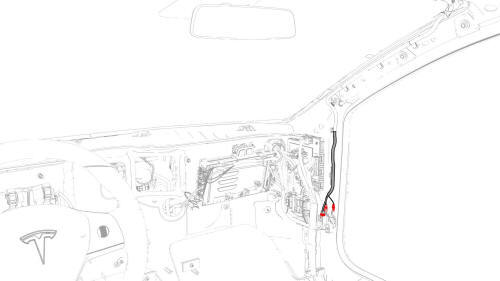
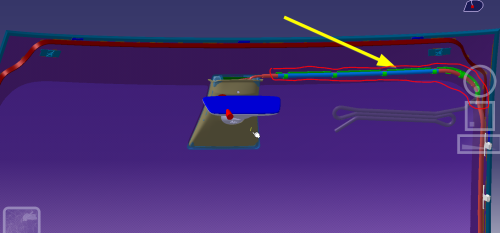
- Disconnect the windshield electrical harness connectors (x3) from the RH vehicle harness, and pull windshield electrical harness up through the opening on the RH side of the instrument panel.
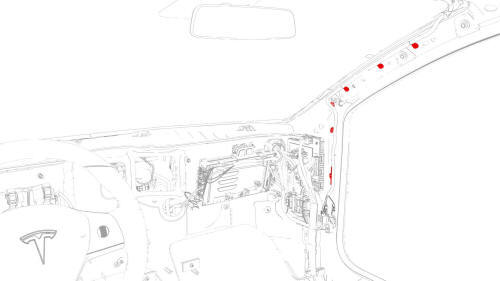
- Release the clips (x6) that attach the windshield electrical harness to the RH A-pillar area.
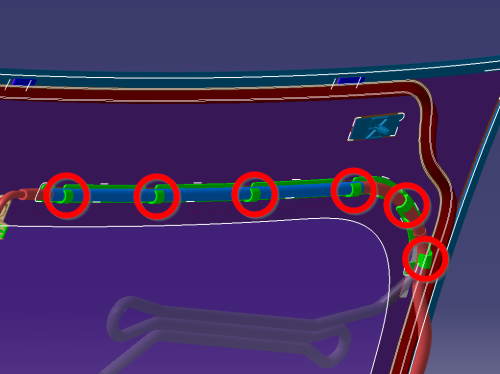
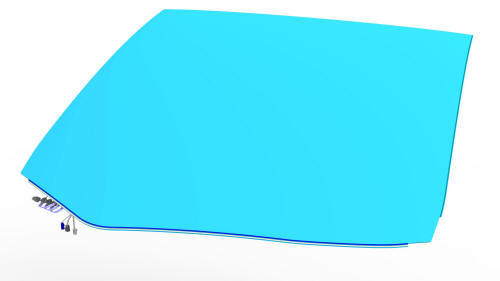
- Release the clips (x6) that attach the windshield electrical harness to the fastener track on the windshield, and then remove the harness from the windshield.
- Remove the fastener track from the windshield with a clip pry tool.
- Tape the windshield electrical harness to the inside of the windshield.
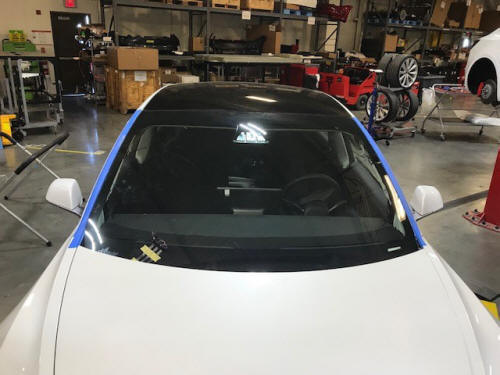
- Apply masking tape to the exterior of the LH and RH A-pillars to protect the paint from damage.
- Put a large towel over the instrument panel for protection.
- Cut a suitable length of square wire to use with T-handles.
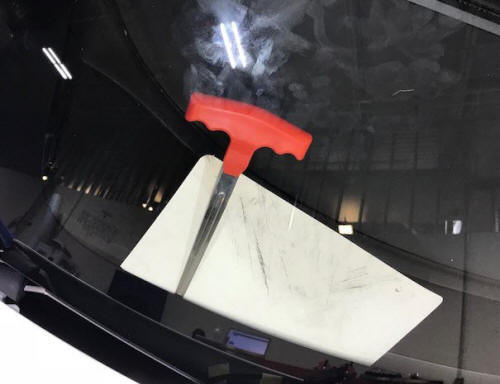
- Secure the wire to the starter tool and push the tool through the urethane at the RH lower side of the windshield.
- Attach the square wire and pull tool back through into the vehicle.
- Remove the square wire from the starter tool and secure the square wire into one T-handle.
- Make sure that there is adequate square wire and attach it to the second T-handle.
- With an assistant, use the T-handles to cut the urethane that attaches the windshield to the body.
Caution:
Use care when cutting the urethane at the upper corners and around the VIN plate.
- Cut the square wire with diagonal cutters, and then remove the T-handles from the vehicle.
- Attach suction cups to the outer LH and RH sides of the windshield.
- Partially close the hood for added clearance between the windshield and the body.
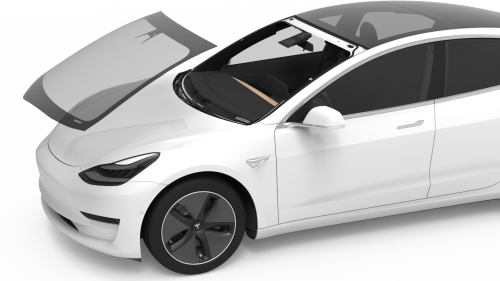
- With an assistant, remove the windshield from the vehicle and put the windshield on support stand.
Note: Use care not to damage the windshield harness when removing the windshield from the vehicle.
- Remove the suction cups from the windshield.
READ NEXT:
 Windshield (Remove and Install)- Windshield
Preparation
Windshield (Remove and Install)- Windshield
Preparation
Windshield Preparation
Use a razor blade and a blade scraper to remove the old urethane from
the windshield flange on the vehicle.
Install the GPS antenna into the windshield bracket, and th
Windshield (Remove and Install)- Install
Install
Note: Use soft materials to protect the windshield and to prevent
scratching.
Attach suction cups to the LH and RH sides of the windshield on the
outside side of the windshield.
W
SEE MORE:
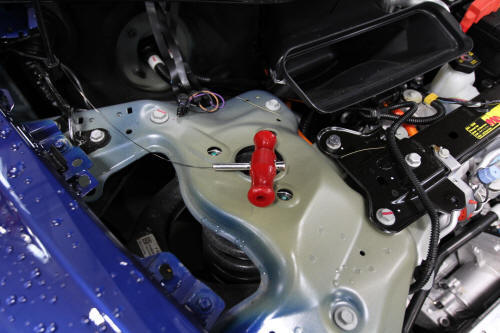
Knuckle - Suspension - Front - LH (Dual Motor) - Remove
Remove
If equipped, remove the LH front wheel center cap. See
Cap - Wheel (Remove and Replace).
Loosen the LH front wheel lug nuts.
Caution: Use only hand tools to remove
or install the fasteners. Do not use impact or power tools.
Caution: Use a 6 point socket. Do not use a 12 point so
Heat Exchanger - Front Drive Unit (Remove and Replace)
Remove
Remove the front subframe assembly. See
Subframe Assembly - Front (Dual Motor) (Remove and Install)
Release the clip that connects the front drive unit inverter-heat
exchanger hose to the heat exchanger coolant inle
Release the clips that attach the front drive unit inverter-
© 2019-2024 Copyright www.tmodel3.com
