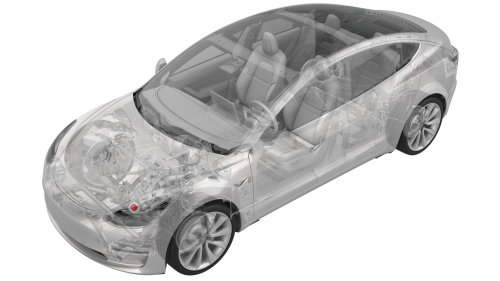
Tesla Model 3: Bushing - Gearbox - Front Drive Unit (Remove and Replace)
SPECIAL TOOLS
Engine Motor Stand, 1000 lb. (NA, APAC)
(1053595-00-A)
Engine Stand, 1000 lbs (EMEA) (1053595-01-A)
Fixture, DUF Disassembly, Model 3 (1467557-00-A)
Tool, Axle Extraction, Model 3 (1133386-00-A)
Kit, Drive Unit Bushing R&R, Model 3
(1137785-00-A)
Remove
Note: Make sure not to move the rear front drive
unit support posts.
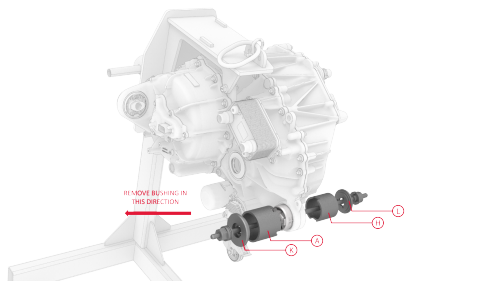
Note: Use cups "K", "A", "H", and "L" when
assembling the special tool, as shown.
Install
Note: Make sure not to move the rear front drive
unit support posts from their previous
positions.
Caution: Do not apply any lubricant to the halfshaft
splines. If lubricant is mistakenly applied,
wipe the splines clean with a shop towel.
Filter - Oil - Front Drive Unit (Remove and Replace)
Procedure Replace the front drive unit oil filter according to the gearbox fluid
procedure. See
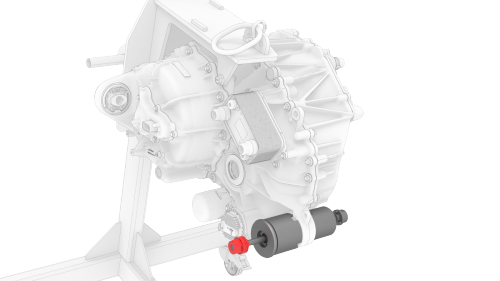
Gearbox Fluid - Front Drive Unit (Drain and Refill). Bushing - Gearbox - Front Drive Unit - Remove
.png)
.png)
.png)
.png)
.png)
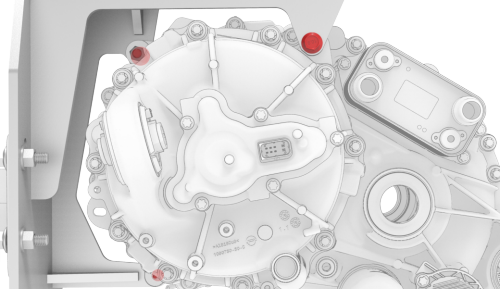
Other assemblies hidden for clarity
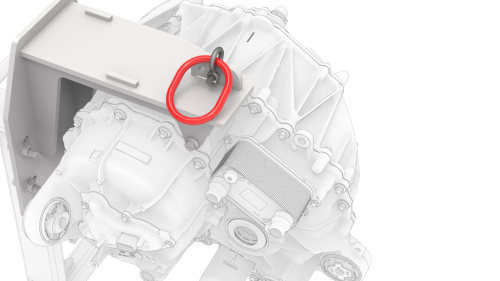
Other assemblies hidden for clarity
.png)

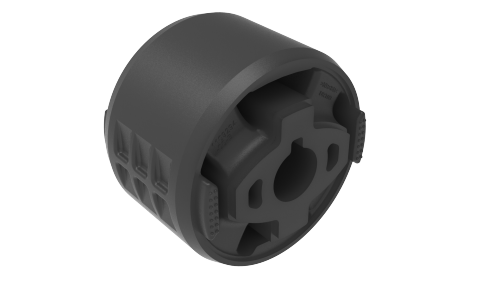
Bushing - Gearbox - Front Drive Unit - Install

.png) Torque 80 Nm
Torque 80 Nm
.jpg)
READ NEXT:
 Gearbox Fluid - Front Drive Unit (Drain and Refill)
Gearbox Fluid - Front Drive Unit - Drain
SPECIAL TOOLS
KIT, DRIVE UNIT OIL DRAIN, MODEL 3
(1134264-00-A)
SEE MORE:
Sensor - Cabin Temperature (Remove and Replace)
Note: This procedure was formulated using a release candidate
or production model. Follow safety requirements and use extreme caution when
working on or near high-voltage systems and components.
Remove
Open the LH front door.
Lower the LH front window.
Release the clips that atta
Mirror - Rear View (Remove and Replace)
Remove
Remove the lower quad camera cover. See
Quad Camera Cover - Lower (Remove and Replace).
Grip the rear view mirror stalk, and then turn counterclockwise to
release the rear view mirror.
Caution:
Do not turn the rear view mirror itself.
Disconnect the electrical connector f
