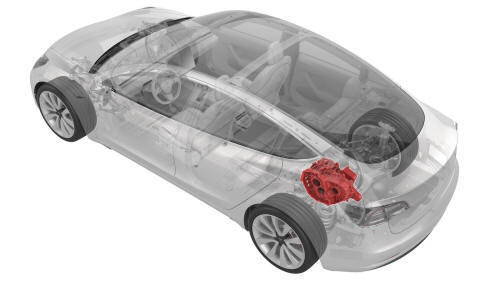
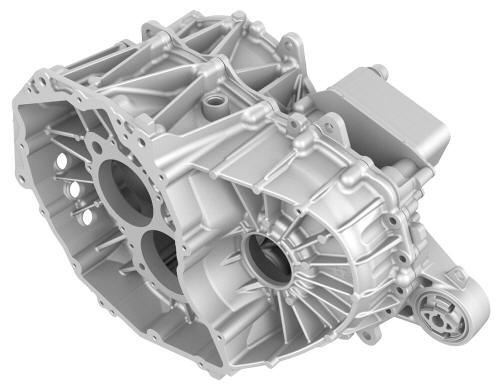
Tesla Model 3: Gearbox - Rear Drive Unit (Remove and Replace)
Tesla Model 3 2017-2026 Service Manual / Rear Drive Unit / Rear Gearbox and Halfshafts / Gearbox - Rear Drive Unit (Remove and
Replace)
Remove
- Remove the rear drive unit inverter. See Inverter - Rear Drive Unit (Remove and Install).
- Setup the gantry to support the gearbox motor assembly.
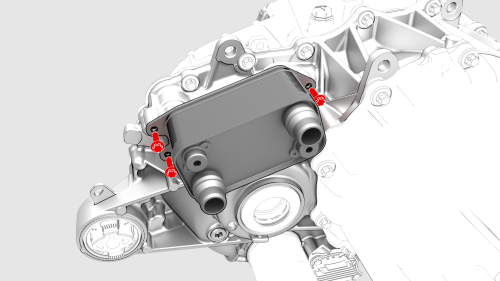
- Remove the bolts that attach
the heat exchanger to the
gearbox, and then remove the
heat exchanger from the gearbox.
 Torque 5 Nm +30º
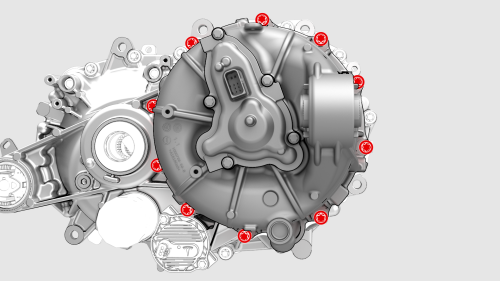
- Remove the bolts that attach
the motor assembly to the
gearbox, and then use the gantry
to lift the gearbox from the
motor assembly.
 Torque 15 Nm +25º
Install
Installation procedure is the reverse of removal, except for the following:
Caution:
Perform a push-pull test to verify that the hose is fully seated.
- Install new o-rings on the heat exchanger.
- Install a new oil filter if the replacement gearbox is without one.
READ NEXT:
 Gearbox Fluid - Rear Drive Unit (Drain and
Refill)
Gearbox Fluid - Rear Drive Unit (Drain and
Refill)
Gearbox Fluid - Rear Drive Unit - Drain
Drain
SPECIAL TOOLS
KIT, DRIVE UNIT OIL DRAIN, MODEL
SEE MORE:
Speed Assist
How Speed Assist Works
Model 3 displays a speed limit on the
touchscreen and you can choose if and how
you are warned when you exceed the speed
limit. You can touch this speed limit sign to
automatically change the set speed to the
detected speed limit (including any offsets
that you have set
Duct - HVAC Plenum - Outer (Remove and Replace)
Remove
Remove the rear underhood apron. See
Underhood Apron - Rear (Remove and Replace).
Remove the cabin intake duct. See
Duct - Cabin Intake (Remove and Replace).
Release the clips that attach the outer HVAC plenum duct to the inner
HVAC plenum duct, and then remove the outer HVAC pl
© 2019-2026 Copyright www.tmodel3.com
