Tesla Model 3: Passthrough - DCDC - 12V- Install
Tesla Model 3 2017-2024 Service Manual / Battery System / HV Battery Electrical Components / Passthrough - DCDC - 12V (Remove and Replace) / Passthrough - DCDC - 12V- Install
Install
- Use an IPA wipe to clean the mating surfaces of the DCDC passthrough, and the DCDC harness.
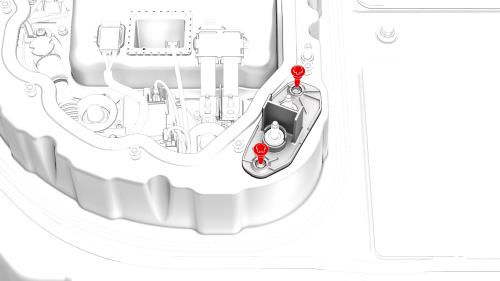
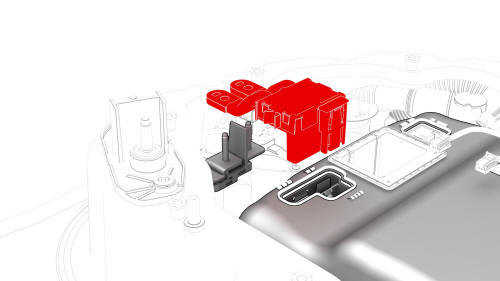
- Install the 12V DCDC passthrough into the penthouse, install the bolts
that attach the 12V DCDC passthrough to the penthouse, and then mark the
bolts with a paint pen after they are torqued.
 Torque 10 Nm
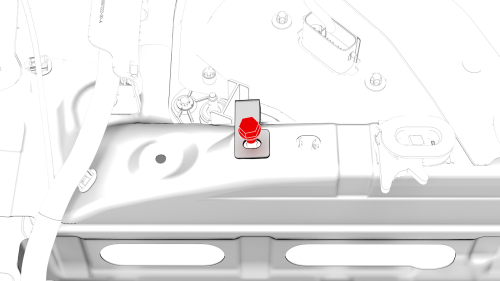
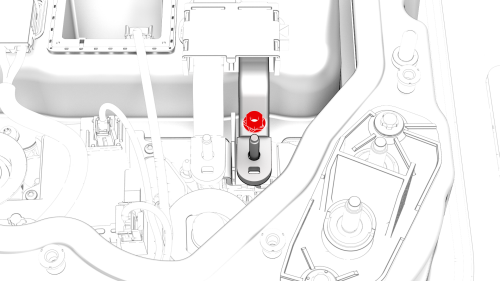
- Install the bolt that attaches the DCDC ground busbar to the body, and
then mark the bolt with a paint pen after it is torqued.
 Torque 20 Nm
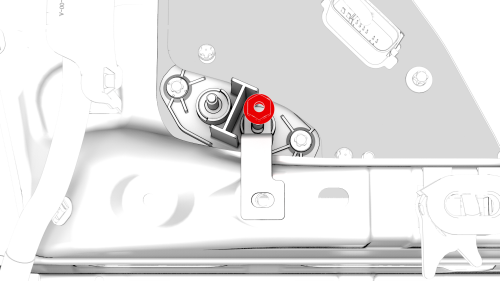
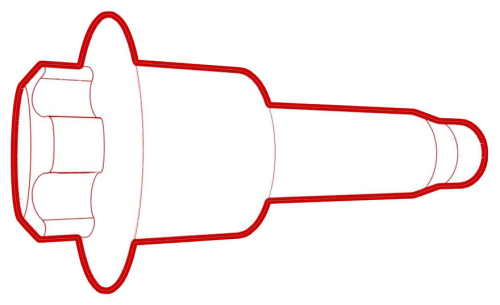
- Install the DCDC ground busbar to the DCDC passthrough, install a new
nut to attach the DCDC ground busbar to the DCDC passthrough, and then mark
the nut with a paint pen after it is torqued.
.png) Torque 15 Nm
Torque 15 Nm
- Connect the DCDC harness to the power conversion system, and then fasten the clip that attaches the DCDC harness to the power conversion system.
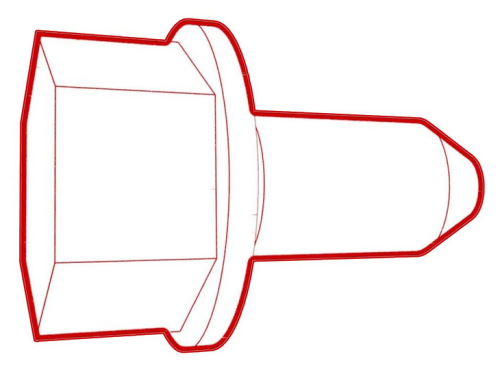
Install the nut that attaches the negative terminal of the DCDC harness to
the negative DCDC passthrough busbar, and then mark the nut with a paint pen
after it is torqued.
.jpg) Torque 4.5 Nm
Torque 4.5 Nm

- Install the nut that attaches the positive terminal of the DCDC harness
to the positive DCDC passthrough busbar, and then mark the nut with a paint
pen after it is torqued.
Torque 4.5 Nm
.jpg) Generic Measurement - Actual busbars and fasteners might appear
different
Generic Measurement - Actual busbars and fasteners might appear
different
- Use the Hioki resistance meter to measure the resistance between the positive joint of the DCDC harness and the positive terminal of the 12V DCDC passthrough.
Note: The maximum acceptable resistance is 0.100 mΩ (100 μΩ). If the resistance is above this value, escalate a Toolbox session, as appropriate.
Generic Measurement - Actual busbars and fasteners might appear
different
- Use the Hioki resistance meter to measure the resistance between the negative joint of the DCDC harness and the negative terminal of the 12V DCDC passthrough.
Note: The maximum acceptable resistance is 0.100 mΩ (100 μΩ). If the resistance is above this value, escalate a Toolbox session, as appropriate.
- Install the high voltage controller. See Controller - High Voltage (Remove and Replace).
- Install the pyrotechnic battery disconnect into the penthouse. See Pyrotechnic Battery Disconnect (Remove and Replace).
READ NEXT:
 Power Conversion System- Remove
SPECIAL TOOLS
Connector Removal, Coolant, PCS, M3 (1111868-00-B)
Kit, Svc Plug, Cooling Hose, Model 3 (1135762-00-A)
Tool, Vacuum Cup, 3" x 6" (Qty 2) (1114917-00-A)
Resistance meter, microohm, Hiok
Power Conversion System- Install
Install
Consider your first step.
If the removed power conversion system is to be reinstalled, go to step
5.
If a replacement power conversion system is to be installed, continue to the
n
SEE MORE:
About HomeLink
If your vehicle is equipped with the HomeLink
Universal Transceiver, you can operate up to
three Radio Frequency (RF) devices, including
garage doors, gates, lights, and security
systems.
Note: Depending on date of manufacture,
market region, and options selected at time of
purchase, some v
Parts, Accessories, and
Modifications
Use only genuine Tesla parts and accessories.
Tesla performs rigorous testing on parts to
ensure their suitability, safety, and reliability.
Purchase these parts from Tesla, where they
are professionally installed and where you can
receive expert advice about modifications to
Model 3.
Not
© 2019-2024 Copyright www.tmodel3.com
