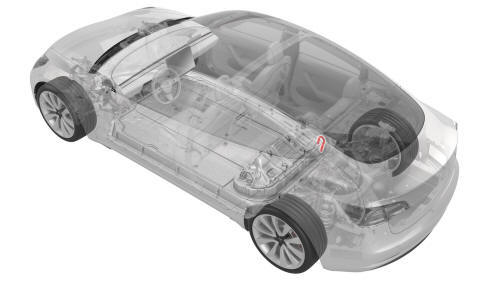
Tesla Model 3: Tube - Input - Coolant - Power Conversion System (Remove and Replace)
SPECIAL TOOLS Connector Removal, Coolant, PCS, M3 (1111868-00-B) Kit, Svc Plug, Cooling Hose, Model 3 (1135762-00-A) Warning: Only technicians who have been trained in High Voltage Awareness are
permitted to perform this procedure. Proper personal protective equipment (PPE)
and insulating HV gloves with a minimum rating of class 0 (1000V) must be worn
at all times a high voltage cable, busbar, or fitting is handled. Refer to Tech
Note TN-15-92-003, "High Voltage Awareness Care Points" for additional safety
information. Remove
Caution: Spilled coolant can create an electrical path. Install Caution: Spilled coolant can create an
electrical path.
Caution: Verify that both clips have fully engaged the barb on the power
conversion system and battery flange, and then pull up on the fittings to check
retention. Caution: Spilled coolant can create an electrical path. Caution: Do not follow the procedure to
connect 12V power at this time.Tube - Input - Coolant - Power Conversion System- Remove
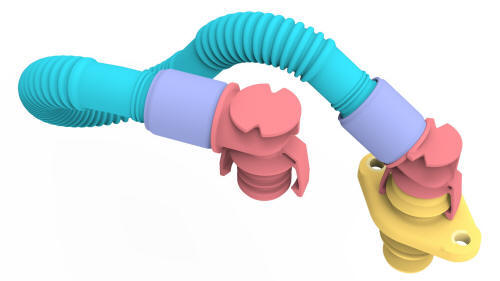
 Example of Coolant Connector Removal Tool Use
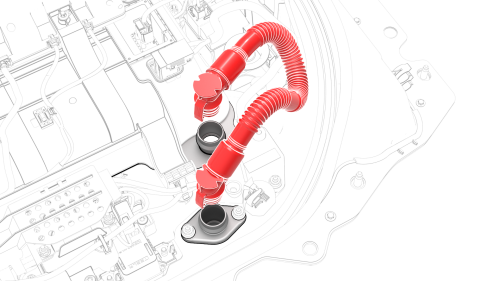
Tube - Input - Coolant - Power Conversion System- Install
 O-rings in good condition
 O-ring in poor condition
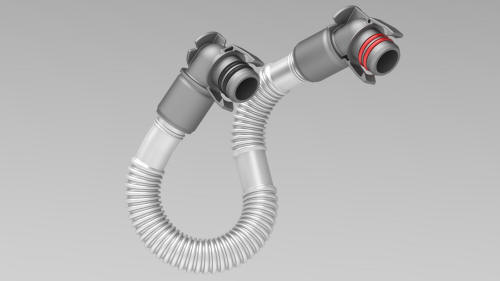
 Example of a Secure Connection
.png) Torque 6 Nm
Torque 6 Nm
READ NEXT:
 Tube - Output - Coolant - Power Conversion System (Remove and Replace)
Tube - Input - Coolant - Power Conversion System-
Remove
SPECIAL TOOLS
Connector Removal, Coolant, PCS, M3 (1111868-00-B)
Kit, Svc Plug, Cooling Hose, Model 3 (1135762-00-A)
Warning:
Only technici
SEE MORE:
HVAC Assembly (Remove and Replace)
HVAC Assembly- Remove
SPECIAL TOOLS
Kit, EPB Release, Handheld (1134520-00-A)
XP-10 Power Supply, XP-10 (1129348-00-A)
Remove
Remove the rear underhood apron. See
Underhood Apron - Rear (Remove and Replace).
Remove the cabin intake duct. See
Duct - Cabin Intake (Remove and Replace).
Remove t
Sensor - Temperature - LH (Remove and Replace)
Remove
Remove the driver floormat.
Remove the center console LH side carpet. See
Carpet - Side Panel - Center Console - LH (Remove and Replace).
Disconnect the LH temperature sensor electrical connector.
Release the tabs that attach the LH temperature sensor inside the HVAC
assembl
