Tesla Model 3: A/C Refrigerant Leak Detection
SPECIAL TOOLS
Tool, Flashlight, UV (1053591-00-A)
UV Leak Detection Kit (1080563-01-A)
Procedure
- Remove the rear underhood apron. See Underhood Apron - Rear (Remove and Replace).
- Remove the cabin intake duct. See Duct - Cabin Intake (Remove and Replace).
- Remove the hood latch cover. See Cover - Hood Latch (Remove and Replace).
- Remove the underhood storage unit. See Underhood Storage Unit (Remove and Replace).
- Remove the caps from the A/C ports.
- Connect the hoses from the A/C machine to the vehicle, and then perform the A/C recovery.
Note: Record the amount of A/C refrigerant and oil that has been recovered after the A/C system is discharged.
- Perform the A/C system vacuum.
Note: The A/C system vacuum takes 30 minutes to complete.
- Perform the A/C refrigerant refill.
- Set the temperature to LO on both driver and passenger sides and set the A/C system to AUTO.
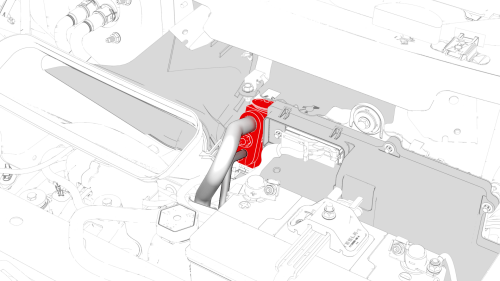
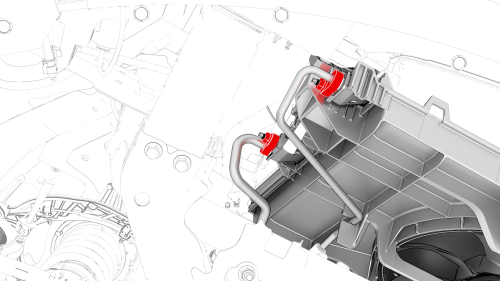
- Use UV light and the UV inspection kit to check for A/C refrigerant leaks in the TXV valve area.
Note: If an A/C refrigerant leak is found, replace the TXV valve. See TXV Valve - Evaporator (Remove and Replace).
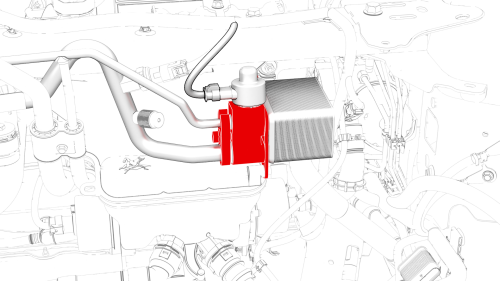
- Use UV light and the UV inspection kit to check for A/C refrigerant leaks in the chiller and EXV valve area.
Note: If an A/C refrigerant leak is found, replace the chiller and EXV valve. See Chiller and EXV Assembly (Remove and Replace).
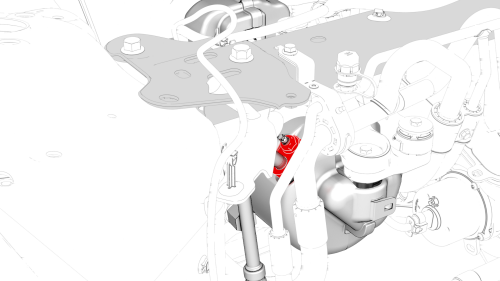
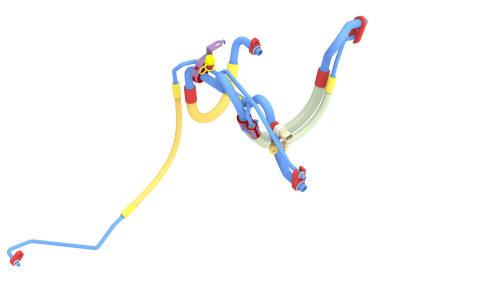
- Use UV light and the UV inspection kit to check for A/C refrigerant leaks in the compressor discharge and suction lines area.
Note: If an A/C refrigerant leak is found, replace the compressor to condenser high pressure pipe. See Pipe - High Pressure - Compressor to Condenser (Remove and Replace).
- Use UV light and the UV inspection kit to check for A/C refrigerant leaks in the high/low pressure refrigerant pipes area.
Note: If an A/C refrigerant leak is found, replace the high/low pressure refrigerant pipes. See Pipes - Refrigerant - High / Low Pressure (Remove and Replace).
- Remove the front aero shield panel. See Panel - Aero Shield - Front (Remove and Replace).
- Remove the front fascia valance. See Valance - Front Fascia (Remove and Replace).
- Use UV light and the UV inspection kit to inspect both condenser connections and the condenser itself for A/C refrigerant leaks.
Note: If an A/C refrigerant leak is found, replace the condenser. See Condenser (Remove and Replace).
- Install the front fascia valance. See Valance - Front Fascia (Remove and Replace).
- Install the front aero shield panel. See Panel - Aero Shield - Front (Remove and Replace).
- Lower the vehicle.
- Remove the vehicle from the lift.
- Remove the A/C lines from the vehicle.
- Install the caps onto the A/C ports.
- Install the underhood storage unit. See Underhood Storage Unit (Remove and Replace).
- Install the hood latch cover. See Cover - Hood Latch (Remove and Replace).
- Install the cabin intake duct. See Duct - Cabin Intake (Remove and Replace).
- Install the rear underhood apron. See
Underhood Apron - Rear (Remove and Replace).
READ NEXT:
 A/C Refrigerant (Recovery and Recharge)
A/C Refrigerant- DRAFT
Warning:
This procedure was derived from pre-production computer models, and
might not reflect the real-world situation. Warnings and cautions might be
missing. Follow safe
SEE MORE:
Airbag and Supplementary Restraint System (SRS) Precautions
General Precautions
The Supplementary Restraint System (SRS) includes airbags, pretensioners, and
other safety-related components. The SRS contains components which could be
potentially hazardous to the technician if not serviced and handled correctly.
Warning: Always follow these precautions and
Smart Summon
Smart Summon (if equipped) is designed to
allow you to move Model 3 to your location
(using your phone's GPS as a target
destination) or to a location of your choice,
maneuvering around and stopping for objects
as necessary. Smart Summon works with the
Tesla mobile app when your phone is l
