Tesla Model 3: Bushing - Front Drive Unit - RH (Remove and Replace)

Remove
- Remove the front subframe assembly from the vehicle. See Subframe Assembly - Front (Dual Motor) (Remove and Install).
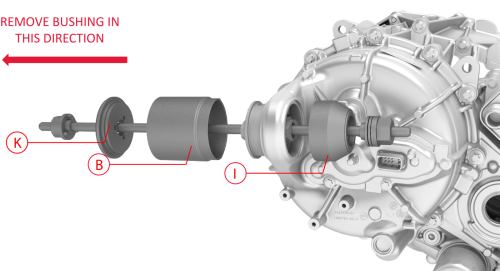
Other assemblies hidden for clarity
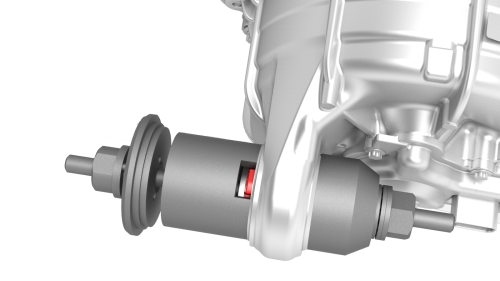
- Install the bushing tool on the RH front drive unit bushing. Note: Use cups "K", "B", and "I" when assembling the special tool, as shown.
Apply torque only to the nut highlighted red
- Turn the bearing-side bushing tool nut with a wrench while holding the opposite nut in place.
Caution: Apply torque only to the bearing-side bushing tool nut.
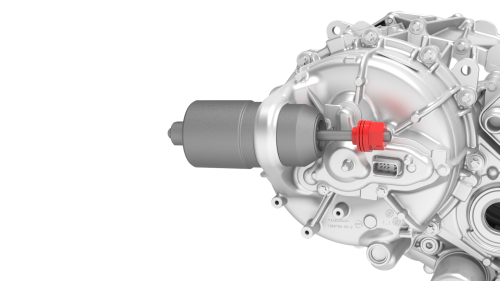
- When the bushing has been pushed out of the front
drive unit, separate the bushing tool, and then remove
the bushing.
Install
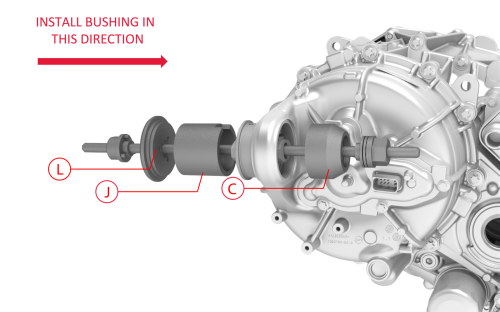
Cups "L", "J", and "C" used to install the
bushing
Rubber tab visible at the top of cup
"J"
- Set up the bushing tool to press in the new bushing. Note: Use cups "L", "J", and "C" when assembling the special tool, as shown. Note: Make sure the rubber tab is visible at the top of cup "J".
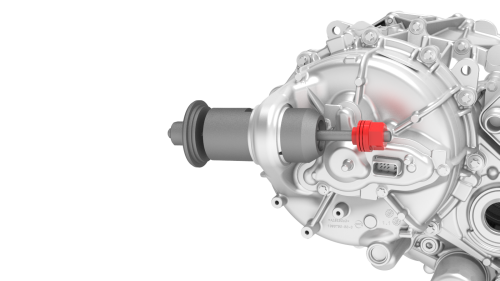
Apply torque only to the nut highlighted red
- Turn the bearing-side bushing tool nut with a wrench until the bushing flange makes contact with the front drive unit.
Caution: Apply torque only to the bearing-side bushing tool nut.
Note: While installing the bushing, make sure the rubber tab remains visible at the top of cup "J".
- Separate the bushing tool, and then remove it from the drive unit.
Other assemblies hidden for clarity
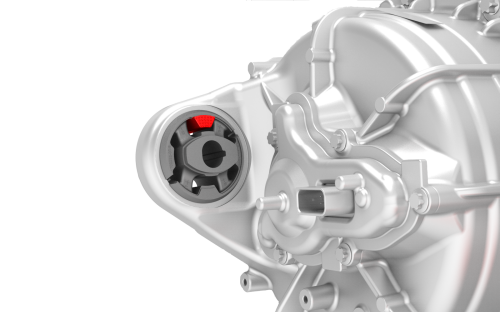
- Make sure the bushing alignment lug is oriented to 12 o'clock.
- Install the front subframe assembly on the vehicle. See Subframe Assembly - Front (Dual Motor) (Remove and Install)
READ NEXT:
 Drive Unit - Front (Remove
and Install)
Drive Unit - Front (Remove
and Install)
Drive Unit - Front
- Remove
SPECIAL TOOLS
Tool, Axle Extraction, Model 3 (1133386-00-A)
SEE MORE:
Latch Actuator - Charge Port (Remove and Replace)
Latch Actuator - Charge Port - Remove
Remove
Perform the vehicle electrical isolation procedure.
See Vehicle Electrical Isolation Procedure.
Remove the LH trunk side trim. See Trim - Side -
Trunk - LH (Remove and Re
Subframe Assembly - Rear - Remove
SPECIAL TOOLS
Fixture, Subframe, Model 3 (1099645-00-B)
Lifting Sling, Drive Unit, Model 3 (NA, APAC) (1130279-00-A)
Adapter, Subframe, Body Shop, Model 3 (1130481-00-A)
Tool, Hub Puller, Hydraulic (1096075-00-A)
Tool, Axle Extraction, Model 3 (1133386-00-A)
Lever Lock, HV Connector, Model 3 (1140
