Tesla Model 3: Actuator - 5-Way Valve (RWD) (Remove and Replace)
Tesla Model 3 2017-2026 Service Manual / Thermal Management / Cooling System / Actuator - 5-Way Valve (RWD) (Remove and Replace)
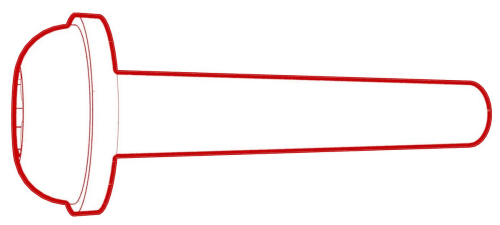
SPECIAL TOOLS
Wrench, Diverter Valve, Model 3 (1447556-00-A)
Remove
- Disconnect 12V power. See 12V Power (Disconnect and Connect).
- Remove the front aero shield. See Panel - Aero Shield - Front (Remove and Replace).
.png)
- From under the vehicle, disconnect the electrical harness from the 5-way valve actuator connector.
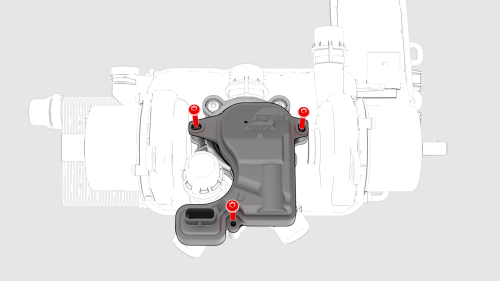
- Remove the screws that attach the 5-way valve actuator to the 5-way valve cover, and then remove the actuator from the valve cover.
Note: The end of the stem shell shaft is exposed.
Install
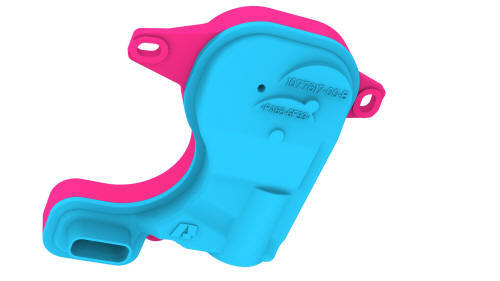
- Examine the end the of the 5-way valve stem shell shaft. One shaft spline is slightly wider than the others.
- Mark the wider spline.
- Use the diverter valve wrench to align the 5-way valve stem shell shaft with the 5-way valve actuator for assembly.
Note: When properly aligned, the actuator easily slides over the stem shell shaft.
- Install the 5-way valve actuator on the 5-way valve cover, and then
install the screws that attach the actuator on the cover.
 Torque 2 Nm
 - Connect the electrical harness to the 5-way valve actuator connector.
- Install the front aero shield. See Panel - Aero Shield - Front (Remove and Replace).
- Connect 12V power. See 12V Power (Disconnect and Connect).
- Connect a laptop with Toolbox to the vehicle.
- Using Toolbox, run the 5-way valve actuator self-test, "TEST-SELF_VCFRONT_X_FIVE-WAY-VALVE."
Note: This Toolbox routine tests and calibrates the 5-way valve actuator.
- Disconnect the laptop from the vehicle.
READ NEXT:
 Coolant Pump - HV Battery (Remove and Replace)
Coolant Pump - HV Battery - Remove
Remove
Remove the underhood storage unit. See Underhood Storage Unit (Remove
and Replace).
Disconnect 12V power. See 12V Power (Disconnect and Connect).
Remo
SEE MORE:
Battery Information
About the Battery
Model 3 has one of the most sophisticated
battery systems in the world. The most
important way to preserve the Battery is to
LEAVE YOUR VEHICLE PLUGGED IN when
you are not using it. This is particularly
important if you are not planning to drive
Model 3 for several weeks. Wh
Switch - Brake Light (Remove and Replace)
Remove
Remove the LH center console side panel carpet. See
Carpet - Side Panel - Center Console - LH (Remove and
Replace).
Disconnect 12V power. See 12V Power (Disconnect
© 2019-2026 Copyright www.tmodel3.com
