Tesla Model 3: Door - Rear - LH (Remove and Replace)
Door - Rear - LH (Remove )
.jpg)
Remove
- Open the rear LH door, pass a shop towel halfway through the striker,
and then close the door so that it rests against the shop towel.
- Remove the rear LH door glass.
- Remove the LH rear door outer belt seal.
- Remove the LH rear window regulator. See Window Motor /
Regulator Assembly - Rear - LH (Remove and Replace).
- Remove the LH rear door latch. See Latch - Door - Rear - LH (Remove and
Replace).
- Remove the LH rear door exterior release handle. See Handle - Exterior
Release - Door - Rear - LH (Remove and Replace).
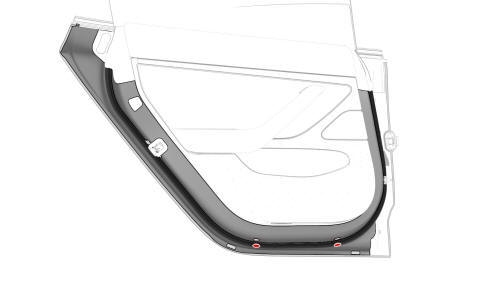
- Remove the button plugs from the bottom of the door.
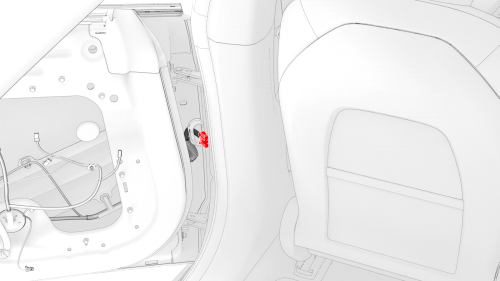
- Open the front LH door, and partially close the rear LH door.
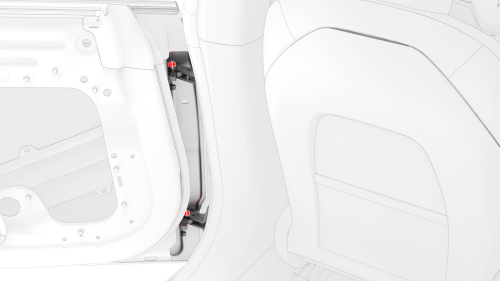
.jpg)
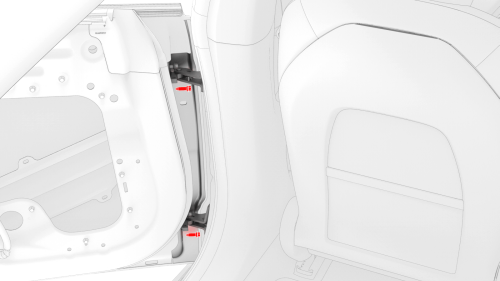
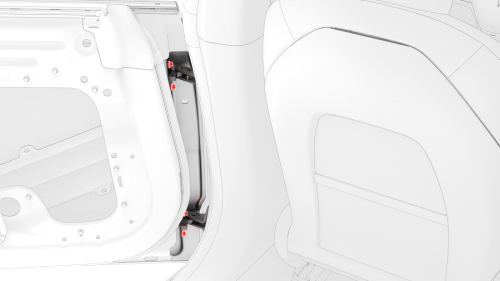
- Release the clips (x4) of the rear LH door electrical harness seal at
the B-pillar, and pull the wiring harness out of the B-pillar bulkhead.
- Pull the rear LH door wiring harness connector out of the B-pillar, and
then tuck the harness into the cavity at the front of the rear LH door.
- Carefully open the rear LH door, and then close the front LH door.
Caution:
Do not allow the leading edge of the rear LH door to crush the wiring
harness or connector against the B-pillar.
- Disconnect the rear LH door electrical harness, and then rotate the
connector exiting the B-pillar 90 degrees, so as to prevent the connector
from falling back into the B-pillar.
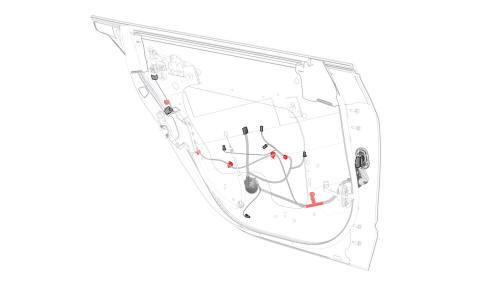
- Release all door electrical harness clips.
- Push the electrical harness out through the door bulkhead, and remove
the electrical harness from the door.
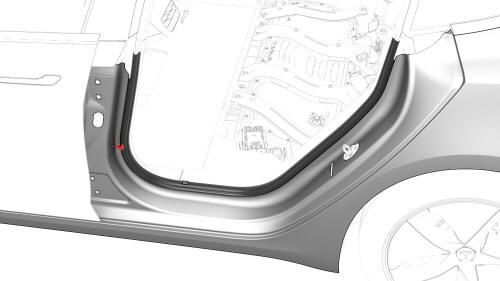
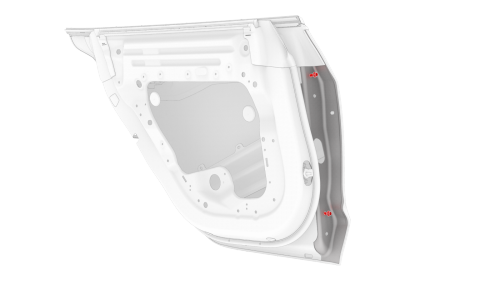
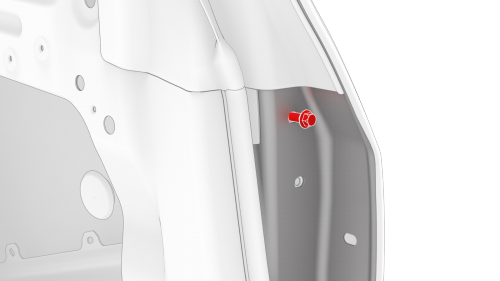
- Remove the bolt that attaches the door check to the B-pillar.
Caution:
Unbolting the door check allows the door to swing freely beyond opening
limits.

- Remove the nuts that attach the door check inside the door, and remove
the door check from the door.
 Torque 24 Nm
- Loosen the upper bolt of each hinge that attaches the rear LH door to
the hinge by approximately 5 mm.
- With assistance, remove the lower bolt of each hinge, and then unhook
and lift the door away from the vehicle.

Door - Rear - LH (Remove and Replace)- Install
Install
- Install a new secondary door seal on the replacement door. See Seal -
Secondary - Rear Door - LH (Remove and Replace).
- Make sure that the upper bolt for each door hinge is installed, and the
bolt head extends approximately 10 mm from flush.
- With assistance, lower the rear LH door onto the door hinges, and engage
the upper bolts into the hinges.
- Install the lower bolt of each hinge into the door and hand-tighten all
bolts.
- Adjust the gap and flush of the door.
- Tighten the hinge bolts.
 Torque 24 Nm
- Install the door check into the door, and then install the nuts that
attach the door check inside the door.
Torque 24 Nm
- Install the bolt that attaches the door check to the B-pillar.
 Torque 24 Nm
- Push the electrical harness in through the door bulkhead, and install
the electrical harness to the door.
- Fasten all door electrical harness clips.
- Connect the rear LH door wiring harness and press the harness against
the inside of the rear LH door.
- Open the front LH door and close the rear LH door.
- Move the rear LH door electrical harness connector into the hole in the
B-pillar, press the rear LH door wiring harness seal into the B-pillar, and
fasten the clips (x4) that attach the seal to the B-pillar bulkhead.
Note: Make sure that the rear LH door wiring harness seal fits
tightly against the B-pillar bulkhead.
- Open the rear LH door, and then close the front LH door.
- Install the button plugs to the bottom of the door.
- Install the LH rear door exterior release handle. See Handle - Exterior
Release - Door - Rear - LH (Remove and Replace).
- Install the LH rear door latch. See Latch - Door - Rear - LH (Remove and
Replace).
- Install the LH rear window regulator. See Window Motor / Regulator
Assembly - Rear - LH (Remove and Replace).
- Install the LH rear door outer belt seal. See Seal - Outer Belt - Rear
Door - LH (Remove and Replace).
- Install the rear LH door glass. See Glass - Door - LH - Rear (Remove and
Replace).
- Remove the shop towel from the striker.
- Adjust the gap and flush at the latch and striker.
- Use Toolbox to calibrate the RH rear window. See Window Regulator - Rear
- LH (Recalibrate).
READ NEXT:
Fender Assembly - Front - LH (Remove and Replace)- Remove
This procedure assumes the cowl screen carrier bracket, headlight grommet,
and underhood storage unit clips on the fender assembly being r
SEE MORE:
Note: Traffic-Aware Cruise Control is a BETA
feature.
Note: If your vehicle is not equipped with an
optional Autopilot package, refer to the
owner's manual on your vehicle's touchscreen
for instructions on how to use Cruise Control.
Traffic-Aware Cruise Control (if equipped)
uses the
SPECIAL TOOLS
Kit, Svc Plug, Cooling Hose, Model 3
(1135762-00-A)
Remove
Remove the LH rear drive unit mount. See Moun
 Fender Assembly - Front - LH (Remove and Replace)
