Tesla Model 3: Finisher - Vent (Remove and Replace)
Tesla Model 3 2017-2026 Service Manual / Instrument Panel / Finisher - Vent (Remove and Replace)
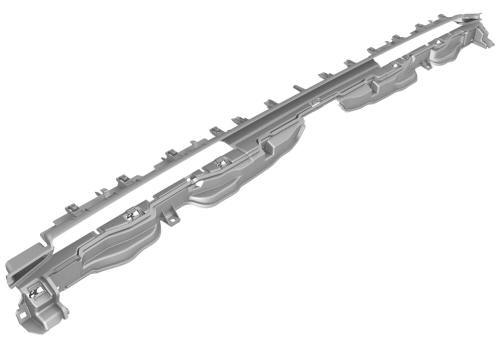
Remove
- Remove the LH instrument panel end cap. See End Cap - Instrument Panel - LH (Remove and Replace).
- Remove both the LH and RH air wave end caps. See End Cap - Air Wave - LH (Remove and Replace).
- Remove the main instrument panel decor trim. See Decor Trim - Instrument Panel - Main (Remove and Replace).
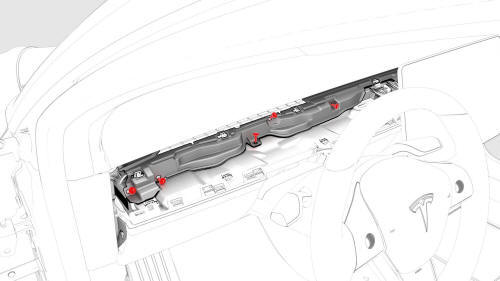
- Remove the screws that attach the LH side of the vent finisher.
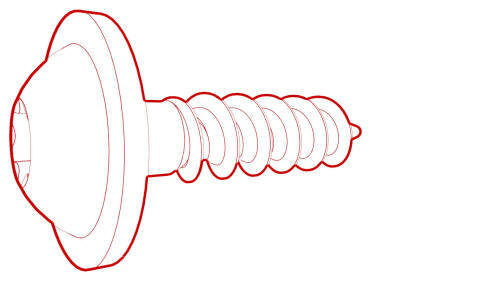 Torque 2.3 Nm
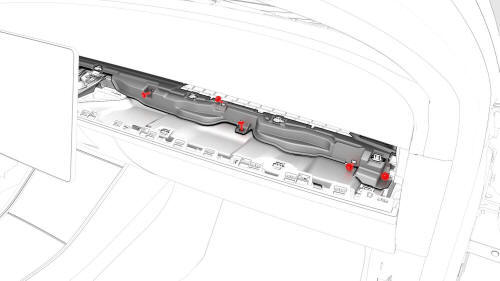
- Remove the screws that attach the RH side of the vent finisher.
Torque 2.3 Nm
- Release the clips (x16) that attach the vent finisher, and then pull the finisher toward the rear of the vehicle to remove it.
Note: The top pad must be lifted slightly in order
to insert a trim tool, and then release the clips.
Install
Installation procedure is the reverse of removal.
READ NEXT:
 Glove Box (LHD) (Remove and Replace) - Remove
Remove
Remove and secure the customer's belongings from the glove box, if
needed.
Remove the 2nd row lower seat cushion. See
Seat Cushion - Lower - 2nd Row (Remove and Replace).
Remove the r
Glove Box (LHD) (Remove and Replace) - Install
Install
Glove box harness connectors
Bring the glove box into the vehicle, and then connect the electrical
harness to the glove box solenoid connector, the damper connector, and the
puddle li
SEE MORE:
Cold Weather Best Practices
Before Driving
The following best practices can help ensure
that you have the best ownership experience
possible in harsh cold weather conditions.
Before Driving
Warm the cabin and Battery ahead of
departure for maximum range and
performance. There are several ways to
precondition your vehicl
Cover - Outer Side - Driver Seat (Remove and Install)
SPECIAL TOOLS
Key, Seat Belt Release, Model 3 (1133787-00-A)
Remove
Open the LH front door.
Move the driver's seat fully forward, and adjust the seat cushion height
to maximum.
Caution:
Do not allow the seat headrest to compress the sun visor as it might
crack the mirror.
Insert the sea
© 2019-2026 Copyright www.tmodel3.com
