Tesla Model 3: Glove Box (LHD) (Remove and Replace) - Install
Tesla Model 3 2017-2026 Service Manual / Instrument Panel / Glove Box (LHD) (Remove and Replace) / Glove Box (LHD) (Remove and Replace) - Install
Install
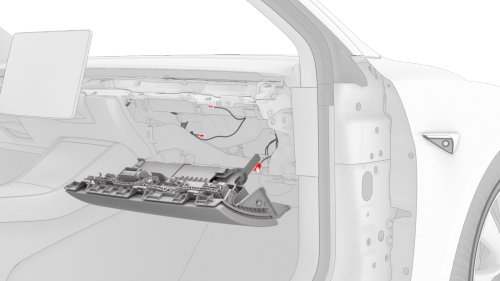
Glove box harness connectors
- Bring the glove box into the vehicle, and then connect the electrical harness to the glove box solenoid connector, the damper connector, and the puddle light connector
Note: 2 of the electrical connectors are accessed from the bottom of the instrument panel.
Note: Route the puddle lamp electrical harness as illustrated.

Puddle lamp harness routing
- Make sure that the glove box damper pin is fully seated, and not to bump the glove box damper when installing the glove box.
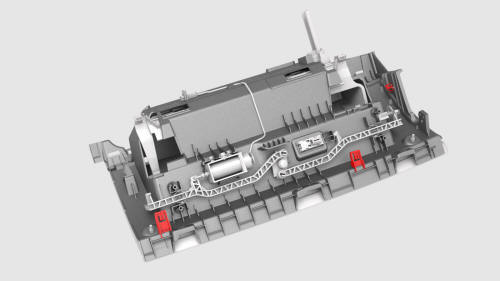
- Fasten the clips that attach the glove box to the IP carrier.
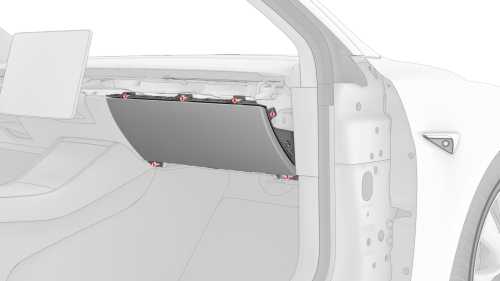
- Install the screws (x6) that attach the glove box to the IP carrier.
 Torque
2.3 Nm
Torque
2.3 Nm - Install the main instrument panel decor trim. See Decor Trim - Instrument Panel - Main (Remove and Replace).
- Install the front passenger knee airbag. See Airbag - Knee - Front Passenger (Remove and Replace).
- Install the passenger footwell cover. See Cover - Footwell - Passenger (LHD) (Remove and Replace).
- Install the RH lower A-pillar trim. See Trim - A-Pillar - Lower - LH (Remove and Replace).
- Install the RH middle A-pillar trim. See Trim - A-Pillar - Middle - LH (Remove and Replace).
- Install the LH and RH instrument panel end caps. See End Cap - Instrument Panel - LH (Remove and Replace).
- Reconnect 12V power. See 12V Power (Disconnect and Connect).
- Install the rear underhood apron. See Underhood Apron - Rear (Remove and Replace).
- Install the 2nd row lower seat cushion. See Seat Cushion - Lower - 2nd Row (Remove and Replace).
- Verify that the glove box door opens normally through the touchscreen.
- Return the customer's belongings in the glove box, if needed.
READ NEXT:
 Grille - Speaker - Instrument Panel (Remove and Replace)
Remove
Remove the LH and RH instrument panel end caps. See
End Cap - Instrument Panel - LH (Remove and Replace).
Remove the LH and RH middle A-pillar trims. See
Trim - A-Pillar - Middle - LH (
Housing - Center Display (Remove and Replace)
Remove
Remove the touchscreen. See
Touchscreen (Remove and Replace).
Remove the screws that attach the center display housing to the
touchscreen, and then slide the center display housing
IP Carrier (Remove and Install)
Remove
Remove the LH and RH lower A-pillar trim. See
Trim - A-Pillar - Lower - LH (Remove and Replace).
Remove the LH and RH upper A-pillar trims. See
Trim - A-Pillar - Upper - LH (Remove and
SEE MORE:
Drive Unit - Rear (Remove and Install)
Drive Unit - Rear- Remove
SPECIAL TOOLS
Fixture, Subframe, Model 3 (1099645-00-B)
Lifting Sling, Drive Unit, Model 3 (NA, APAC)
(1130279-00-A)
Skid Plate - HV Battery - Front (Remove and Replace)
Remove
Remove the front aero shield. See
Panel - Aero Shield - Front (Remove and Replace).
Remove the bolts and clips that attach the skid plate to the battery,
and then remove the plate from the battery.
Install
Installation procedure is the reverse of removal.
© 2019-2026 Copyright www.tmodel3.com
