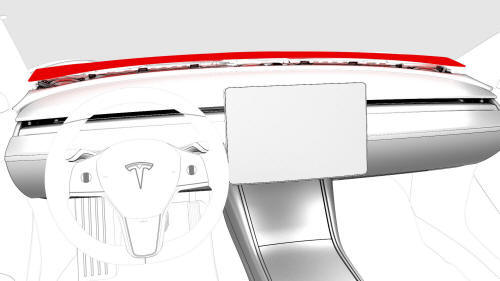
Tesla Model 3: Grille - Speaker - Instrument Panel (Remove and Replace)
Tesla Model 3 2017-2026 Service Manual / Instrument Panel / Grille - Speaker - Instrument Panel (Remove and Replace)
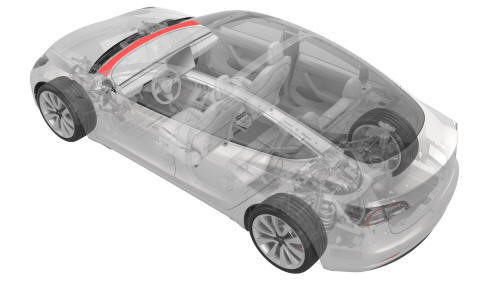
Remove
- Remove the LH and RH instrument panel end caps. See End Cap - Instrument Panel - LH (Remove and Replace).
- Remove the LH and RH middle A-pillar trims. See Trim - A-Pillar - Middle - LH (Remove and Replace).
- Remove the LH and RH upper A-Pillar trims. See Trim - A-Pillar - Upper - LH (Remove and Replace).
- Release the clips that attach the speaker grille to the body. Rotate the
rear of the speaker grille upwards, and then pull the grille towards the
rear of the vehicle to remove it.
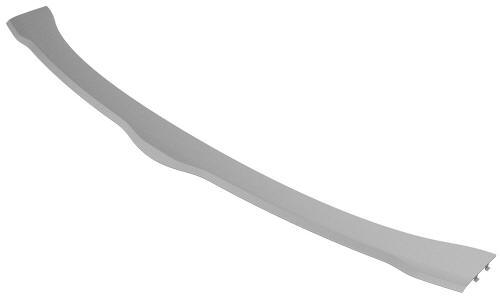
Install
- Position the instrument panel speaker grille into position on the instrument panel.
- Attach the clips that secure the instrument panel grille to the vehicle. Use a plastic pry stick to press the vertical clips forward to assist with inserting them into the IP carrier.
Note: Make sure of the following:
- The instrument panel speaker grille forward hooks are fully engaged into the IP carrier.
- There is no gap at the bottom of the windshield.
- Use Toolbox to perform a defrost functionality test to make sure the speaker grille
- Install the LH and RH upper A-Pillar trims. See Trim - A-Pillar - Upper - LH (Remove and Replace).
- Install the LH and RH middle A-pillar trims. See Trim - A-Pillar - Middle - LH (Remove and Replace).
- Install the LH and RH instrument panel end caps. See End Cap - Instrument Panel - LH (Remove and Replace).
READ NEXT:
 Housing - Center Display (Remove and Replace)
Remove
Remove the touchscreen. See
Touchscreen (Remove and Replace).
Remove the screws that attach the center display housing to the
touchscreen, and then slide the center display housing
IP Carrier (Remove and Install)
Remove
Remove the LH and RH lower A-pillar trim. See
Trim - A-Pillar - Lower - LH (Remove and Replace).
Remove the LH and RH upper A-pillar trims. See
Trim - A-Pillar - Upper - LH (Remove and
IP Carrier (Remove and Replace)
Remove
Remove the IP carrier. See
IP Carrier (Remove and Install).
Remove the upper gap hider nuts from the IP carrier.
Remove the screws that attach the LH and RH side window defroster ducts
SEE MORE:
Knuckle - Suspension - Rear - LH (Remove and Replace)
Knuckle - Suspension - Rear - LH - Remove
SPECIAL TOOLS
Tool, Spring Compressor, Hook, Model 3
(1135103-00-A)
Card, Magnetic Field Viewer (1062500-00-A)
Brake Lines - LH Sill (Remove and Replace)
SPECIAL TOOLS
Flare nut crowfoot set (1079041-00-A)
Remove
Caution:
Brake fluid dissolves paint. Have clean towels and plenty o
© 2019-2026 Copyright www.tmodel3.com
