Tesla Model 3: Touchscreen
Tesla Model 3 2017-2026 Service Manual / Infotainment / Touchscreen
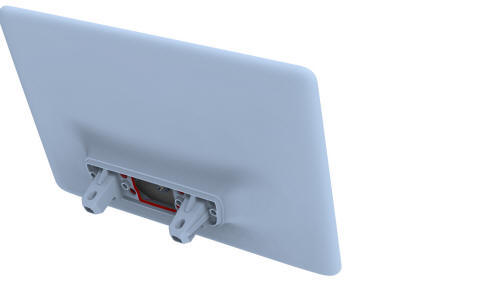
Touchscreen (Remove and Replace)
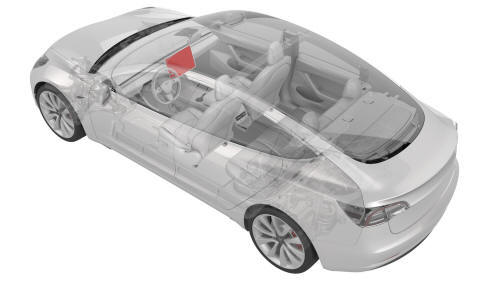
Remove
- Remove the 2nd row lower seat cushion. See Seat Cushion - Lower - 2nd Row (Remove and Replace).
- Remove the rear underhood apron. See Underhood Apron - Rear (Remove and Replace).
- Disconnect 12V power. See 12V Power (Disconnect and Connect).
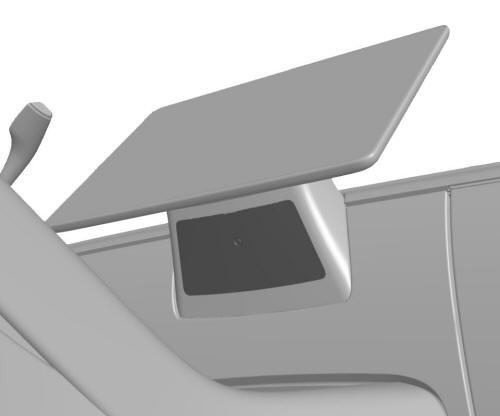
- Insert a pry tool into the top center slot of the service panel, and then release the clips and tabs that attach the service panel to the instrument panel.
- Disconnect the cabin temperature sensor connector, and then remove the service panel from the vehicle.
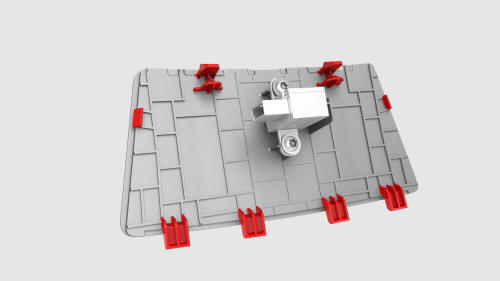
- Remove and discard the bolts that attach the touchscreen to the instrument panel, and then slide the touchscreen toward the rear of the vehicle to remove it.
- Remove the center display housing to remove the touchscreen. See Housing
- Center Display (Remove and Replace).
Install
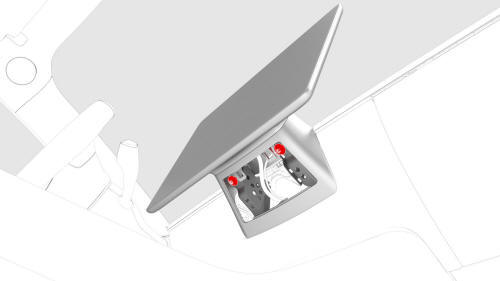
- Install the center display housing onto the touchscreen. See Housing - Center Display (Remove and Replace).
- Connect the temperature sensor to the service panel.
Note: The connector orientation is facing towards the LH side of the vehicle.
- Position the touchscreen on the instrument panel, slide it toward the
front of the vehicle, and then install new bolts that attach the touchscreen
to the instrument panel.
 Torque 12 Nm
- Install the clips and tabs that attach the service panel to the instrument panel.
- Connect 12V power. See 12V Power (Disconnect and Connect).
- Install the rear underhood apron. See Underhood Apron - Rear (Remove and Replace).
- Install the 2nd row lower seat cushion. See Seat Cushion - Lower - 2nd Row (Remove and Replace).
- Connect a laptop with Toolbox to the vehicle.
- In Toolbox, type "Display" in the search field.
Note: Make sure "Actions" is selected, if not already
- Click the Play button next to "PING-BASH_DISPLAY", and then select Run.
- In Toolbox, type "GATEWAY" in the search field.
- Click the Play button next to "PROC_ICE_X_GATEWAY-REBOOT", and then select Run.
Note: This will reboot the gateway.
READ NEXT:
 Car Computer (Remove and Replace)
Car Computer - Remove
SPECIAL TOOLS
Plug,Car Computer Fluid Port (1119171-00-A)
Kit, Battery Coolant Drain & Fill (1065131-00-A)
Kit, Computer Purge Adapters, Model 3 (1473522-00-A)
Kit, Svc Plu
SEE MORE:
Glove Box (LHD) (Remove and Replace) - Install
Install
Glove box harness connectors
Bring the glove box into the vehicle, and then connect the electrical
harness to the glove box solenoid connector, the damper connector, and the
puddle light connector
Note: 2 of the electrical connectors are accessed from the bottom
of the instrument
Panel - Door Trim - Front - LH (Remove and Replace)
Panel - Door Trim - Front - LH (Remove and Replace) -
Remove
Remove
Open the front LH door, and fully lower the window.
Remove the front LH door tweeter. See
Tweeter - Front Door - LH (Remove and Replace).
Remove the LH front door puddle light. See
Puddle Light - Front Door - LH (Remov
© 2019-2026 Copyright www.tmodel3.com
