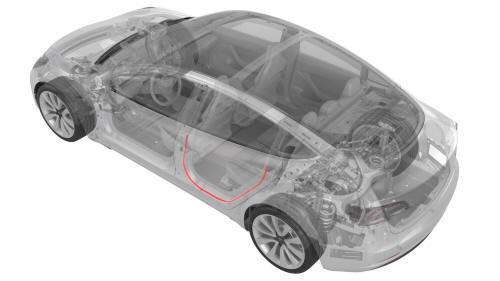
Tesla Model 3: Seal - Secondary - Rear Door - LH (Remove and Replace)
Tesla Model 3 2017-2026 Service Manual / Closures / Seals Body Closures / Seal - Secondary - Rear Door - LH (Remove and Replace)
Remove
- Open the LH rear door.
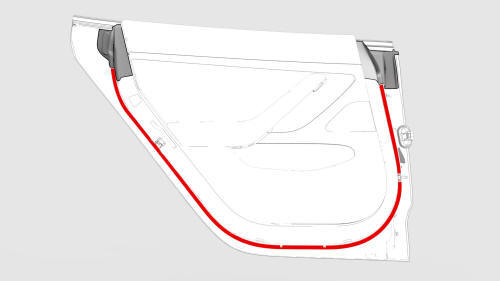
- Use narrow-width tape to carefully mark the location of the secondary seal around the door.
Caution:
Make sure that the edge of the tape accurately follows the edge of the seal.
- Release the ends of the door secondary seal from the ends of the inner belt seal.
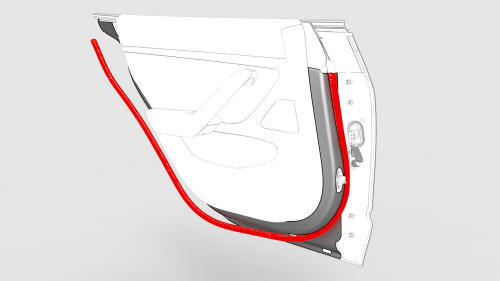
- Slowly peel the length of the secondary seal from the perimeter of the rear door.
- Clean any remaining adhesive or residue from the rear door.
Install
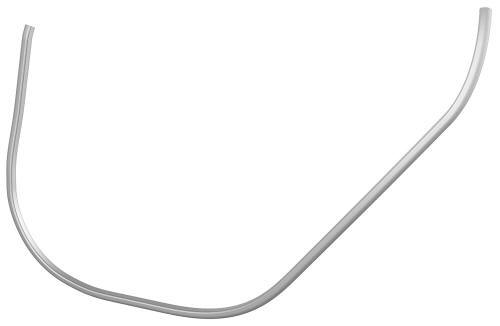
- Peel a short section of seal backing and insert the end of the seal into the rear of the inner belt seal.
- Peel the seal backing and carefully position the edge of the seal to the edge of the marking tape while working around the rear door.
Note: Do not stretch the seal as it is applied to the door.
- Insert the end of the seal into the front of the inner belt seal.
- Use a seam roller to attach the seal to the rear door.
- Remove the marking tape from the rear door, and close the door.
READ NEXT:
 Seal - Trunk (Remove and Replace)
Remove
Open the trunk.
Lift up the rear trunk floor, and then remove it from the vehicle.
Remove the trunk sill trim. See
Trim - Sill - Trunk (Remove and Replace).
Release the trunk seal
SEE MORE:
Coolant - HV Battery (Drain and Refill)
SPECIAL TOOLS
Drive Unit Pressure Test Fixture (1053600-00-B)
Adapter, Coolant Reservoir Pressure Test (1130942-00-B)
Kit, Coolant Leak Test Adapters, Model 3 (1132185-00-B)
Kit, Coolant Drain & Fill Adapters, M3 (1133843-00-A)
Kit, Svc Plug, Cooling Hose, Model 3 (1135762-00-A)
Kit, Battery C
Drive Unit - Front (Remove
and Replace)
Drive Unit - Front - Remove
SPECIAL TOOLS
Tool, Axle Extraction, Model 3 (1133386-00-A)
Lifting Sling, Drive Unit, Model 3 (NA, APAC)
(1130279-00-A)
© 2019-2026 Copyright www.tmodel3.com
