Tesla Model 3: Tuner - FM / HD (Remove and Replace)
Tesla Model 3 2017-2026 Service Manual / Infotainment / Antenna - FM HD Radio / Tuner - FM / HD (Remove and Replace)
Remove
- Remove the RH side rail trim. See Trim - Side Rail - LH (Remove and Replace).
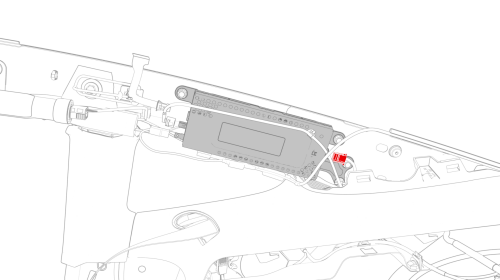
- Disconnect the backlight electrical connector from the tuner.
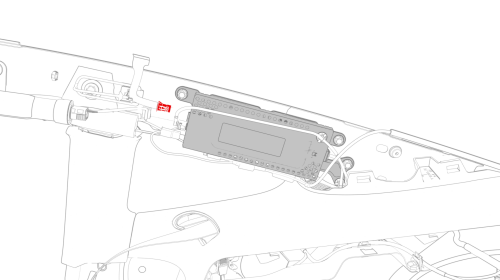
- Disconnect the electrical connectors from the front of the tuner.
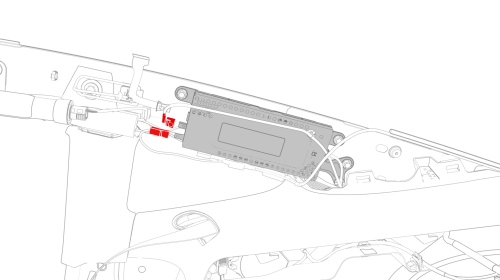
- Disconnect the electrical connector from the rear of the tuner.
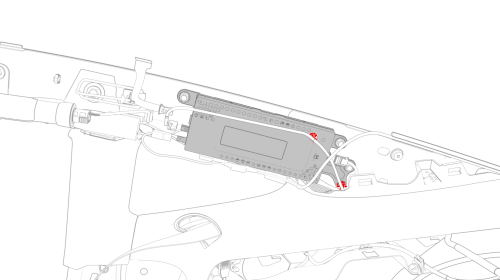
- Release the clips that attach the wiring harnesses to the tuner.
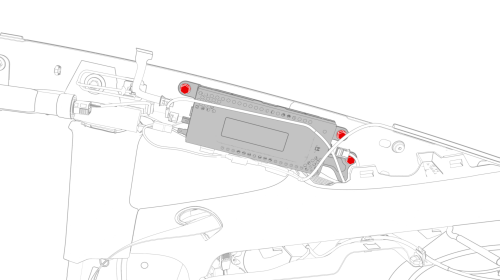
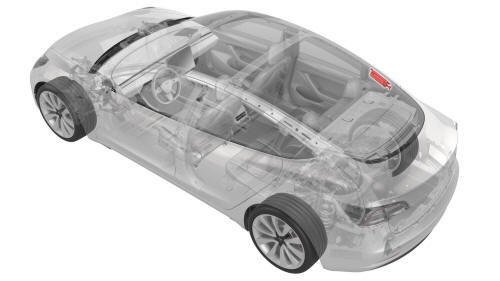
- Remove the bolts that attach the tuner to the body, and then remove the
tuner from the vehicle.
Install
- Install the bolts that attach the tuner onto the body.
 Torque 10.1 Nm
- Install the clips that attach the wiring harnesses onto the tuner.
- Connect the electrical connector into the rear of the tuner.
- Connect the electrical connectors into the front of the tuner.
- Connect the backlight electrical connector into the tuner.
- Install the RH side rail trim. See Trim - Side Rail - LH (Remove and Replace).
- Connect a laptop with Toolbox to the vehicle.
- In Toolbox, type "Tuner" in the search field.
Note: Make sure that "Actions" is selected, if not already.
- In Toolbox, click the play button next to the "PING-BASH_ TUNER", and then select Run.
- Disconnect the laptop from the vehicle.
READ NEXT:
 Antenna - GPS
Antenna - GPS (Remove and Replace)
Remove
Remove the forward facing camera. See Camera - Forward Facing (Remove
and Replace).
Disconnect the electrical harness from the humidity and tempera
Antenna - Wi-Fi
Antenna - Wi-Fi (Remove and Replace)
Remove
Remove the LH and RH side rail trims. See Trim - Side Rail - LH (Remove
and Install).
Open the LH and RH hook covers, and then release the clips th
SEE MORE:
Actuator - Lower Mode (Remove and Replace)
Remove
Remove the HVAC assembly. See
HVAC Assembly (Remove and Replace).
Disconnect the lower mode actuator electrical connector.
Remove the screws that attach the lower mode actuator to the HVAC
assembly, and then remove the actuator from the HVAC assembly.
Install
Position th
Strap - 12V Battery (Remove and Replace)
Remove
Remove the rear underhood apron. See
Underhood Apron - Rear (Remove and Replace).
Remove the cabin intake duct. See
Duct - Cabin Intake (Remove and Replace).
Loosen the nut that attaches the 12V battery upper tie down bracket to
the 12V battery strap. Torque 5 Nm
Push down and s
© 2019-2026 Copyright www.tmodel3.com
