Tesla Model 3: Headlight - LH (Remove and Replace)
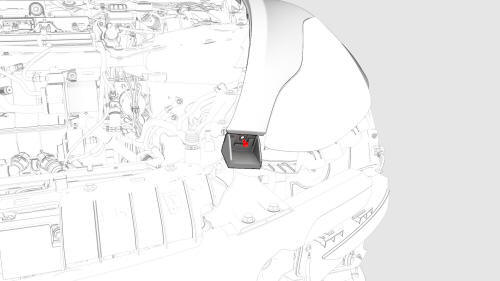
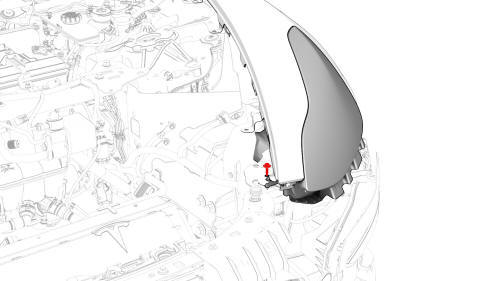
Headlight - LH- Remove
.jpg)
It is recommended that the vehicle be powered down before executing headlight
replacement to ensure that the new headlights are recognized during vehicle
firmware update.
Remove
- Raise and support the vehicle. See Raise Vehicle - 2 Post Lift.
- Remove the rear underhood apron. See Underhood Apron - Rear (Remove and
Replace).
- Remove the cabin intake duct. See Duct - Cabin Intake (Remove and
Replace).
- Remove the hood latch cover. See Cover - Hood Latch (Remove and Replace).
- Remove the underhood storage unit. See Underhood Storage Unit (Remove
and Replace).
- Remove the front fascia. See Fascia - Front (Remove and Install).
.jpg)
- Disconnect the electrical connector from the LH headlight.

- Remove the bolt that attaches the fender bracket to the body, and then
remove the bracket from the vehicle.


- Remove the fastener(s) that attach the LH headlight to the body, and
then remove the headlight from the vehicle.
Note: The headlight might not be equipped with a lower fastener.
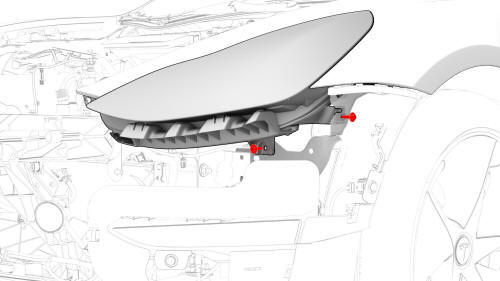
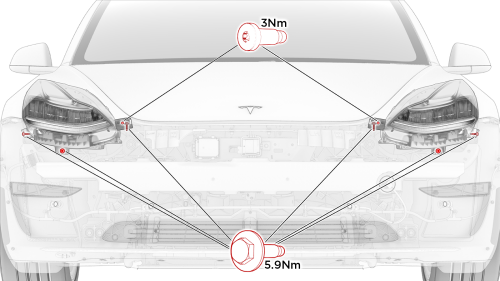
Headlight - LH- Install
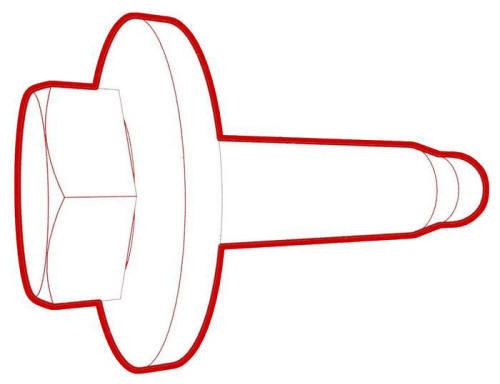
Install
- Install the LH headlight to the vehicle.
Caution: Do not damage the headlight during installation.


- Install the fastener(s) that attach the LH headlight to the body.
Torque 5.9 Nm

- Install the bolt that attaches the fender bracket to the body.
Torque 3 Nm
.jpg)
- Connect the electrical connector for the LH headlight.
- Install the front fascia. See Fascia - Front (Remove and Install).
- Connect a laptop with Toolbox to the vehicle.
- Use Toolbox to update the vehicle firmware.
- Install the underhood storage unit. See Underhood Storage Unit (Remove
and Replace).
- Install the hood latch cover. See Cover - Hood Latch (Remove and Replace).
- Install the cabin intake duct. See Duct - Cabin Intake (Remove and
Replace).
- Install the rear underhood apron. See Underhood Apron - Rear (Remove and
Replace).
- Remove the vehicle from the lift.

- Adjust the LH headlight:
- Headlights - Adjust - NA (Tool Method)
- Headlights - Adjust - NA (Wall Method)
- Headlights - Adjust - EMEA (Wall Method)
READ NEXT:
Remove
Remove the LH 2nd row seat side bolster. See Bolster - Side - Seat - 2nd
Row - LH (Remove and Replace).
Remove the LH side rail trim. See Trim - Side Rail - LH (Remove and
Install).
R
SEE MORE:
Prepare for Adjustment
SPECIAL TOOLS
SEAT COVER (1096767-00-A)
Ballast Bag, 25lb (1145158-00-A)
CHASSIS HEIGHT MEASURING TOOL (1071271-00-A)
STEERING WHEEL LEVEL (1049463-00-A)
Prepare for Adjustment
Make sure the tire pressures are to specification.
Note: Use the tire sticker values displayed on
SPECIAL TOOLS
Camera Calibration Target (1053066-00-A)
Wrench, 2.5mm, Thin (1448868-00-A)
Note: This procedure describes how to calibrate the forward
facing cameras. It does not apply to the rear facing camera.
Setup
Park the vehicle on a flat surface with at least 106 cm (3.5 ft) of
space in