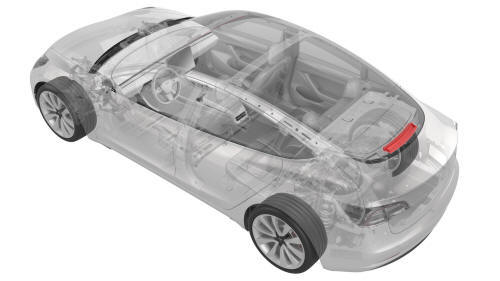
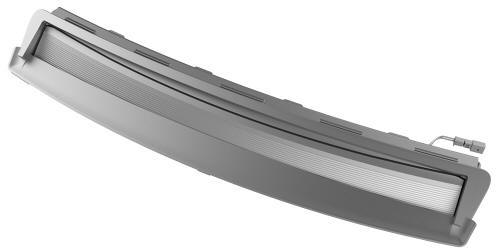
Tesla Model 3: Light - Brake - High Mounted (Remove and Replace)
Tesla Model 3 2017-2026 Service Manual / Electrical / Exterior Lights / Light - Brake - High Mounted (Remove and Replace)
Remove
- Remove the LH 2nd row seat side bolster. See Bolster - Side - Seat - 2nd Row - LH (Remove and Replace).
- Remove the LH side rail trim. See Trim - Side Rail - LH (Remove and Install).
- Remove the LH upper C-pillar trim. See Trim - C-Pillar - Upper - LH (Remove and Replace).
- Remove the RH 2nd row seat side bolster. See Bolster - Side - Seat - 2nd Row - LH (Remove and Replace).
- Remove the RH side rail trim. See Trim - Side Rail - LH (Remove and Install).
- Remove the RH upper C-pillar trim. See Trim - C-Pillar - Upper - LH (Remove and Replace).
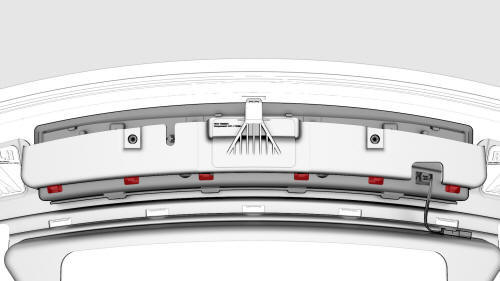
- Remove the package tray trim. See Trim - Package Tray (Remove and Install).
- Disconnect the high mounted brake light electrical connector.
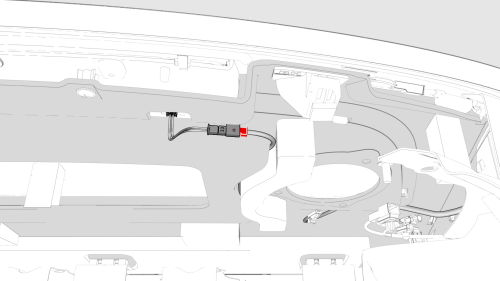
- Remove the screws that attach the high mounted brake light to the
package tray.
- Release the clips that attach the high mounted brake light to the
package tray, and then remove the brake light from the vehicle.
Install
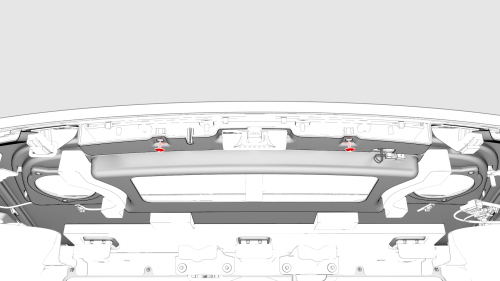
- Install the high mounted brake light on the package shelf and secure it with clips.
- Install the screws that attach the high mounted brake light to the
package tray.
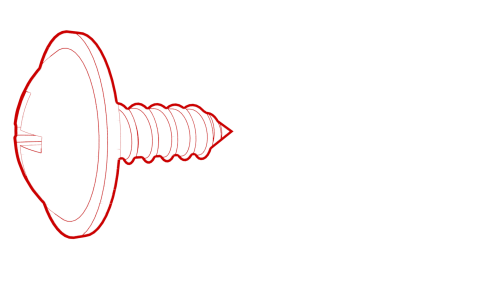 Torque 0.5 Nm
- Connect the high mounted brake light electrical connector.
- Install the package tray trim. See Trim - Package Tray (Remove and Install).
- Install the RH upper C-pillar trim. See Trim - C-Pillar - Upper - LH (Remove and Replace).
- Install the RH side rail trim. See Trim - Side Rail - LH (Remove and Install).
- Install the RH 2nd row seat side bolster. See Bolster - Side - Seat - 2nd Row - LH (Remove and Replace).
- Install the LH upper C-pillar trim. See Trim - C-Pillar - Upper - LH (Remove and Replace).
- Install the LH side rail trim. See Trim - Side Rail - LH (Remove and Install).
- Install the LH 2nd row seat side bolster. See Bolster - Side - Seat - 2nd Row - LH (Remove and Replace).
- Install the LH 2nd row seat side bolster. See Bolster - Side - Seat - 2nd Row - LH (Remove and Replace).
READ NEXT:
 Light - Fog - Front (Adjust)
Procedure
Special tools required for this procedure:
SPECIAL TOOLS
Pliers, Clip Removal (1133569-00-A)
On a wall, measure 14.5 in (36.8 cm) from the floor, and then apply a
length of 1-inch mask
SEE MORE:
Touchscreen Overview
The features and information you need to drive Model 3 are displayed on the touchscreen. When driving, the touchscreen displays driving-related information such as driving speed, vehicle range, warnings, etc. The touchscreen is used to control many features that, in traditional cars, are controll
Hinge - Trunk - LH (Remove and Replace)
Remove
Remove the trunk assembly. See Trunk (Remove and Install).
Remove the LH side trunk trim. See Trim - Side - Trunk - LH (Remove and
Replace).
Use masking tape to mark the position of the trunk hinge on the body.
Remove the LH trunk gas strut. See Gas Strut - Trunk - LH (Remove and
© 2019-2026 Copyright www.tmodel3.com
