Tesla Model 3: Glove Box (LHD) (Remove and Replace) - Remove
Tesla Model 3 2017-2026 Service Manual / Instrument Panel / Glove Box (LHD) (Remove and Replace) / Glove Box (LHD) (Remove and Replace) - Remove
Remove
- Remove and secure the customer's belongings from the glove box, if needed.
- Remove the 2nd row lower seat cushion. See Seat Cushion - Lower - 2nd Row (Remove and Replace).
- Remove the rear underhood apron. See Underhood Apron - Rear (Remove and Replace).
- Disconnect 12V power. See 12V Power (Disconnect and Connect).
- Remove the LH and RH instrument panel end caps. See End Cap - Instrument Panel - LH (Remove and Replace).
- Remove the RH middle A-pillar trim. See Trim - A-Pillar - Middle - LH (Remove and Replace).
- Remove the RH lower A-pillar trim. See Trim - A-Pillar - Lower - LH (Remove and Replace).
- Remove the passenger footwell cover. See Cover - Footwell - Passenger (LHD) (Remove and Replace).
- Remove the front passenger knee airbag. See Airbag - Knee - Front Passenger (Remove and Replace).
- Remove the main instrument panel decor trim. See Decor Trim - Instrument Panel - Main (Remove and Replace).
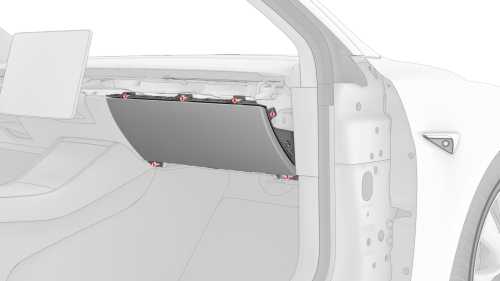
- Remove the screws (x6) that attach the glove box to the IP carrier.
- Release the clips that attach the glove box to the IP carrier.
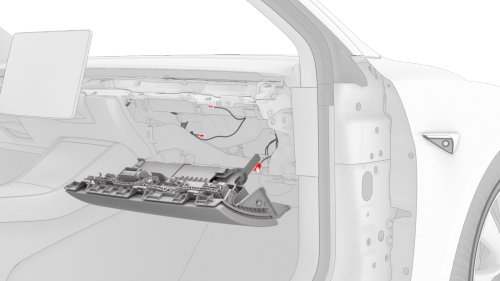
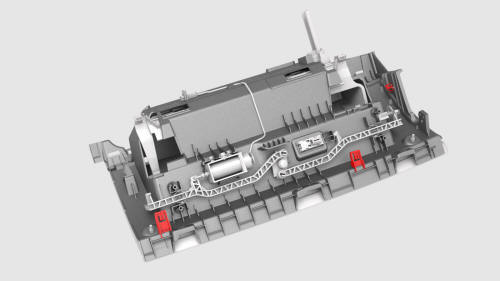
- Disconnect the electrical harness from the glove box solenoid connector, the damper connector, and the puddle light connector.
Note: 2 of the electrical connectors are accessed from the bottom of the instrument panel.
- Remove the glove box from the vehicle.
READ NEXT:
 Glove Box (LHD) (Remove and Replace) - Install
Install
Glove box harness connectors
Bring the glove box into the vehicle, and then connect the electrical
harness to the glove box solenoid connector, the damper connector, and the
puddle li
Grille - Speaker - Instrument Panel (Remove and Replace)
Remove
Remove the LH and RH instrument panel end caps. See
End Cap - Instrument Panel - LH (Remove and Replace).
Remove the LH and RH middle A-pillar trims. See
Trim - A-Pillar - Middle - LH (
Housing - Center Display (Remove and Replace)
Remove
Remove the touchscreen. See
Touchscreen (Remove and Replace).
Remove the screws that attach the center display housing to the
touchscreen, and then slide the center display housing
SEE MORE:
Grille - Fascia - Front (Remove and Replace)
DRAFT
Warning:
This procedure was derived from pre-production computer models, and
might not reflect the real-world situation. Warnings and cautions might be
missing. Follow safety requirements and use extreme caution when working on or
near high voltage systems and components.
Do not r
Climate Controls
Overview of Climate Controls
Climate controls are always available at the bottom of the touchscreen. To
turn the climate control
system on, touch the fan icon or adjust the cabin temperature. To turn it off,
touch the fan icon
and then touch the off button near the center of the popup window.
© 2019-2026 Copyright www.tmodel3.com
