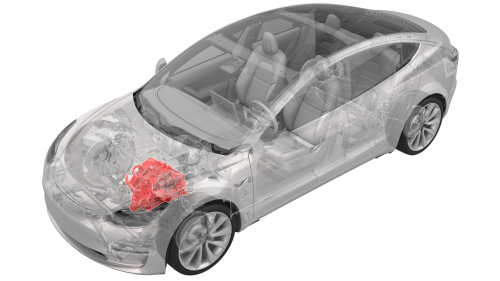
Tesla Model 3: Drive Unit - Front - Remove
SPECIAL TOOLS
Tool, Axle Extraction, Model 3 (1133386-00-A)
Lifting Sling, Drive Unit, Model 3 (NA, APAC) (1130279-00-A)
Lifting Sling, Drive Unit, Model 3 (EMEA) (1130279-01-A)
Remove
- Remove the front subframe assembly from the vehicle. See Subframe Assembly - Front (Dual Motor) (Remove and Install).
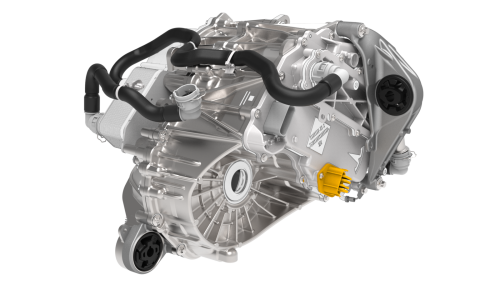
- Install an axle extraction tool between the front drive unit and the inner joint of the LH front drive unit halfshaft, and then strike the end of the extraction tool with a dead blow hammer to unseat the halfshaft.
- With assistance, remove the LH front drive unit halfshaft from the front drive unit, and then install a halfshaft plug into the opening of the gearbox.
- Repeat steps 2 to 3 on the RH front drive unit halfshaft.
.png)
- Release the locking tab, and then push the handle downward to disconnect the front drive unit inverter logic connector.
.png)
- Release the red locking tab, and then press down on the tab to disconnect the resolver logic connector.
.png)
- Release the grey locking tab, and then press down on the tab to disconnect the oil pump connector.
.png)
- Release the clip that attaches the front drive unit harness to the front drive unit motor.
.png)
- Release the clips that attach the front drive unit harness to the front drive unit inverter.
- Remove the steering rack. See Steering Rack (RWD) (Remove and Replace).
- Position the subframe assembly under the gantry.
- Install the drive unit sling onto the gantry hook.
.png)
Front drive unit sling hook locations
- Install the drive unit sling hooks onto the front drive unit.
- Slightly raise the gantry hook until the drive unit sling is taut.
.png)
- Remove the bolt that attaches the front drive unit to the front subframe.
- Lift the front drive unit up and away from the front subframe.
Note: Make sure not to move the rear front drive
unit support posts.
READ NEXT:
 Drive Unit - Front - Install
Install
Lower the front drive unit onto the front subframe.
Note: Make sure not to move the rear front drive
unit support posts from
Drive Unit - Front - Remove
SPECIAL TOOLS
Tool, Axle Extraction, Model 3 (1133386-00-A)
Lifting Sling, Dri
SEE MORE:
Controller - High Voltage- Remove
Warning: Only technicians who have been trained in High Voltage
Awareness are permitted to perform this procedure. Proper personal protective
equipment (PPE) and insulating HV gloves with a minimum rating of class 0
(1000V) must be worn at all times a high voltage cable, busbar, or fitting is
Glovebox
To open the glovebox, touch Controls >
Glovebox on the bottom corner of the
touchscreen. The glovebox automatically
opens and its light turns on.
To close the glovebox, push it upward until it
clicks into its closed position.
Note: If you leave the glovebox open, its light
eventually tur
