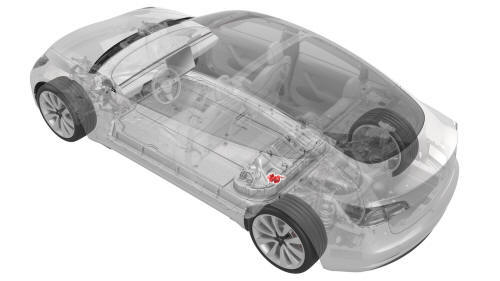
Tesla Model 3: Guide - Probing - HV Battery (Remove and Replace)
SPECIAL TOOLS Ratchet, 1/4" Sq Dr, HV Insulated (1057602-00-A) Ext Bar, Wobble, 1/4" Dr, HV Insulated (1057603-00-A) Skt, 1/4" Sq Dr, 13mm, HV Insulated (1057606-00-A) Magnet, Flexible, HV Insulated, 18" (1057607-00-A) Connector Removal, Coolant, PCS, M3 (1111868-00-B) Kit, Svc Plug, Cooling Hose, Model 3 (1135762-00-A) Skt, 1/4in Dr, 5-Lobe Torx Plus External (1059330-00-B) Resistance meter, microohm, Hioki RM 3548 (1076927-00-A) Note: Only technicians who have been trained in High Voltage Awareness are
permitted to perform this procedure. Proper personal protective equipment (PPE)
and insulating HV gloves with a minimum rating of class 0 (1000V) must be worn
at all times a high voltage cable, busbar, or fitting is handled. Refer to Tech
Note TN-15-92-003, "High Voltage Awareness Care Points" for additional safety
information. Remove
Install Caution: Spilled coolant can create an electrical path.
Caution: Make sure that the coolant output tube is securely connected by firmly
pressing down on the fittings, verify that both clips have fully engaged the
barb on the power conversion system and battery flange, and then pull up on the
fittings to check retention. Caution: Do not follow the procedure to
connect 12V power at this timeGuide - Probing - HV Battery- Remove
.png)
.png)
Guide - Probing - HV Battery- Install
.png) Torque 6 Nm
Torque 6 Nm
READ NEXT:
 Harness - AC Inlet - HV Battery (Remove and Replace)
Harness - AC Inlet - HV Battery- Remove
SPECIAL TOOLS
Resistance meter, microohm, Hioki RM 3548 (1076927-00-A)
Warning:
Only technicians who have been trained in High Voltage Awareness are
permitt
SEE MORE:
Subframe Assembly - Rear - Install
Install
With an assistant, install the new rear subframe onto the subframe
lifting tool, and then attach the straps.
Top view of the rear subframe
Install the clips that attach the electrical harness to the rear
subframe.
Bottom view of the rear subframe
With an assistant, position t
Insulators - HV Battery (Install)
Warning:
Only technicians who have been trained in High Voltage Awareness are
permitted to perform this procedure. Proper personal protective equipment (PPE)
and insulating HV gloves with a minimum rating of class 0 (1000V) must be worn
at all times a high voltage cable, busbar, or fitting is ha
