Tesla Model 3: Insulators - HV Battery (Install)
Tesla Model 3 2017-2026 Service Manual / Battery System / HV Battery Electrical Components / Insulators - HV Battery (Install)
Warning:
Only technicians who have been trained in High Voltage Awareness are permitted to perform this procedure. Proper personal protective equipment (PPE) and insulating HV gloves with a minimum rating of class 0 (1000V) must be worn at all times a high voltage cable, busbar, or fitting is handled. Refer to Tech Note TN-15-92-003, "High Voltage Awareness Care Points" for additional safety information.
Install
Note: This procedure supplements removing the penthouse cover for when HV insulators are missing. After completing this procedure, continue to the procedure that required the penthouse cover to be removed.
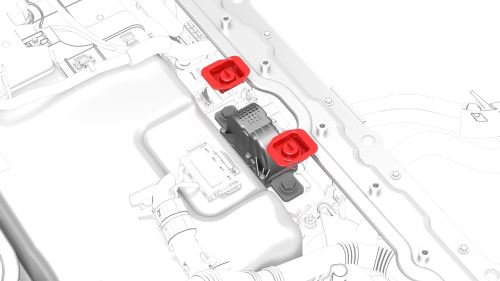
- Install the squarish insulator caps onto the pyrotechnic battery disconnect busbar bolt heads.
.png)
- Install the round insulator caps onto the HV battery positive contactor busbar bolt heads.
.png)
- Install the round insulator caps onto the HV battery negative contactor busbar bolt heads.
.png)
- Raise the high voltage controller, install the fuse access insulator onto the RH penthouse bus cover, fasten the clips that attach the insulator to the cover, and lower the high voltage controller.
.png)
- Install the special insulator onto the DC input assembly busbar bolt heads.
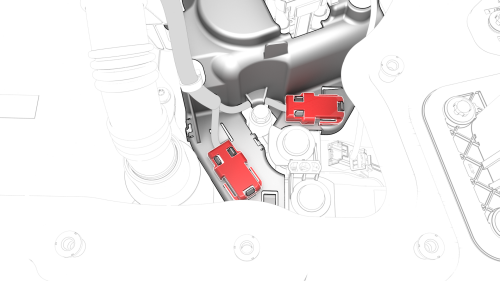
- Install the AC inlet terminal covers over the positive and negative ring terminal bolts, and fasten the clips that attach the AC inlet terminal covers to the HV battery fast charge contactor cover.
- Continue to the procedure that required the penthouse cover to be removed.
READ NEXT:
 Passthrough - DCDC - 12V (Remove and Replace)
Passthrough - DCDC - 12V- Remove
SPECIAL TOOLS
Skt, 1/4in Dr, 5-Lobe Torx Plus External (1059330-00-B)
Resistance meter, microohm, Hioki RM 3548 (1076927-00-A)
Remove
Remove the high voltage contr
SEE MORE:
Actuator - Vent - LH (Remove and Replace)
Remove
Remove the LH front vent. See
Vent - Front - LH (Remove and Replace).
Remove the bolts that attach the LH vent actuator to the vent, and then
remove the LH vent actuator.
Install
Installation procedure is the reverse of removal.
Using Voice Commands
Voice commands are designed to understand
natural requests. You can use voice commands
to:
Call a contact.
Navigate to a location.
Listen to Internet music.
Control various aspects of Model 3.
To initiate a voice command, tap
the
microphone button on the
touchscreen. When you hear
© 2019-2026 Copyright www.tmodel3.com
