Tesla Model 3: Bracket - License Plate - Front (NA) (Retrofit)
Tesla Model 3 2017-2026 Service Manual / Exterior Fittings / License Plate Mountings / Bracket - License Plate - Front (NA) (Retrofit)
Retrofit
- Clean the front center surface of the front fascia.
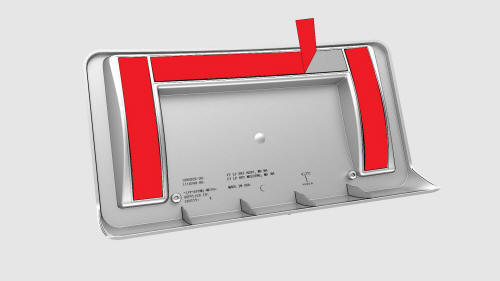
- Remove the backing from the long horizontal tape strip on the new front license plate bracket.
- Fold the backing of the vertical tape strips out at a 90 degree angle.
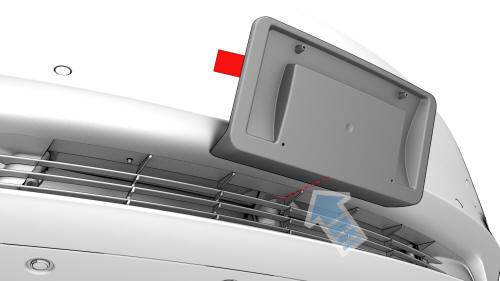
- Hold the license plate bracket horizontally and align the locator tab at the bottom lip of the bracket with the center rib of the fascia grille.
- Rotate the license plate bracket vertically and press the top edge against the front fascia.
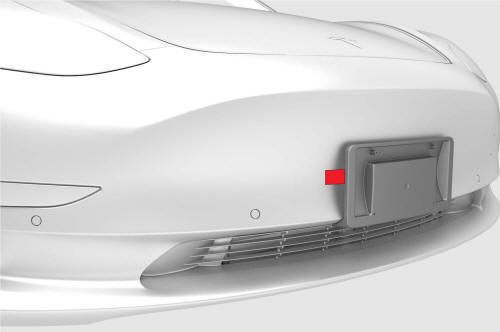
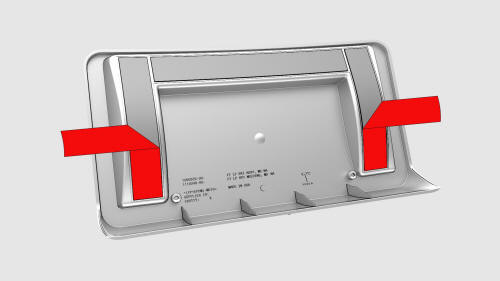
- Pull the tape strips out from the sides of license plate bracket, and then press the bracket against the front fascia.

- Install the license plate onto the front license plate bracket, and then
install the screws that attach the plate to the bracket.
.png) Torque 3 Nm
Torque 3 Nm
READ NEXT:
 Bracket - License Plate - Rear (EMEA) (Remove and Replace)
Remove
Remove the screws (x4) that attach the rear license plate to the rear
license plate bracket, if a license plate is installed. Otherwise, skip to
the next step.
Remove the screws
Mirror - Door - LH (Remove and Replace)
Remove
Use a plastic trim tool to pry up along the inner edge of the mirror
cover.
Lift upward to release the tabs that attach the mirror cover to the LH
door mirror, and then remove
SEE MORE:
Harness - Penthouse - HV Battery (Remove and Replace)
Harness - Penthouse - HV Battery- Remove
SPECIAL TOOLS
Ratchet, 1/4" Sq Dr, HV Insulated (1057602-00-A)
Ext Bar, Wobble, 1/4" Dr, HV Insulated (1057603-00-A)
Skt, 1/4" Sq Dr, 13mm, HV Insulated (1057606-00-A)
Magnet, Flexible, HV Insulated, 18" (1057607-00-A)
Connector Removal, Coolant, PCS, M3 (1
Fluid Reservoirs
Removing the Maintenance Panel
To check fluid levels, remove the maintenance
panel:
Open the hood.
Pull the maintenance panel upward to
release the clips that hold it in place.
If checking the Battery coolant, remove
the cabin intake trim panel by pulling it
upwards to r
© 2019-2026 Copyright www.tmodel3.com
