Tesla Model 3: Strap - 12V Battery (Remove and Replace)
Tesla Model 3 2017-2026 Service Manual / Electrical / 12V Battery and Fuses / Strap - 12V Battery (Remove and Replace)
Remove
- Remove the rear underhood apron. See Underhood Apron - Rear (Remove and Replace).
- Remove the cabin intake duct. See Duct - Cabin Intake (Remove and Replace).
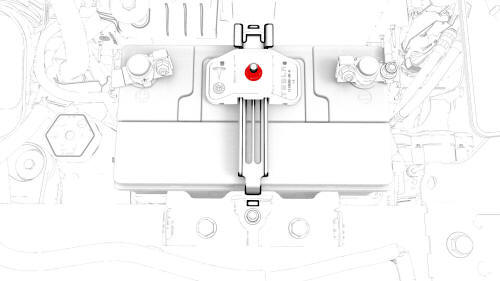
- Loosen the nut that attaches the 12V battery upper tie down bracket to the 12V battery strap. Torque 5 Nm
- Push down and slide the 12V battery strap to the right to release it from the front hook and rear tie down assembly.
- Remove the 12V battery strap from the vehicle.
Install
Installation procedure is the reverse of removal.
READ NEXT:
 Vehicle Electrical Isolation Procedure
SPECIAL TOOLS
Insulation Multimeter, Fluke 1507 (1076921-00-B)
Test Probes, Slim, Fluke TP38 (1130480-00-A)
Warning: This procedure verifies that high voltage power is no
longer available to high vol
Vent Hose - 12V Battery (Remove and Replace)
Remove
Remove the rear underhood apron. See
Underhood Apron - Rear (Remove and Replace).
Remove the cabin intake duct. See
Duct - Cabin Intake (Remove and Replace).
Remove the hood latch cover
SEE MORE:
Penthouse Coolant Leak Test
DRAFT
Warning:
This procedure was derived from pre-production computer models, and
might not reflect the real-world situation. Warnings and cautions might be
missing. Follow safety requirements and use extreme caution when working on or
near high voltage systems and components.
SPECIAL TOOLS
Dri
Heat Exchanger - Front Drive Unit (Remove and Replace)
Remove
Remove the front subframe assembly. See
Subframe Assembly - Front (Dual Motor) (Remove and Install)
Release the clip that connects the front drive unit inverter-heat
exchanger hose to the heat exchanger coolant inle
Release the clips that attach the front drive unit inverter-
© 2019-2026 Copyright www.tmodel3.com
