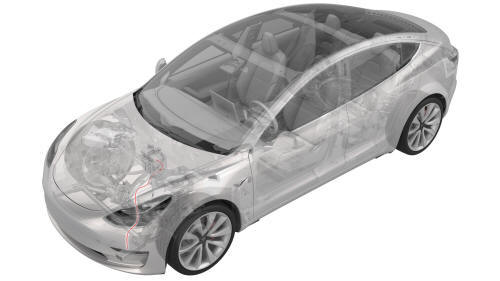
Tesla Model 3: Vent Hose - 12V Battery (Remove and Replace)
Tesla Model 3 2017-2026 Service Manual / Electrical / 12V Battery and Fuses / Vent Hose - 12V Battery (Remove and Replace)
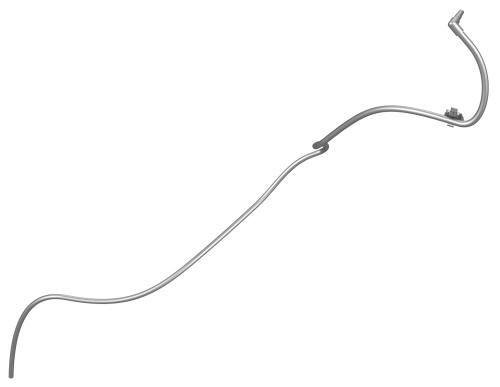
Remove
- Remove the rear underhood apron. See Underhood Apron - Rear (Remove and Replace).
- Remove the cabin intake duct. See Duct - Cabin Intake (Remove and Replace).
- Remove the hood latch cover. See Cover - Hood Latch (Remove and Replace).
- Remove the underhood storage unit. See Underhood Storage Unit (Remove and Replace).
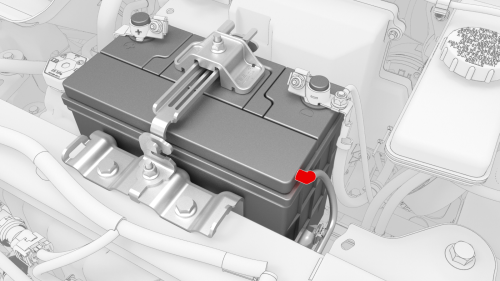
- Remove the 12V battery vent hose from the LH side of the 12V battery.
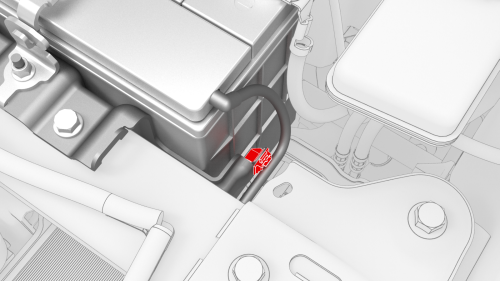
- Release the 12V battery vent hose clip from the 12V battery bracket.
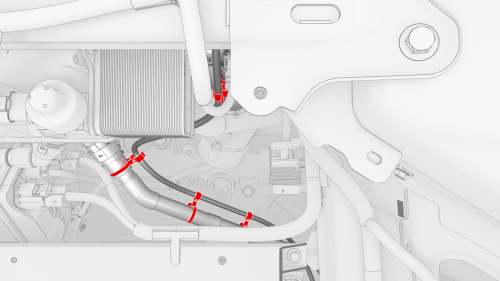
- Release the clips that attach the 12V battery vent hose to the vehicle,
and then remove the vent hose.
Install
Installation procedure is the reverse of removal.
READ NEXT:
 Busbar - DCDC Ground (Remove and Replace)
Remove
Disconnect 12V power. See
12V Power (Disconnect and Connect).
Remove and discard the nut that attaches the DCDC ground busbar to the
HV battery at the DCDC passthrough.
Remove
Harness - 12V Battery Ground (Remove and Replace)
Harness - 12V Battery Ground-Remove
Remove
Remove the cowl screen panel. See
Panel - Cowl Screen (Remove and Replace).
Remove and discard the nut that attaches the front harness ground wire
SEE MORE:
Actuator - Intake (Remove and Replace)
Remove
Remove the HVAC assembly. See
HVAC Assembly (Remove and Replace).
Disconnect the electrical harness from the intake actuator connector.
Remove the screws (x2) that attach the intake actuator to the HVAC
module, and then remove the actuator from the HVAC module.
Torque 1.2 N
Adjustable Top Loop (Remove and Replace)
Remove
Open both LH doors and lower both LH windows.
Move the LH front seat fully forward.
Release the clips that attach the LH upper B-pillar trim to the vehicle.
Tip: Release the clips at the bottom of the LH upper B-pillar trim first, and
then release the clips at the top of the trim.
© 2019-2026 Copyright www.tmodel3.com
