Tesla Model 3: Headlights - Adjust - NA (Wall Method)
Tesla Model 3 2017-2026 Service Manual / Electrical / Exterior Lights / Headlights - Adjust - NA (Wall Method)
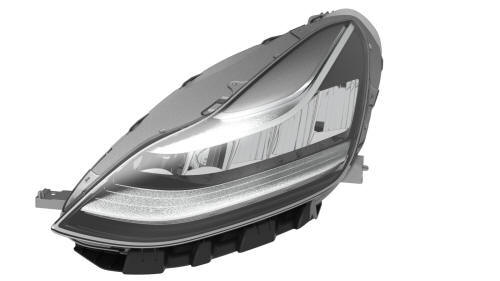
.jpg)
Adjust Headlights Using a Wall
- Position the vehicle for adjusting the headlights. The vehicle should be:
- Located in a darkened area.
- Parked on a level surface.
- Perpendicular to a wall that has a white matte surface. The wall must be at least 1.8 m (6 ft) high and 3.7 m (12 ft) wide.
- Close enough to the wall so that the headlights are positioned 10 m (32.8 ft) away.
- Make sure that all 4 tires are inflated to specification.
- Open the hood.
- On the touchscreen, enter headlight adjustment mode: Controls > Service > Adjust Headlights.
- Turn on the headlights.
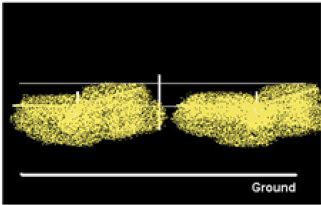
- Put a piece of tape on the wall 27.5 in (698 mm) from the ground to indicate where the beam should show.
- Measure 25 ft (7.62 m) away from the wall and put a piece of tape on the ground to indicate where the vehicle should be parked.
- Park the vehicle perpendicular to the wall so that the front fascia is flush with the tape that was placed on the ground in the previous step.
- Note the height between the ground and the center projector lens on the driver side headlight.
- Mark a straight line between each of the center projector lenses and the wall. At the point where each line meets the wall, mark the height that was noted in the previous step.
- Use the touchscreen to turn on the low beam headlights.
- Cover the RH headlight; make sure that all light from the right headlight is blocked.
- On the steering wheel, use the left scroll wheel to adjust the beam level: Target 0.00" +/- 1.0"
Caution: Do not sit in the vehicle, as this will affect headlight alignment.
Note: There might be a delay between the scroll wheel input and actual headlight adjustment output.
- Adjust the headlight so that the distance between the ground and the top right part of the beam on the wall is 27.5 in (698 mm).
- Repeat steps 9-14 by covering the LH headlight and adjusting the RH headlight.
- Close the hood.
- Use the touchscreen to turn off the headlights.
READ NEXT:
 Headlight - LH (Remove and Replace)
Headlight - LH- Remove
It is recommended that the vehicle be powered down before executing headlight
replacement to ensure that the new headlights are recognized during vehicle
firmware update.
Re
SEE MORE:
Doors
Keyless Locking and Unlocking
Locking and unlocking Model 3 is easy and
convenient. Just carry your authenticated
phone or paired key fob with you. Model 3
recognizes the presence of an authenticated
phone or paired key fob and automatically
unlocks when you press a door handle, and
locks when
Applique - B-Pillar - LH (Remove and Replace)
Applique - B-Pillar - LH (Remove and Replace) -
Remove
Remove
Open the LH front and rear doors.
Release the clips that attach the B-pillar applique fastener cover to
the vehicle, and then remove the cover.
Remove the bolts that attach the B-pillar applique to the body, but do
© 2019-2026 Copyright www.tmodel3.com
