Tesla Model 3: Knuckle - Suspension - Rear - LH - Install
Install
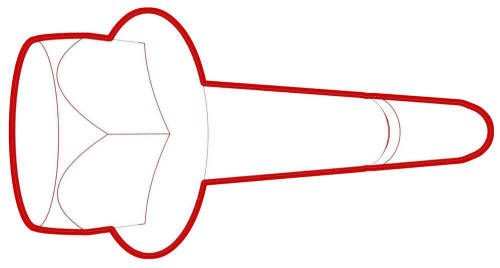
- Position the LH rear suspension knuckle on the rear suspension.
.jpg)
- Hand-tighten the bolt and nut that attach the LH rear aft lower link to the LH rear suspension knuckle.
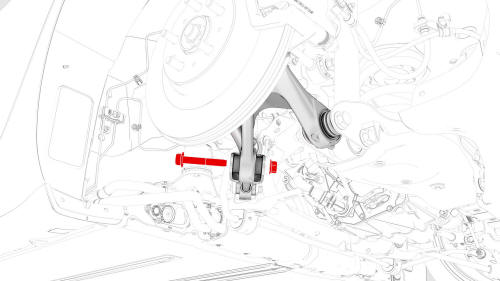
- Hand-tighten the bolt and nut that attach the LH rear lower fore link to the LH rear suspension knuckle.

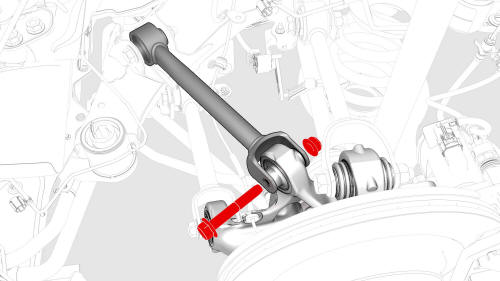
- Hand-tighten the bolt and nut that attach the LH toe link to the LH rear suspension knuckle.
- Hand-tighten the bolt and nut that attach the LH rear upper fore link to the LH rear suspension knuckle.
- Hand-tighten the bolt and nut that attach the LH rear upper aft link to the LH rear suspension knuckle.
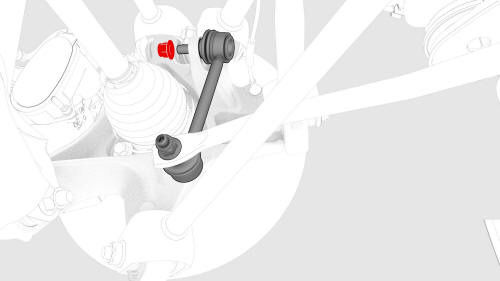
- Hand tighten the nut that attaches the LH sway bar link to the LH rear suspension knuckle.
Note: Counter-hold the ball joint wih a 5 mm hex wrench.
- Remove the support stand from underneath the LH rear suspension.
.jpg)
- Install the clip and grommet that attach the rear LH ABS wheel speed sensor cable to the rear knuckle and bracket.
.jpg)
- Install the bolt that attaches the rear LH ABS wheel
speed sensor to the knuckle.
.jpg) Torque 5 Nm
Torque 5 Nm - Install the LH rear brake dust shield. See Shield - Dust - Brake - Rear - LH (Remove and Replace).
- Install the LH rear hub. See Hub - Rear - LH (Remove and Replace).
- Install the LH rear brake rotor. See Brake Rotor - Rear - LH (Remove and Replace).
- Hand-tighten the nuts that attach the rear hub jack adapter to the LH rear hub.
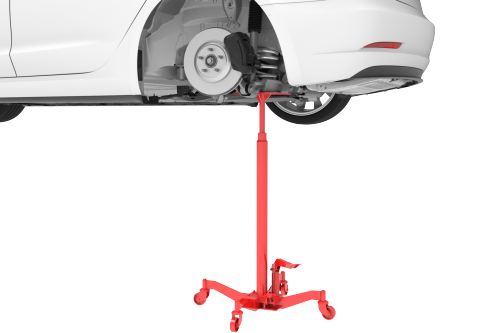
- Position a support stand underneath the LH lower rear control arm, and then raise the support stand to simulate vehicle at ride height.
- Use the rear ride height torque gauge to verify that the suspension is set within ride height specification. Note: Might need to adjust the support stand or spring compressor tool slightly.
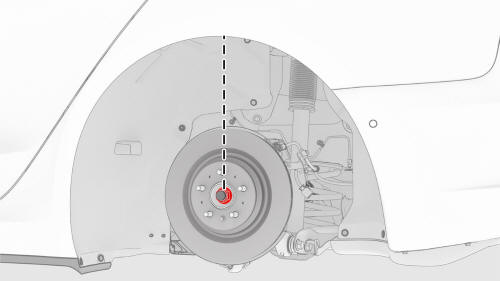
- Measure the distance between the bottom of the quarter panel to the center of the rear axle to make sure that the rear suspension is set to ride height: The distance should measure 378 mm.
- Tighten the bolt and nut that attach the LH rear aft
lower link to the LH rear suspension knuckle. Mark the
bolt with a paint pen.
 Torque 115 Nm
 Torque 115 Nm
- Tighten the bolt and nut that attach the LH rear
lower fore link to the LH rear suspension knuckle. Mark
the bolt with a paint pen.
 Torque 76 Nm
Torque 76 Nm
Torque 76 Nm
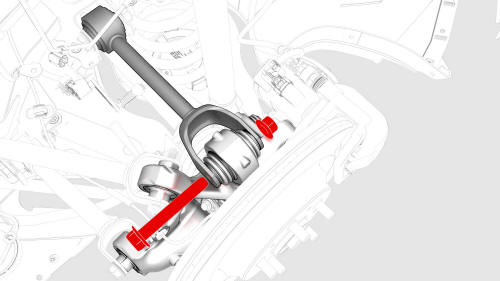
- Tighten the bolt and nut that attach the LH toe link
to the LH rear suspension knuckle. Mark the bolt with a
paint pen.
 Torque 76 Nm
 Torque 76 Nm
- Tighten the bolt and nut that attach the LH rear
upper fore link to the LH rear suspension knuckle. Mark
the bolt with a paint pen.
 Torque 76 Nm
 Torque 76 Nm
- Tighten the bolt and nut that attach the LH rear
upper aft link to the LH rear suspension knuckle. Mark
the bolt with a paint pen.
 Torque 134 Nm
 Torque 134 Nm
- Tighten the nut that attaches the LH sway bar link to the LH rear suspension knuckle. Mark the bolt with a paint pen. Torque 55 Nm
- Remove the support stand from underneath the LH rear suspension.
- Remove the rear hub jack adapter from the LH rear hub.
.jpg)
- Install the bolt that attaches the brake rotor to
the hub.
.jpg) Torque 5 Nm
Torque 5 Nm - Remove the spring compressor from the LH rear coil spring.
- Install the LH rear suspension cover. See Cover - Rear Suspension - LH (Remove and Replace).
- Install the LH rear wheel arch liner. See Wheel Arch Liner - Rear - LH (Remove and Replace).
- Install the LH rear wheel. See Wheel (Remove and Install).
- Perform four wheel alignment (check and adjust) procedure. See Four Wheel Alignment (Check and Adjust).
READ NEXT:
 Link - Aft - Lower - Rear - LH - Remove
SPECIAL TOOLS
Tool, Spring Compressor, Hook, Model 3
(1135103-00-A)
Tool,
Link - Aft - Lower - Rear - LH - Install
Install
Hand-tighten the bolt and nut that attach the LH
rear lower aft link to the subframe.
SEE MORE:
Striker - Seat Back - 2nd Row - RH (Remove and Replace)
Remove
Remove the 2nd row lower seat cushion. See
Seat Cushion - Lower - 2nd Row (Remove and Replace).
Remove the LH and RH 2nd row seat side bolsters. See
Bolster - Side - Seat - 2nd Row - LH (Remove and Replace).
Remove the LH side rail trim. See
Trim - Side Rail - LH (Remove and Replace
Bluetooth Compatibility
You can use your Bluetooth-capable phone
hands-free in Model 3 provided your phone is
within operating range. Although Bluetooth
typically supports wireless communication
over distances of up to approximately 30 feet
(9 meters), performance can vary based on
the phone you are using.
Before
