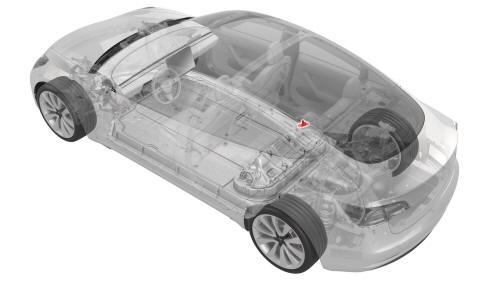
Tesla Model 3: Passthrough - DCDC - 12V- Remove
Tesla Model 3 2017-2024 Service Manual / Battery System / HV Battery Electrical Components / Passthrough - DCDC - 12V (Remove and Replace) / Passthrough - DCDC - 12V- Remove
SPECIAL TOOLS
Skt, 1/4in Dr, 5-Lobe Torx Plus External (1059330-00-B)
Resistance meter, microohm, Hioki RM 3548 (1076927-00-A)
Remove
- Remove the high voltage controller. See Controller - High Voltage (Remove and Replace).

- Remove the nut that attaches the positive terminal of the DCDC harness to the positive DCDC passthrough busbar.
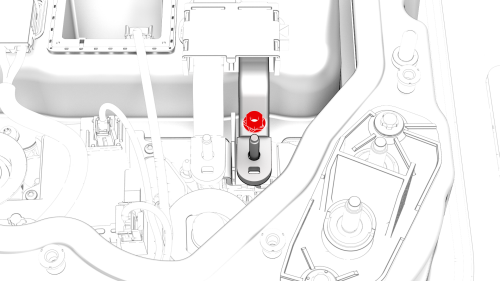
- Remove the nut that attaches the negative terminal of the DCDC harness to the negative DCDC passthrough busbar.
- Release the clip and disconnect the DCDC harness from the power conversion system.
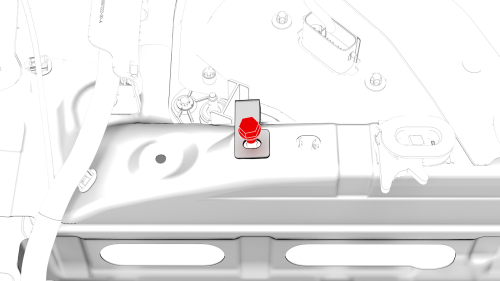
- Remove the bolts that attaches the DCDC ground busbar to the body.
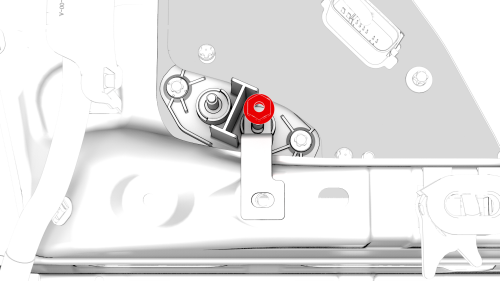
- Remove and discard the nut that attaches the DCDC ground busbar to the
HV battery, and remove the DCDC ground busbar from the vehicle.
.png) Torque 15 Nm
Torque 15 Nm
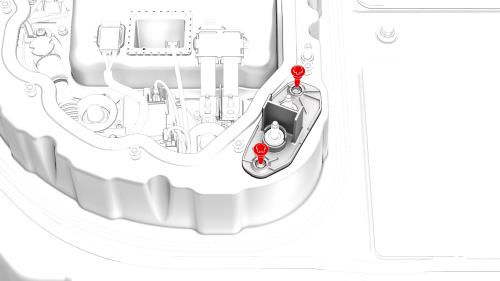
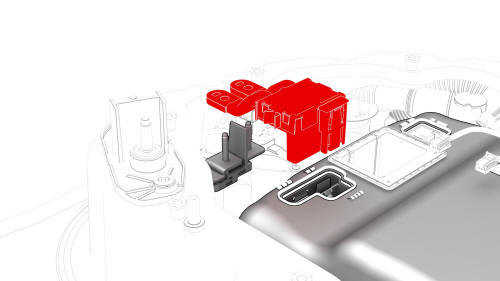
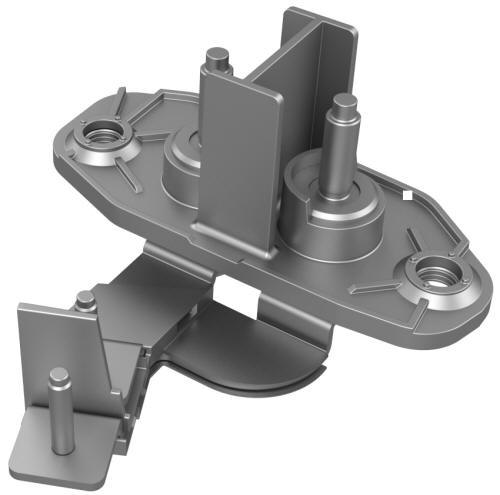
- Remove the bolts that attach the 12V DCDC passthrough to the penthouse,
and then remove the 12V DCDC passthrough from the penthouse..
READ NEXT:
 Passthrough - DCDC - 12V- Install
Install
Use an IPA wipe to clean the mating surfaces of the DCDC passthrough,
and the DCDC harness.
Install the 12V DCDC passthrough into the penthouse, install the bolts
that attach the 1
Power Conversion System- Remove
SPECIAL TOOLS
Connector Removal, Coolant, PCS, M3 (1111868-00-B)
Kit, Svc Plug, Cooling Hose, Model 3 (1135762-00-A)
Tool, Vacuum Cup, 3" x 6" (Qty 2) (1114917-00-A)
Resistance meter, microohm, Hiok
SEE MORE:
Pipes - Refrigerant - High / Low Pressure (Remove and Replace)
DRAFT
Warning:
This procedure was derived from pre-production computer models, and
might not reflect the real-world situation. Warnings and cautions might be
missing. Follow safety requirements and use extreme caution when working on or
near high voltage systems and components.
Remove
Recover
Polishing, Touch Up, and Body
Repair
To preserve the cosmetic appearance of the
body, you can occasionally treat the paint
surfaces with an approved polish containing:
Very mild abrasive to remove surface
contamination without removing or
damaging the paint.
Filling compounds that fill scratches and
reduce their visibilit
© 2019-2024 Copyright www.tmodel3.com
