Tesla Model 3: Radiator (Remove and Replace)
Tesla Model 3 2017-2026 Service Manual / Thermal Management / Cooling System / Radiator (Remove and Replace)
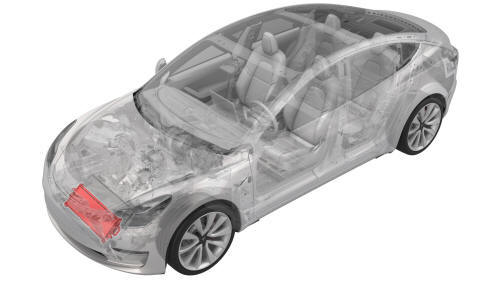
Remove
- Remove the cooling fan module. See Module - Cooling Fan (Remove and Install).
.png)
.png)
- Release the clips that attach the active grille shutter to the cooling fan module, and then remove the active grille shutter from the module.
.png)
- Remove the screws that attach the radiator to the condenser fan module.
.png) Torque 10 Nm
Torque 10 Nm
.png)
- Release the clip that attaches the radiator to the condenser fan module,
and then remove the radiator from the condenser fan module.

Install
Installation procedure is the reverse of removal, except for the following: Perform a cooling system vacuum refill. See Cooling System (Vacuum Refill).
READ NEXT:
 Superbottle (Dual Motor) (Remove and Replace)
Superbottle (Dual Motor) - Remove
SPECIAL TOOLS
Kit, Svc Plug, Cooling Hose, Model 3 (1135762-00-A)
Remove
Remove the 2nd row lower seat cushion. See Seat Cushion - Lower - 2nd
Row (Remove and R
SEE MORE:
Striker - Door - Front - LH (Remove and Replace)
Remove
Open the LH front door.
Mark the position of the LH front door striker using masking tape.
Remove the bolts that attach the LH front door striker to the body, and
then remove the striker from the vehicle.
Install
Hand-tighten the bolts that attach the LH front door st
Calendar
Overview
The Calendar app allows you to view
scheduled events from your phone's (iPhone
or Android) calendar for the current and next
day. The Calendar is conveniently integrated
with navigation and the Phone app so you can
navigate to, or dial into, your next meeting.
The Calendar app requ
© 2019-2026 Copyright www.tmodel3.com
