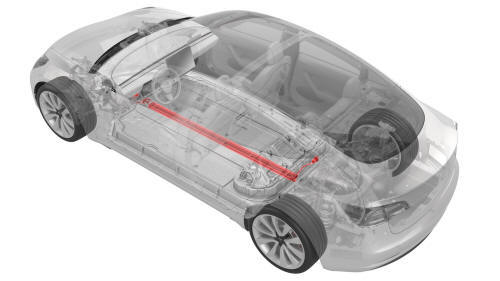
Tesla Model 3: Ski - Center Rail - HV Battery (RWD) (Remove and Replace)
Ski - Center Rail - HV Battery (RWD) - Remove
SPECIAL TOOLS
Lever Lock, HV Connector, Model 3 (1140311-00-A)
Warning:
Only technicians who have been trained in High Voltage Awareness are
permitted to perform this procedure. Proper personal protective equipment (PPE)
and insulating HV gloves with a minimum rating of class 0 (1000V) must be worn
at all times a high voltage cable, busbar, or fitting is handled. Refer to Tech
Note TN-15-92-003, "High Voltage Awareness Care Points" for additional safety
information.
Parent topic:
1610 - HV Battery Enclosure
Remove
- Perform the vehicle electrical isolation procedure. See
Vehicle Electrical Isolation Procedure.
- Remove the front HV battery skid plate. See
Skid Plate - HV Battery - Front (Remove and Replace).
.jpg)
- Disconnect the PTC heater HV electrical harness, and then remove the PTC
heater HV electrical harness from the connector bracket.
.jpg)
- Disconnect the A/C compressor HV electrical harness, and then remove the
A/C compressor HV electrical harness from the connector bracket.
- Position a coolant drain under the LH front of the HV battery.
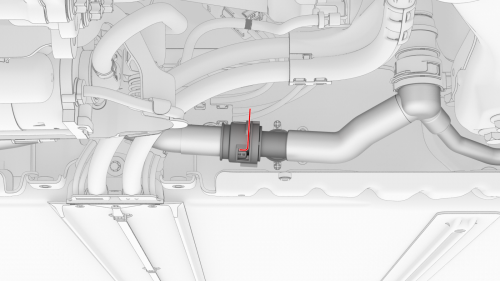
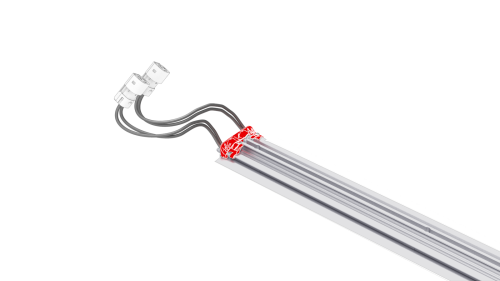
- Release the clip, disconnect the HV battery RH supply manifold from the
HV battery LH supply manifold, and then immediately plug the male and female
fittings.
.png)
- Release the clips that attach the PTC heater and A/C compressor
electrical harness bracket to the front of the HV battery, and then separate
the bracket from the battery.
- Remove the rear HV battery skid plate. See
Skid Plate - HV Battery - Rear (Remove and Replace).
.png)
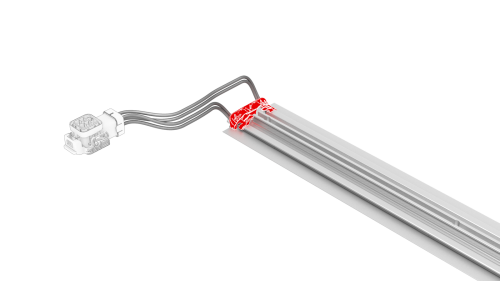
- Release the clips that attach the RH inner HV battery return hose to the
HV battery.
.png)
- Remove the nuts that attach the rear drive unit HV electrical harness
bracket to the HV battery.
.png)
- Release the locking tab of the rear drive unit HV electrical harness.
.png)
- Raise the handle, and them disconnect the rear drive unit HV electrical
harness from the HV battery connector.
- Position a coolant drain under the RH rear of the HV battery
.png)
- Release the clip and disconnect the RH inner HV battery return hose
fitting from the RH end of the HV battery platter enclosure.
- Quickly plug both the male and female fittings.
.jpg)
- Release the locking tab, raise the handle, and then disconnect the PTC
heater and A/C electrical harness from the HV battery connector.
.jpg)
- Release the clips that attach the PTC heater and A/C electrical harness
to the HV battery.
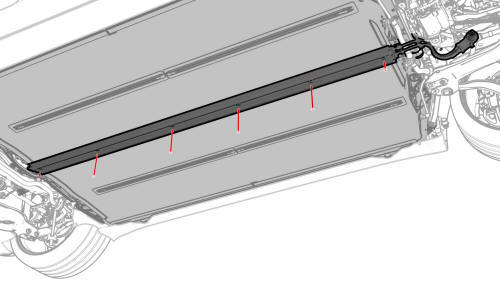
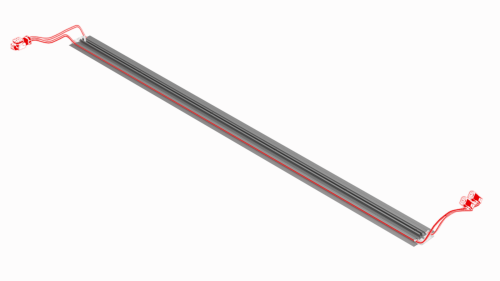
- With an assistant, remove the bolts that attach the center rail ski to
the HV battery.
- Remove the center rail ski from the vehicle.
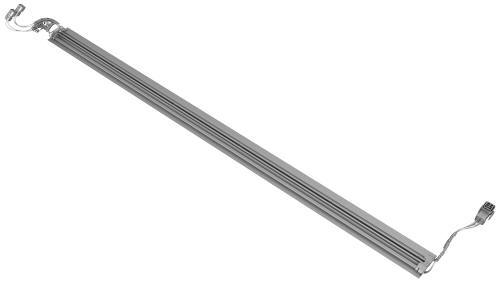
- Remove the cap cover at the front of the HV battery center rail ski.
- Remove the cap cover at the rear of the HV battery center rail ski.
- Remove the PTC heater and A/C compressor electrical harnesses from the
sides of the HV battery center rail ski.
Ski - Center Rail - HV Battery (RWD)- Install
- Install the PTC heater and A/C compressor electrical harness into the
sides of the HV battery center rail ski.
- Install the cap cover at the rear of the HV battery center rail ski.
- Install the cap cover at the front of the HV battery center rail ski
- With an assistant, install the center rail ski to the HV battery.
- Install the bolts that attach the center rail ski to the HV battery.
 Torque 38 Nm
.jpg) Torque 38 Nm
Torque 38 Nm
- Fasten the clips that attach the electrical harness to the HV battery.
- Connect the electrical harness to the HV battery connector, lower the
handle, and attach the locking tab.
- Remove the plugs from the male and female fittings, quickly connect the
RH inner HV battery return hose to the HV battery platter enclosure, and
then fasten the clip.
- Remove the coolant drain from under the RH rear of the HV battery.
- Fully raise the handle on the rear drive unit HV electrical harness.
.png)
- Attach the HV connector lever lock onto the back of the HV electrical
harness.
- Firmly connect the HV electrical harness to the HV battery connector.
Caution:
Make sure that the harness fits the connector squarely and tightly.
- While pressing the harness to the connector, remove the HV connector
lever lock.
- While pressing the harness to the connector, fully lower the handle.
- Slide the release to lock the HV electrical harness.
- Install the nuts that attach the rear drive unit HV electrical harness
bracket to the HV battery.
.png) Torque 10 Nm
Torque 10 Nm
- Fasten the clips that attach the RH inner HV battery return hose to the
HV battery.
- Install the rear HV battery skid plate. See
Skid Plate - HV Battery - Rear (Remove and Replace).
- Position the coolant drain under the LH front of the HV battery.
- Install the PTC heater and A/C compressor electrical harness bracket to
the front of the HV battery, and then fasten the clips that attach the
bracket to the HV battery.
- Remove the plugs from the HV battery RH supply manifold and the HV
battery LH supply manifold, immediately connect the male and female fittings,
and then fasten the clip.
- Install the A/C HV electrical harness into the connector bracket, and
then connect the A/C HV electrical harness.
- Install the PTC heater HV electrical harness into the connector bracket,
and then connect the PTC heater HV electrical harness.
- Install the front HV battery skid plate. See
Skid Plate - HV Battery - Front (Remove and Replace).
- Perform a penthouse air leak test. See
Penthouse Air Leak Test.
- Connect 12V power. See
12V Power (Disconnect and Connect).
- Perform a vacuum refill of the cooling system. See
Cooling System (Vacuum Refill).
READ NEXT:
Ski - Center Rail - HV Battery (Dual Motor)-Remove
SPECIAL TOOLS
Lever Lock, HV Connector, Model 3 (1140311-00-A)
Warning:
Only technicians who have been trained in High Voltage Awareness are
perm
SEE MORE:
Remove
Remove the LH instrument panel end cap. See
End Cap - Instrument Panel - LH (Remove and Replace).
Release the clips that attach the LH air wave end cap to the main
instrument panel decor trim, and then remove the cap from the vehicle.
Install
Installation procedure is the re
Remove
Remove the LH and RH instrument panel end caps. See
End Cap - Instrument Panel - LH (Remove and Replace).
Remove the LH and RH middle A-pillar trims. See
Trim - A-Pillar - Middle - LH (Remove and Replace).
Remove the LH and RH upper A-Pillar trims. See
Trim - A-Pillar - Upper - LH (
 Ski - Center Rail - HV Battery (Dual Motor) (Remove and Replace)
