Tesla Model 3: Diffuser - Rear Fascia (Remove and Replace)
Tesla Model 3 2017-2026 Service Manual / Exterior Fittings / Undertray and Diffuser / Diffuser - Rear Fascia (Remove and Replace)
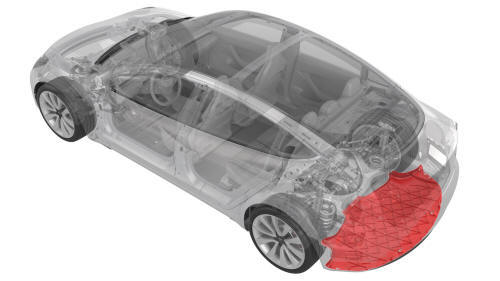
Remove
- Raise and support the vehicle. See Raise Vehicle - 2 Post Lift.
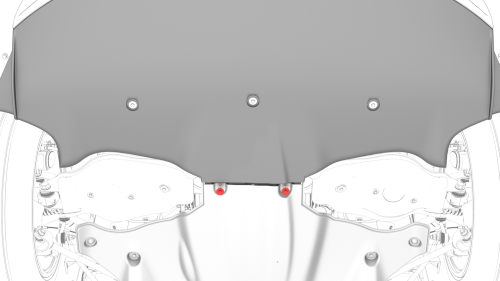
- Remove the bolts that attach the rear fascia diffuser to the mid aero
shield.
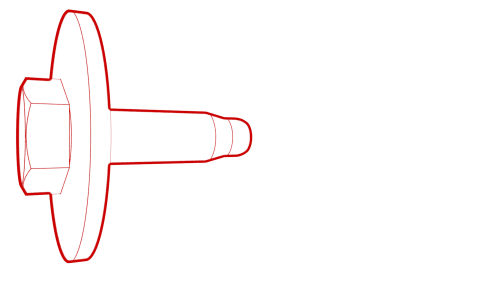 Torque 5 Nm
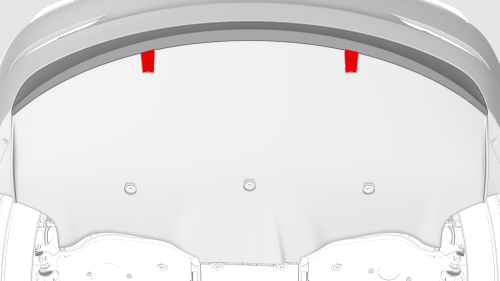
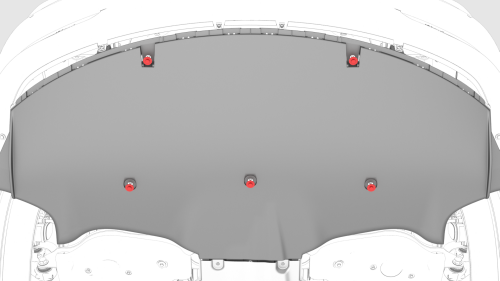
- Remove the fastener covers, and then remove the bolts that attach the
rear fascia diffuser to the vehicle.
 Torque 4 Nm
.png)
- Remove the bolts that attach the rear fascia diffuser to the outer edge
of the rear fascia.
 Torque 3 Nm
.png)
- Remove the bolts that attach the rear fascia diffuser to the inside of
the rear fascia.
Torque 3 Nm
Note: Reach into the loosened rear fascia diffuser to access these bolts.
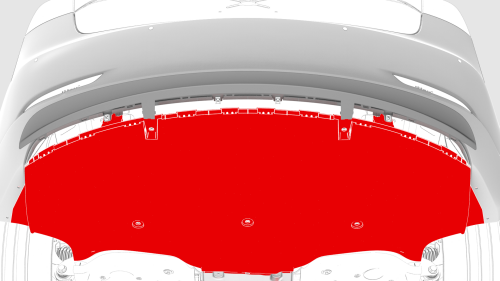
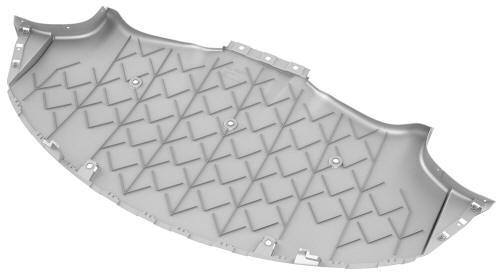
- Release the tabs that attach the rear fascia diffuser to the rear
fascia, and then remove the diffuser.
Install
Installation procedure is the reverse of removal.
READ NEXT:
 Panel - Aero Shield - Front (Remove and Replace)
Remove
Raise and support the vehicle. See
Raise Vehicle - 2 Post Lift.
Remove the bolts (x9) that attach the front aero shield panel to the
vehicle.
Remove the nuts (x2) that attac
Panel - Aero Shield - Mid (Remove and Replace)
Remove
Raise and support the vehicle. See
Raise Vehicle - 2 Post Lift.
Remove the bolts (x13) that attach the mid aero shield panel to the
vehicle, and then remove the panel from the veh
SEE MORE:
Hose - Supply - Powertrain (Remove and Replace)
Remove
Remove the HV battery. See HV Battery (RWD) (Remove and Install).
Release the clip and disconnect the powertrain supply hose fitting from
the RH underside of the penthouse.
Release the clips (x5) that attach the powertrain supply (upper) hose to
the RH side of the HV battery,
Brake Lines - Rear - LH to Sill (Remove and Replace)
SPECIAL TOOLS
Flare nut crowfoot set (1079041-00-A)
Remove
Caution:
Brake fluid dissolves paint. Have clean towels and plenty o
© 2019-2026 Copyright www.tmodel3.com
