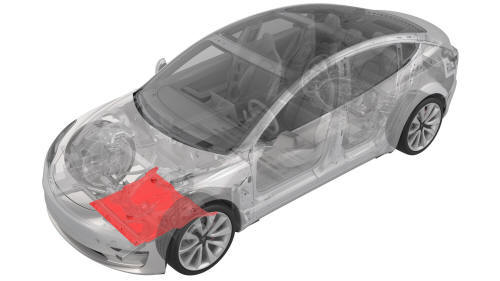
Tesla Model 3: Panel - Aero Shield - Front (Remove and Replace)
Tesla Model 3 2017-2026 Service Manual / Exterior Fittings / Undertray and Diffuser / Panel - Aero Shield - Front (Remove and Replace)
Remove
- Raise and support the vehicle. See Raise Vehicle - 2 Post Lift.
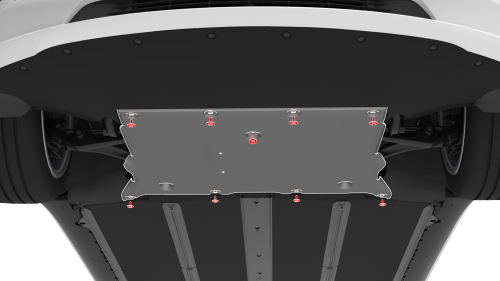
- Remove the bolts (x9) that attach the front aero shield panel to the vehicle.
- Remove the nuts (x2) that attach the front aero shield panel to the
vehicle, and then remove the panel from the vehicle
Install
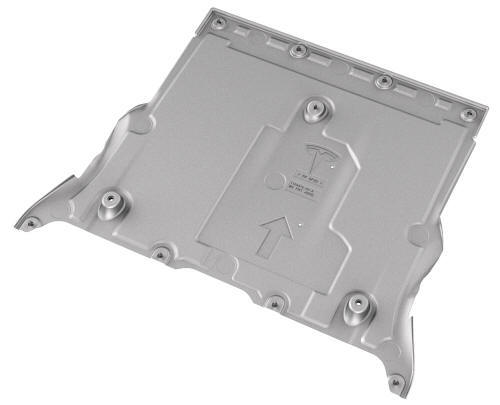
- Apply a thin bead of Loctite 222 to the threads of the bolts (x9) that attach the front aero shield panel to the vehicle.
- Install the front aero shield panel to the underside of the vehicle, and then hand-tighten the nuts (x2) to temporarily hold the panel in place.
- Hand-tighten the bolts (x9) that attach the front aero shield panel to the vehicle.
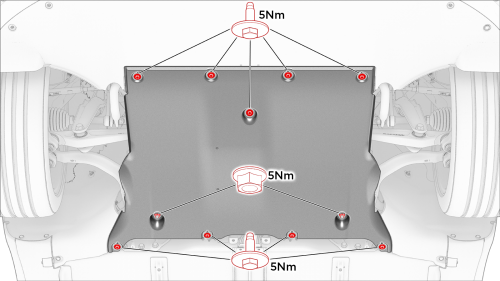
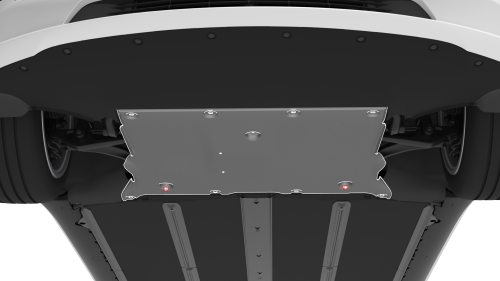
- Torque the nuts (x2) and bolts (x9) to the proper specification.
 Torque 5 Nm
 Torque 5 Nm
 - Lower the vehicle. See Raise Vehicle - 2 Post Lift.
READ NEXT:
 Panel - Aero Shield - Mid (Remove and Replace)
Remove
Raise and support the vehicle. See
Raise Vehicle - 2 Post Lift.
Remove the bolts (x13) that attach the mid aero shield panel to the
vehicle, and then remove the panel from the veh
Rear Lettering (Retrofit)
SPECIAL TOOLS
Fixture, Badge, Dual Motor/Perf, M3 (1475764-00-A)
Seam Roller, Silicone, 5" (1049517-00-A)
Procedure
Clean the trunk area where the "Dual Motor" badge is to be installed
with an
SEE MORE:
Seat Cushion - Lower - 2nd Row (Remove and Replace)
Remove
Move the driver seat and the front passenger seat fully forward.
Note: Note the position of the driver seat and the front passenger
seat prior to movement so that both seats are restored to their original
position during installation.
While pressing the LH and RH tabs towards the
Skid Plate - HV Battery - Front (Remove and Replace)
Remove
Remove the front aero shield. See
Panel - Aero Shield - Front (Remove and Replace).
Remove the bolts and clips that attach the skid plate to the battery,
and then remove the plate from the battery.
Install
Installation procedure is the reverse of removal.
© 2019-2026 Copyright www.tmodel3.com
