Tesla Model 3: Vent - Front - LH (Remove and Replace)
Tesla Model 3 2017-2026 Service Manual / Instrument Panel / Vent - Front - LH (Remove and Replace)
Remove
- Remove the vent finisher. See Finisher - Vent (Remove and Replace).
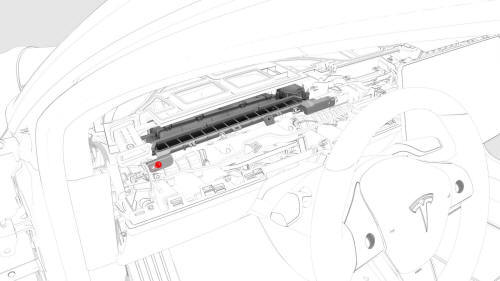
- Remove the screw that attaches the LH front vent, and then pull out the
LH side of the LH front vent to release it from the instrument panel.
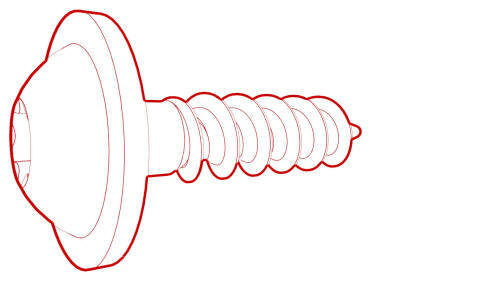 Torque 2.3 Nm
 -
Disconnect the electrical connector from the LH front vent, and then remove the LH front vent from the vehicle.

Install
Installation procedure is the reverse of removal, except for the following:
If the vehicle is left hand drive, make sure not to dislodge the foam block in the cavity where the front LH vent installs.
READ NEXT:
 Vent - Front - RH (Remove and Replace)
Remove
Remove the LH instrument panel end cap. See
End Cap - Instrument Panel - LH (Remove and Replace).
Remove the LH and RH air wave end caps. See
End Cap - Air Wave - LH (Remove and Replace
Solenoid - Glove Box (Remove and Replace)
Remove
Remove the glove box. See
Glove Box (LHD) (Remove and Replace).
Remove and discard the NVH pad from the glove box.
Note: The NVH pad is one time use only.
Release the clips th
End Cap - Air Wave - LH (Remove and Replace)
Remove
Remove the LH instrument panel end cap. See
End Cap - Instrument Panel - LH (Remove and Replace).
Release the clips that attach the LH air wave end cap to the main
instrument pane
SEE MORE:
Tuner - FM / HD (Remove and Replace)
Remove
Remove the RH side rail trim. See Trim - Side Rail - LH (Remove and
Replace).
Disconnect the backlight electrical connector from the tuner.
Disconnect the electrical connectors from the front of the tuner.
Disconnect the electrical connector from the rear of the tuner.
Collision Avoidance Assist
The following collision avoidance features are
designed to increase the safety of you and
your passengers:
Forward Collision Warning - provides
visual and audible warnings in situations
when Model 3 detects that there is a high
risk of a frontal collision
Automatic Emergency Braking -
© 2019-2026 Copyright www.tmodel3.com
