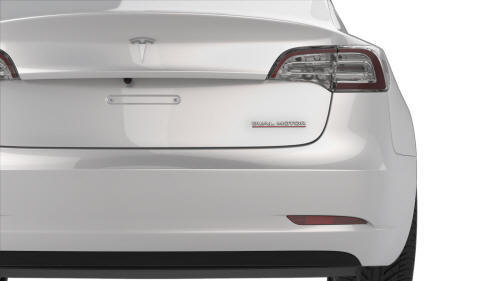
Tesla Model 3: Rear Lettering (Retrofit)
Tesla Model 3 2017-2026 Service Manual / Exterior Fittings / Badges and Films / Rear Lettering (Retrofit)
SPECIAL TOOLS
Fixture, Badge, Dual Motor/Perf, M3 (1475764-00-A)
Seam Roller, Silicone, 5" (1049517-00-A)
Procedure
- Clean the trunk area where the "Dual Motor" badge is to be installed with an isopropyl alcohol (IPA) wipe.
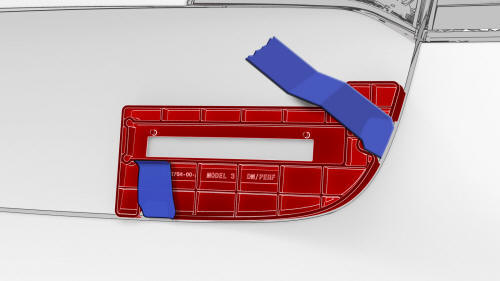
- Put the badge fixture tool in position on the trunk and secure it with masking tape.
Note: Make sure the badge and adhesion surface are between 60-120 degrees Fahrenheit (15.556-43.333 Celsius). Use a heat gun in cold weather conditions to bring installation surfaces to optimum temperature
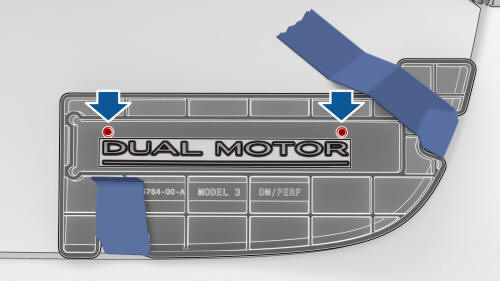
- Remove the badge liner on the adhesive side, and then set the badge in the badge fixture using the datum holes.
- Adhere the badge to the trunk by pressing through the badge fixture window
- Remove the clear front liner from the badge. Do not discard the liner at this time.
- Remove the badge fixture and masking tape from the trunk.
- Reapply the clear front liner to the badge to protect the surface.
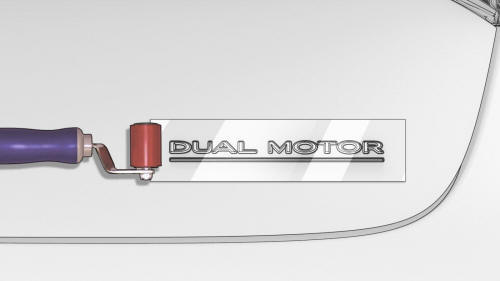
- Use the silicone seam roller to fully adhere the badge.
- Remove the clear front liner from the badge.
READ NEXT:
 Tesla Badge - Front (Remove and Replace)
SPECIAL TOOLS
Kit, Badge Removal (1453028-00-A)
Fixture, Front Badge, Model 3 (1134702-00-A)
Remove
Prepare the badge removal tool with approximately 60 centimeters of
monofilament line.
With
Tesla Badge - Rear (Remove and Replace)
SPECIAL TOOLS
Kit, Badge Removal (1453028-00-A)
Fixture, Rear Badge, Model 3 (1134703-00-A)
Remove
Prepare the badge removal tool with approximately 60 centimeters of
monofilament line.
Raise
SEE MORE:
Speaker - Emergency (Remove and Replace)
Remove
Remove the RH footwell cover. See Cover - Footwell - Passenger (LHD) (Remove
and Replace).
Disconnect the electrical connector for the emergency speaker.
Release the screws that attach the emergency speaker to the RH footwell
cover, and then remove the emergency speaker.
Sensor - Airbag - B-Pillar - LH (Remove and Replace)
Remove
Remove the LH instrument panel end cap. See End Cap - Instrument Panel -
LH (Remove and Replace).
Remove the LH middle A-pillar trim. See Trim - A-Pillar - Middle - LH (Remove
and Replace).
Remove the LH lower A-pillar trim. See Trim - A-Pillar - Lower - LH (Remove
and Replace).
© 2019-2026 Copyright www.tmodel3.com
