Tesla Model 3: To Use Autopark
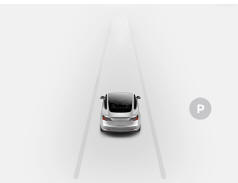
Autopark (if equipped) uses data from the ultrasonic sensors and GPS to simplify parking on public roads by maneuvering Model 3 into parallel and perpendicular parking spaces.
Warning: Autopark's performance depends on the ability of the ultrasonic sensors to determine the vehicle's proximity to curbs, objects, and other vehicles.
To Use Autopark
When driving, follow these steps to allow Autopark to maneuver Model 3 into a parking space:
- When driving slowly on a public road, monitor the touchscreen to determine when Autopark has detected a parking space. When Autopark detects a potential parking space, the touchscreen displays a parking icon. Autopark detects parallel parking locations when driving below 15 mph (24 km/h) and perpendicular parking locations when driving below 10 mph (16 km/h).
Note: The parking icon appears only if the vehicle's position and/or the circumstances of the surrounding area are such that Autopark can determine an appropriate driving path. If Autopark cannot determine an appropriate path (for example, when driving on a narrow street where moving into the parking space causes the front of the vehicle to extend into the adjacent lane), you can either reposition the vehicle, find a different parking space, or park manually.
- Check to determine if the detected parking space is appropriate and safe. If so, pull forward and stop approximately a car length ahead of the parking space (as you normally would when parallel parking or when backing into a perpendicular parking space).
- Release the steering wheel, shift Model 3 into Reverse, then touch Start Autopark on the touchscreen.
- When parking is complete, Autopark displays the "Complete" message.
In situations where Autopark cannot operate due to inadequate sensor data, the touchscreen displays a message indicating that you must manually park Model 3.
Note: If you press the brake when Autopark is actively parking Model 3, the parking process pauses until you touch Resume on the touchscreen.
Note: Autopark detects potential perpendicular parking spaces that are at least 9.5 feet (2.9 meters) wide with a vehicle parked on each side. Autopark detects parallel parking spaces that are at least 20 feet (6 meters), but less than 30 feet (9 meters) long.
Autopark does not operate on angled parking spaces.
Warning: Never depend on Autopark to find a parking space that is legal, suitable, and safe. Autopark may not always detect objects in the parking space. Always perform visual checks to confirm that a parking space is appropriate and safe.
Warning: When Autopark is actively steering Model 3, the steering wheel moves in accordance with Autopark's adjustments. Do not interfere with the movement of the steering wheel. Doing so cancels Autopark.
Warning: During the parking sequence, continually check your surroundings. Be prepared to apply the brakes to avoid vehicles, pedestrians, or objects.
Warning: When Autopark is active, monitor the touchscreen to ensure that you are aware of the instructions that Autopark is providing.
READ NEXT:
 To Pause Parking
To pause Autopark, press the brake pedal
once. Model 3 stops and remains stopped until
you touch Resume on the touchscreen.
To Cancel Parking
Autopark cancels the parking sequence when
you manual
Before Using Summon
Summon (if equipped) allows you to
automatically park and retrieve Model 3 while
you are standing outside the vehicle. Summon
uses data from the ultrasonic sensors to move
Model 3 forward and reve
SEE MORE:
Bracket - License Plate - Front (EMEA) (Retrofit using Template)
Procedure
Clean the front center surface of the front fascia.
Align the template with the parking sensors, and then use masking tape
to hold the template in place.
LH side shown, RH side similar
Align the front license plate bracket over the template, and then secure
the bracket
Brake Pad Kit - Front (Sport Brakes)- Install
Install
Brush the LH front brake caliper and anti rattle
springs with soapy water.
Apply a thin layer of copper grease to the left and
