Tesla Model 3: Brake Pad Kit - Front (Sport Brakes)- Install
Tesla Model 3 2017-2024 Service Manual / Brakes / Brake Discs and Calipers / Brake Pad Kit - Front (Sport Brakes) (Remove and Replace) / Brake Pad Kit - Front (Sport Brakes)- Install
Install
- Brush the LH front brake caliper and anti rattle springs with soapy water.
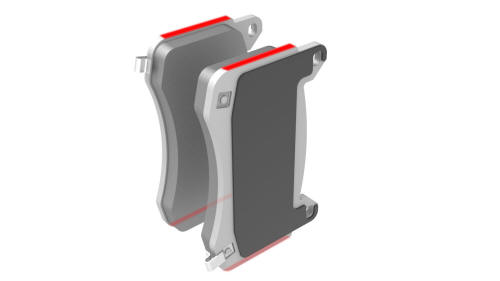
- Apply a thin layer of copper grease to the left and right side edges of the LH front brake pads.
Caution: Do not apply any grease to the back side of the brake pad.
- Install the LH front brake pads on the LH front brake caliper.
Tip: Push the pads toward the anti rattle springs, and then slide the pads onto the fixed pins.
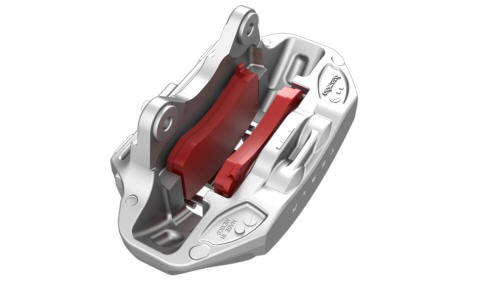
- Position the LH front brake caliper on the LH front
knuckle, and then install new bolts that attach the
caliper to the knuckle.
 Torque 94 Nm
.png)
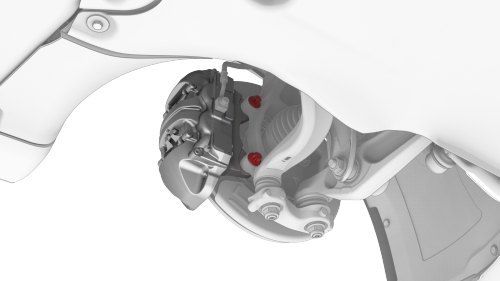
- Install the bolt that attaches the LH front brake
hose bracket to the LH front knuckle.
.png) Torque 5 Nm
Torque 5 Nm
- Install the LH front wheel. SeeWheel (Remove and Install).
- Repeat step 1 through step 6 to install the RH front brake pads.
- Lower the vehicle.
- Pump the brake pedal 3-5 times to seat the pads against the brake rotor until the brake pedal feels firm.
- Perform vehicle road test using a series of ABS-active stops and make sure proper brake pedal feel and performance is achieved.
READ NEXT:
 Brake Pad Kit - Rear (Base Brakes) (Remove and Replace)
SPECIAL TOOLS
Kit, EPB Release, Handheld (1134520-00-A)
XP-10 Power Supply, XP-10 (
Brake Pad Kit - Rear (Sport Brakes) - Remove
Remove
Raise and support the vehicle. See Raise Vehicle - 2
Post Lift.
Remove the LH and RH rear wheels. See Wheel (Remove
and Install).
Us
SEE MORE:
Garnish - Trunk (Remove and Replace)
Remove
LH shown, RH similar
Open the trunk.
Release the clips (x2) that attach the ends of the trunk garnish to the
body.
Release the tabs (x10) that attach the trunk garnish to the body, and
then remove the trunk garnish from the vehicle.
Install
Installation procedure is the
Controls
Overview
Touch Controls on the bottom
corner of the touchscreen to control features and
customize Model 3 to suit your preferences. The Controls window appears over the
map. Touch an option on the left side of the window to display the associated
controls and settings. By default, Quick Contro
© 2019-2024 Copyright www.tmodel3.com
