Tesla Model 3: Brake Pad Kit - Rear (Base Brakes) (Remove and Replace)
SPECIAL TOOLS
Kit, EPB Release, Handheld (1134520-00-A)
XP-10 Power Supply, XP-10 (1129348-00-A)
Remove
- Remove the LH rear wheel. See Wheel (Remove and Install).
- Use Toolbox to place the vehicle into EPB Service Mode. See Release Parking Brake Using Toolbox.
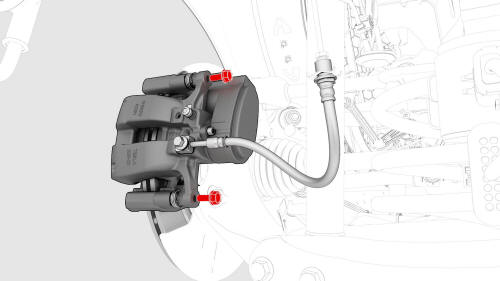
- Remove the bolts that attach the LH rear brake
caliper to the LH rear brake caliper bracket.
.png) Torque 26.5 Nm
Torque 26.5 Nm
- Use a brake caliper S-hook to hang the LH rear brake caliper on the body.
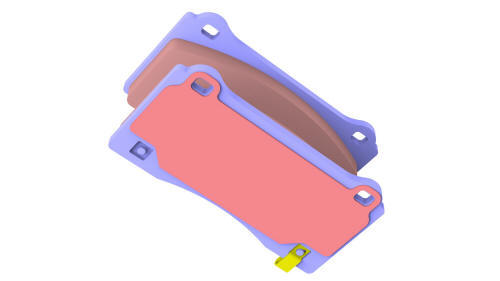
- Remove the brake pads from the LH rear brake caliper bracket.
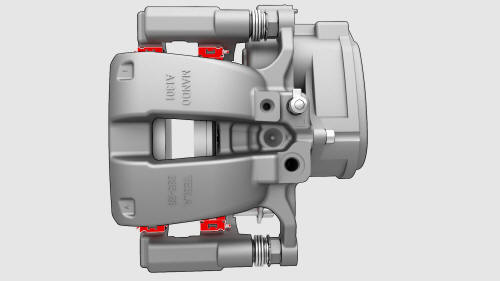
- Remove the caliper abutment clips from the LH rear brake caliper bracket.
- Repeat step 1 through step 10 for the RH rear brake
pad removal.
Install
- Install the caliper abutment clips.
- Apply an even layer of Silaramic lubricant to the abutment clips.
- Install the brake pads on the LH rear brake caliper bracket.
Tip: During installation, press the brake pads toward the brake rotor.
Note: Use the caliper spreader tool to push the caliper piston back into the caliper, if more room is needed.
- Install the bolts that attach the LH rear brake
caliper to the LH rear brake caliper bracket.
 Torque 26.5 Nm
- Install the LH rear wheel. See Wheel (Remove and Install).
- Repeat step 1 through step 5 for the RH rear brake pad installation.
- Apply the parking brake by touching the Park button on the touchscreen.
- Pump the brake pedal to seat the pads against the brake rotor until the brake pedal feels firm.
- Check the brake fluid level and top off the brake fluid reservoir, if necessary.
- Perform vehicle road test using a series of ABS-active stops and make sure proper brake pedal feel and performance is achieved
READ NEXT:
 Brake Pad Kit - Rear (Sport Brakes) (Remove and Replace)
Brake Pad Kit - Rear (Sport Brakes) - Remove
Remove
Raise and support the vehicle. See Raise Vehicle - 2
Post Lift.
Remove the LH and RH rea
SEE MORE:
Harness - Charge Port to HV Battery (Single-Phase) (Remove and Replace)
DRAFT
Warning:
This procedure was derived from pre-production computer
models, and might not reflect the real-world situation. Warnings
and cautions might be missing. Follow safety requirements and
use extreme caution when
IP Carrier (Remove and Install)
Remove
Remove the LH and RH lower A-pillar trim. See
Trim - A-Pillar - Lower - LH (Remove and Replace).
Remove the LH and RH upper A-pillar trims. See
Trim - A-Pillar - Upper - LH (Remove and Replace).
Remove the driver and front passenger seats. See
Seat - Driver (Remove and Replace).
Re
