Tesla Model 3: Garnish - Trunk (Remove and Replace)
Tesla Model 3 2017-2026 Service Manual / Interior Trim / Trunk Trim / Garnish - Trunk (Remove and Replace)
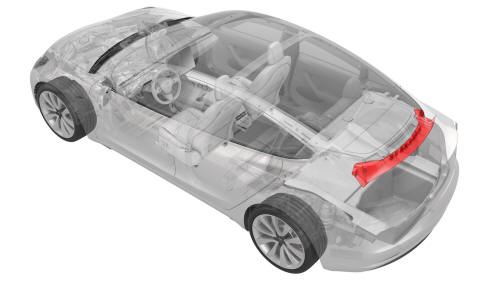
Remove
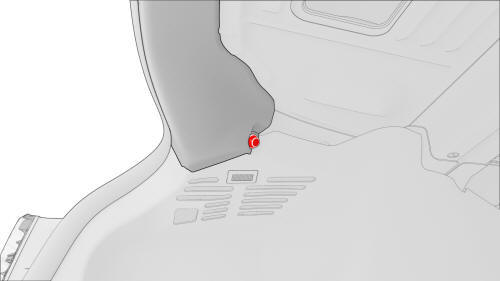
LH shown, RH similar
- Open the trunk.
- Release the clips (x2) that attach the ends of the trunk garnish to the body.
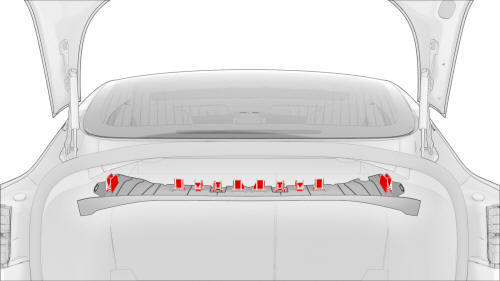
- Release the tabs (x10) that attach the trunk garnish to the body, and
then remove the trunk garnish from the vehicle.
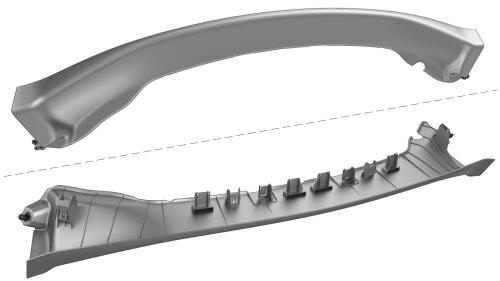
Install
Installation procedure is the reverse of removal.
READ NEXT:
 Trim - Lid - Trunk (Remove and Replace)
Remove
Open the trunk.
Release the clips at the upper corners, then work around the trim to
release the clips that attach the trunk trim to the trunk lid.
Note: The clips (x4) closest to
Panel - Door Trim - Front - LH (Remove and Install)
Panel - Door Trim - Front - LH (Remove and Install) - Remove
Remove
Open the front LH door, and fully lower the window.
Remove the front LH door tweeter. See
Tweeter - Front Door - LH (Remove a
SEE MORE:
Skid Plate - HV Battery - Front (Remove and Replace)
Remove
Remove the front aero shield. See
Panel - Aero Shield - Front (Remove and Replace).
Remove the bolts and clips that attach the skid plate to the battery,
and then remove the plate from the battery.
Install
Installation procedure is the reverse of removal.
Lumbar Support - Backrest - Driver Seat (Remove and Replace)
Remove
Remove the driver seat back shell. See
Shell - Seat Back - Driver (Remove and Replace).
Release the clips that attach the outboard side of the seat back
cover to the seat back frame, and then expose the air bag connector.
Disconnect the electrical harness from the dr
© 2019-2026 Copyright www.tmodel3.com
