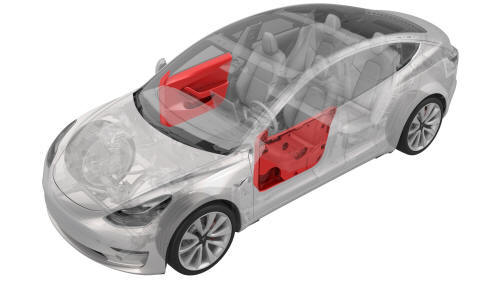
Tesla Model 3: Panel - Door Trim - Front - LH (Remove and Install)
Panel - Door Trim - Front - LH (Remove and Install) - Remove
Remove
- Open the front LH door, and fully lower the window.
- Remove the front LH door tweeter. See
Tweeter - Front Door - LH (Remove and Replace).
- Remove the LH front door puddle light. See
Puddle Light - Front Door - LH (Remove and Replace).
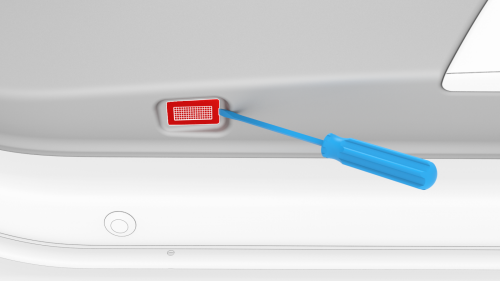
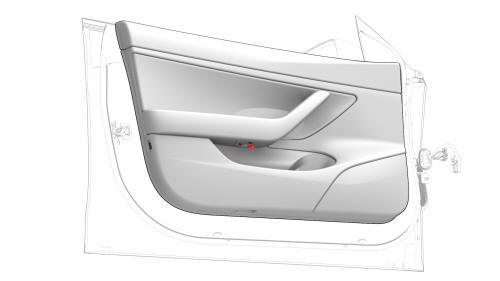
- Release the clips that attach the reflector to the rear edge of the LH
front door trim panel and the screw cover to the front of the armrest, and
then remove the reflector and cover from the trim panel.
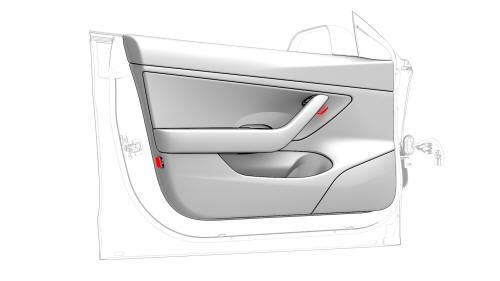
Rear
Middle
- Remove the screws that attach the trim panel to the door.
Front
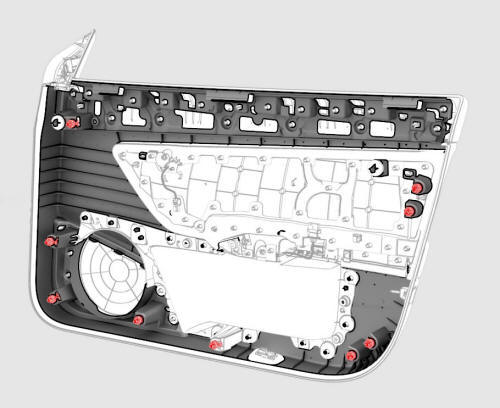
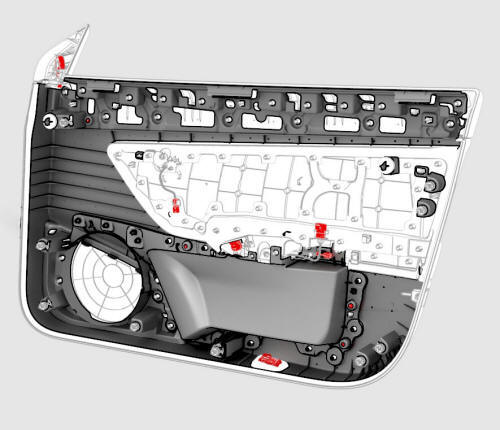
Trim Panel Clip Locations
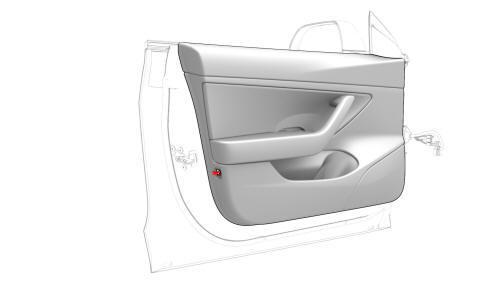
- Pull out on the trim panel from the puddle light opening to release the
clips that attach the trim panel to the door.
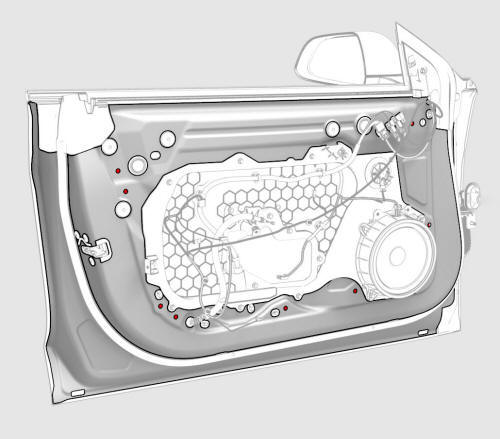
Door Clip Locations
Caution:
Do not remove the trim panel from the door at this time.
- Continue to pull and release all of the clips around the edge of the
trim panel, working from the bottom up.
Caution:
Do not remove the trim panel from the door at this time.
- Remove the manual release cable collar from the trim panel, and pivot
the collar down to a vertical orientation.

- Slide the cable barrel end out of the release lever, and remove the
cable from the trim panel.
Trim Panel Connectors
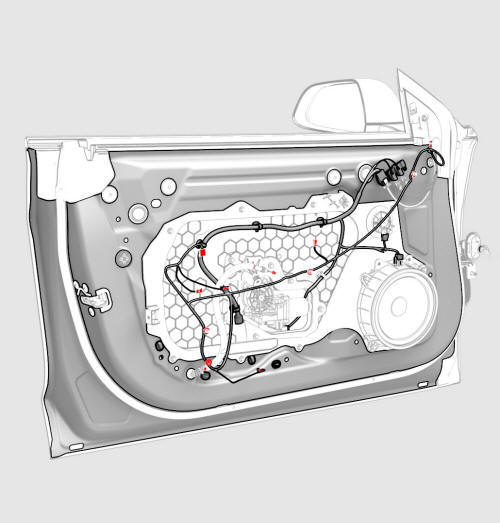
Door Electrical Harness Connectors
- Disconnect the electrical harness from the connectors, and then release
the clips that attach the electrical harness to the trim panel.
Caution:
Do not remove the trim panel from the door at this time.
- If present, remove and discard the cable ties that attach the electrical
harness to the door trim panel.
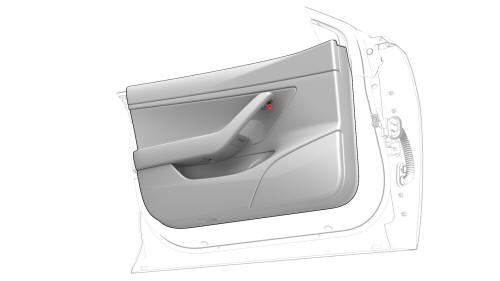
- Raise the trim panel up to unhook it from the door, and then remove the
panel from the door.

Panel - Door Trim - Front - LH (Remove and Install) - Install
Install
- Inspect the condition of the LH front door and the LH front door trim
panel. Replace any broken clips and repair any damage.
- Bring the trim panel to the door, and rest it on the door edge.
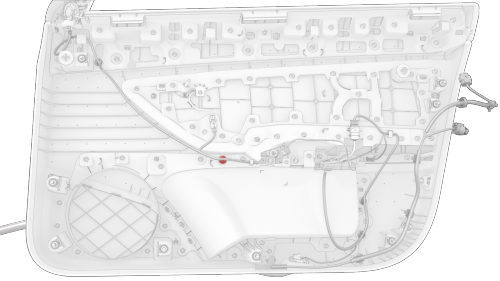
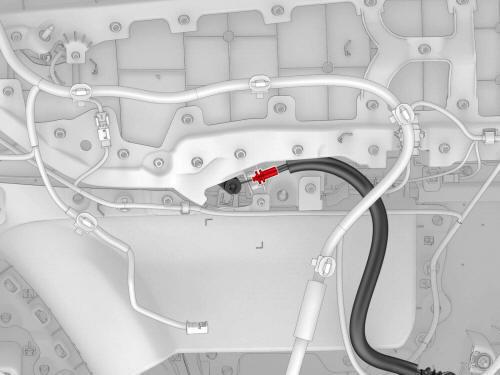
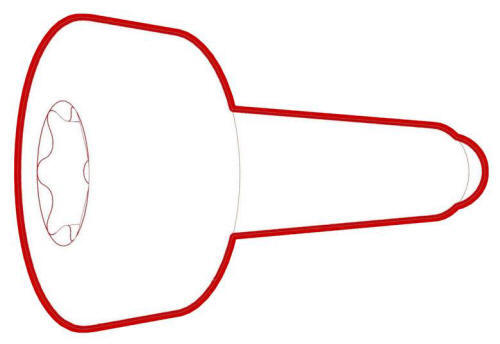
- If present, remove and discard the highlighted clip.

Attach harness to hooks (highlighted red), if present
- Route the harness as illustrated.
-
If harness hooks are present, attach the harness to the hooks.
-
If harness hooks are not present, attach the harness to the door trim panel
with cable ties.
Secure harness with cable ties if hooks are not present
- Fasten the clips that attach the electrical harnesses to the trim panel.
- Connect the electrical harness to the LH front door trim panel
connectors.
- Position the manual release cable in a vertical orientation, and slide
the cable barrel end into the release lever.
- Pivot the manual release cable collar to a horizontal orientation, and
press the collar into the trim panel.
Note: Make sure the manual release cable is routed underneath the
door harness.

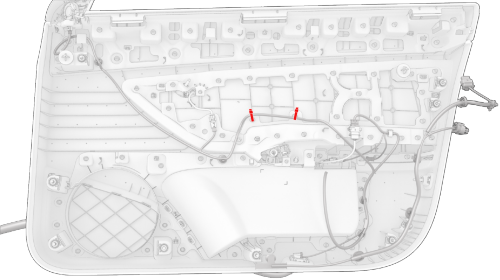
- Lift the trim panel, compress the LH front door inner belt seal slightly,
and then hook the three trim panel tabs into the top edge of the door.
- Move the electrical harness connector for the puddle lamp out the hole
in the bottom of the trim panel.
- Install the LH front door puddle lamp. See
Puddle Light - Front Door - LH (Remove and Replace).
- Make sure that the puddle lamp and map pocket ambient light illuminate
when connected.
- Fasten the clips that attach the trim panel to the door.
- Make sure that the trim panel fits tightly, and that there are no gaps
from misaligned or bent clips.
Rear
Middle
- Install the screws that attach the trim panel to the door.
 Torque 6 Nm
Caution:
Make sure that all fasteners are properly torqued and not cross-threaded.
Front
- Install the reflector to the rear edge of the trim panel and the screw
cover to the front of the armrest.
- Install the front LH door tweeter. See
Tweeter - Front Door - LH (Remove and Replace).
- Close the door and verify the operation of the manual door release lever,
that the door latch releases smoothly and easily.
- Raise the window and close the door.
READ NEXT:
Panel - Door Trim - Front - LH (Remove and Replace) -
Remove
Remove
Open the front LH door, and fully lower the window.
Remove the front LH door tweeter. See
Tweeter - Front Door - LH (Remove a
SEE MORE:
Halfshaft - Front Drive Unit - LH - Remove
SPECIAL TOOLS
Tool, Axle Extraction, Model 3 (1133386-00-A)
Tool, Hub Puller, Hydraulic (1096075-00-A)
Windshield (Remove and Replace) - Remove
Remove
Remove the cowl screen panel. See Panel - Cowl Screen (Remove and
Replace).
Disconnect the electrical harness from the windshield heater connector.
Partially close the hood.
Caution:
Use care not to damage the dashboard.
Place a fende
 Panel - Door Trim - Front - LH (Remove and Replace)
