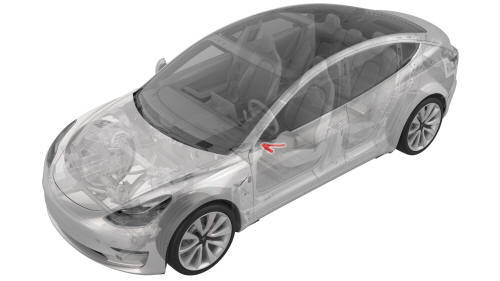
Tesla Model 3: Motor - Seat Height - Driver Seat (Remove and Replace)
Tesla Model 3 2017-2026 Service Manual / Seats / Front Seat Tracks and Motors / Motor - Seat Height - Driver Seat (Remove and Replace)
Remove
- Remove the 2nd row lower seat cushion. See Seat Cushion - Lower - 2nd Row (Remove and Replace).
- Remove the rear underhood apron. See Underhood Apron - Rear (Remove and Replace).
- Remove the LH instrument panel end cap. See End Cap - Instrument Panel - LH (Remove and Replace).
- Remove the middle A-Pillar trim panel. See Trim - A-Pillar - Middle - LH (Remove and Replace).
- Remove the LH lower A-Pillar trim. See Trim - A-Pillar - Lower - LH (Remove and Replace).
- Remove the driver seat. See Seat - Driver (Remove and Replace).
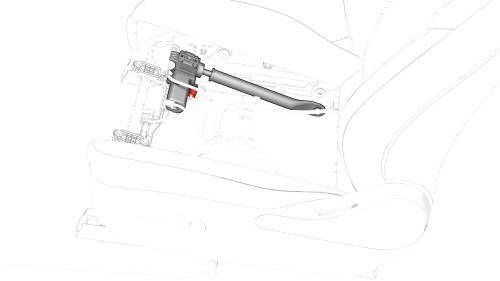
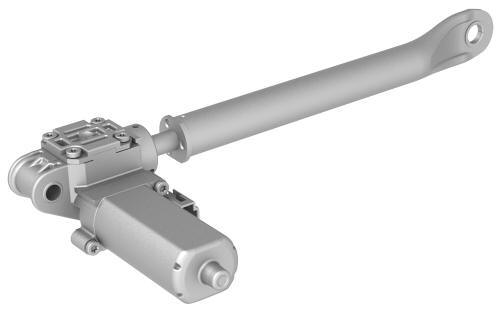
- Disconnect the electrical harness from the seat height motor connector.
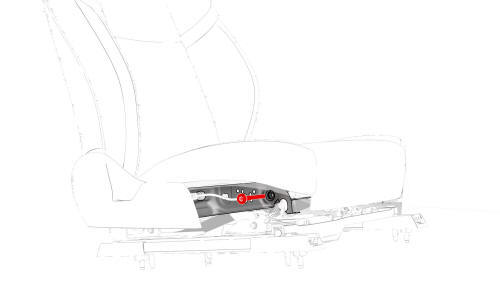
- Remove and discard the patchbolt that attaches the seat height motor to the seat cushion frame. Torque 23 Nm
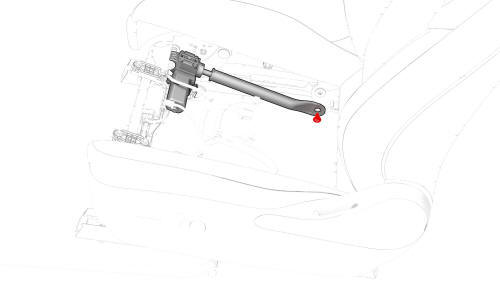
- Remove and discard the patchbolt that attaches the seat height motor to the rear RH link, and then remove the motor from the seat. Torque 18 Nm
.png) Tip:
Slide the seat height motor down and out, away from the wiring harness.
Tip:
Slide the seat height motor down and out, away from the wiring harness.
Install
Installation procedure is the reverse of removal, except for the following:
- Replace all patchbolts.
READ NEXT:
 Motor - Seat Tilt - Driver Seat (Remove and Replace)
Remove
Remove the driver seat. See
Seat - Driver (Remove and Replace).
Remove the driver seat outer side cover. See
Cover - Outer Side - Driver Seat (Remove and Install).
Disconnect the
Switch - Back Rest and Cushion Adjust - Driver Seat (Remove and Replace)
Remove
Remove the drivers seat outer side cover. See
Cover - Outer Side - Driver Seat (Remove and Install).
Carefully release the clips that attach the seat cushion and seat back
buttons
SEE MORE:
Power Conversion System (Remove and Replace)
Power Conversion System- Remove
SPECIAL TOOLS
Connector Removal, Coolant, PCS, M3 (1111868-00-B)
Kit, Svc Plug, Cooling Hose, Model 3 (1135762-00-A)
Tool, Vacuum Cup, 3" x 6" (Qty 2) (1114917-00-A)
Resistance meter, microohm, Hioki RM 3548 (1076927-00-A)
Warning:
Only technicians who have been tr
Subframe Assembly - Front (RWD) (Remove and Replace)
Caution:
Vehicles built before March 25th, 2019 have 1st generation front
subframes. Vehicles built on March 25th, 2019 and after have 2nd generation
front subframes. When a 1st generation subframe is replaced with a 2nd
generation subframe, the 1st generation (discontinued) steering rack, if
© 2019-2026 Copyright www.tmodel3.com
