Tesla Model 3 Owners & Service Manuals

Tesla Model 3: 5-Way Valve (Remove and Replace)

5-Way Valve- Remove

5-Way Valve (Remove and Replace)

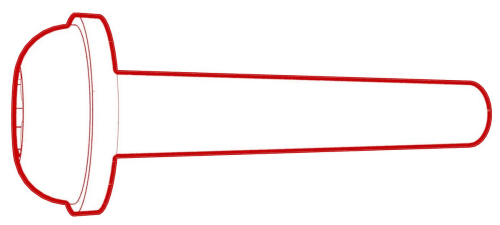
SPECIAL TOOLS

Wrench, Diverter Valve, Model 3 (1447556-00-A)

Remove

  1. Remove the 5-way valve actuator. See Actuator - 5-Way Valve (RWD) (Remove and Replace).

5-Way Valve- Remove

  1. Release the clip that attaches the electrical harness to the lower LH side of the superbottle.
  2. Position a coolant drain under the superbottle

5-Way Valve- Remove

  1. Disconnect the powertrain supply hose at the lower LH side of the superbottle, and then plug the female connector.

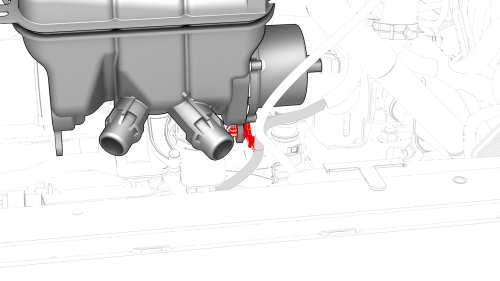
Note: Allow the coolant to drain from the superbottle

5-Way Valve- Remove

  1. Remove and discard the screws that attach the 5-way valve actuator cover to the superbottle, and then remove the cover from the superbottle.

5-Way Valve- Remove

  1. Remove and discard the O-rings from the 5-way valve cover.

5-Way Valve- Remove

  1. Remove the stem shell from the superbottle.

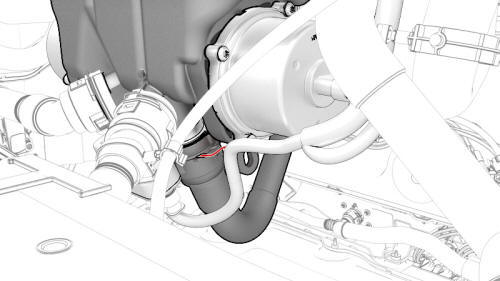
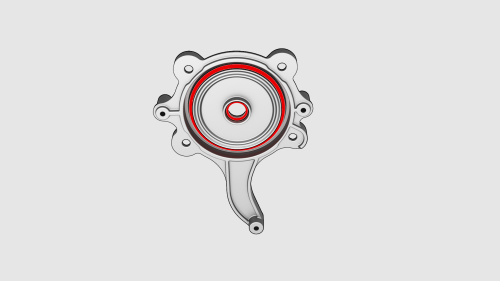
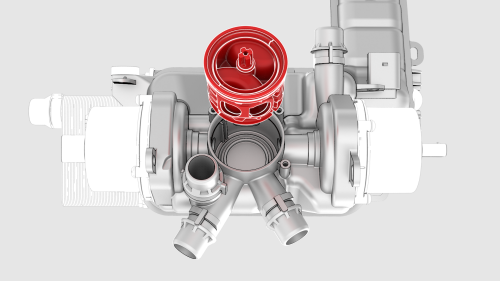
5-Way Valve - Install
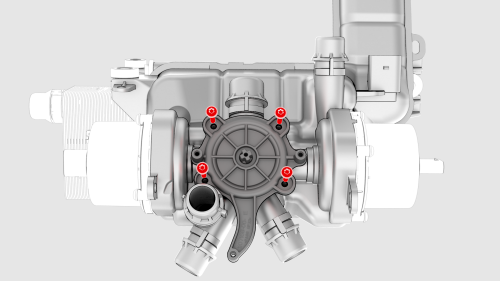
Install

  1. Install new O-rings onto the 5-way valve cover.

Note: Align notches in the o-rings with the ribs in the 5-way valve cover.

  1. Examine the end the of the 5-way valve stem shell shaft. One shaft spline is slightly wider than the others.
  2. Mark the wider spline.
  3. Slide the new stem shell into the superbottle.

Note: Align channels in the stem shell with ribs in the superbottle.

  1. Install the new 5-way valve cover onto the superbottle, and then install new screws to attach the cover to the superbottle. Torque 3.3 Nm
  2. Use the diverter valve wrench to verify that the stem shell shaft turns smoothly and does not bind.
  3. Connect the powertrain supply hose to the superbottle.
  4. Remove the coolant drain from under the superbottle.
  5. Fasten the clip that attaches the electrical harness to the superbottle.
  6. Use the diverter valve wrench to align the 5-way valve stem shell shaft with the 5-way valve actuator for assembly.

Note: When properly aligned, the actuator easily slides over the stem shell shaft.

  1. Install the 5-way valve actuator on the 5-way valve cover, and then install the screws that attach the actuator on the cover. Torque 3.3 Nm
  2. Connect the electrical harness to the 5-way valve actuator connector.
  3. Install the front aero shield. See Panel - Aero Shield - Front (Remove and Replace).
  4. Add coolant to the superbottle, so that the liquid level is approximately 6mm (0.25 in) above the MAX line.
  5. Connect 12V power. See 12V Power (Disconnect and Connect).
  6. Perform a cooling system vacuum refill. See Cooling System (Vacuum Refill).
  7. Connect a laptop with Toolbox to the vehicle.
  8. Using Toolbox, run the 5-way valve actuator self-test, "TEST-SELF_VCFRONT_X_FIVE-WAY-VALVE."

Note: This Toolbox routine tests and calibrates the 5-way valve actuator.

  1. Disconnect the laptop from the vehicle.

    READ NEXT:

     Actuator - 5-Way Valve (Dual Motor) (Remove and Replace)

    SPECIAL TOOLS Kit, Svc Plug, Cooling Hose, Model 3 (1135762-00-A) Wrench, Diverter Valve, Model 3 (1447556-00-A) Remove Remove the superbottle. See Superbottle (Dual Motor) (Remove and Replace).

    SEE MORE:

     Hose - Inverter Inlet - Front Drive Unit (Remove and Replace)

    Hose - Inverter Inlet - Front Drive Unit - Remove   Remove Remove the 2nd row lower seat cushion. See Seat Cushion - Lower - 2nd Row (Remove and Replace). Remove the rear underhood apron. See Underhood Apron - Rear (Remove and Replace

     Hose - Chiller to Car Computer and HV Battery Supply Manifold (Dual Motor) (Remove and Replace)

    SPECIAL TOOLS Plug,Car Computer Fluid Port (1119171-00-A) Kit, Svc Plug, Cooling Hose, Model 3 (1135762-00-A) Remove Remove the front subframe assembly. See Subframe Assembly - Front (Dual Motor) (Remove and Install). Disconnect the electrical harness from the chiller and EXV assembly hos

    © 2019-2025 Copyright www.tmodel3.com