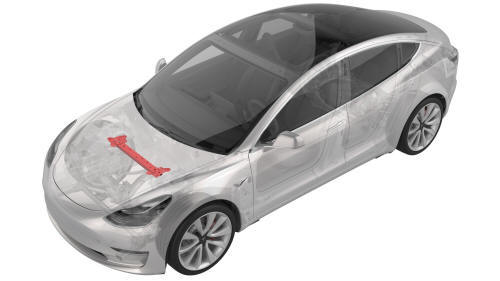
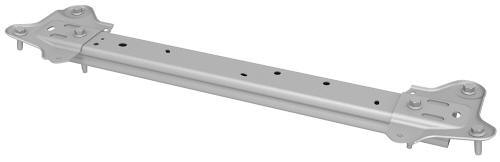
Tesla Model 3: Brace - Shock Tower (Remove and Replace)
Tesla Model 3 2017-2026 Service Manual / Body / Body Panels / Brace - Shock Tower (Remove and Replace)
Remove
- Open all the doors.
- Lower all the windows.
- Remove the 2nd row lower seat cushion.
- Remove the rear underhood apron.
- Remove the cabin intake duct.
- Remove the underhood storage unit
- Disconnect the 12V power.
- Remove the 12V auxiliary battery.
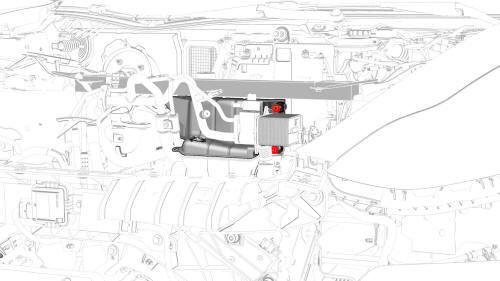
- Support the A/C compressor from below.
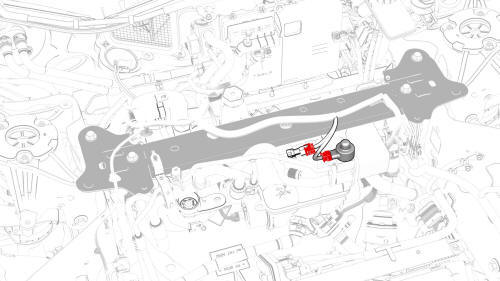
- Disconnect the electrical connectors from the low pressure transducer and the EXV.
- Release the clips that attach the electrical harness to the shock tower brace.
- Remove the bolt that attaches the liquid line bracket to the shock tower
brace.
 Torque 5.5 Nm
- Remove the bolts that attach the A/C compressor to the compressor
bracket.
 Torque
10 Nm
Torque
10 Nm
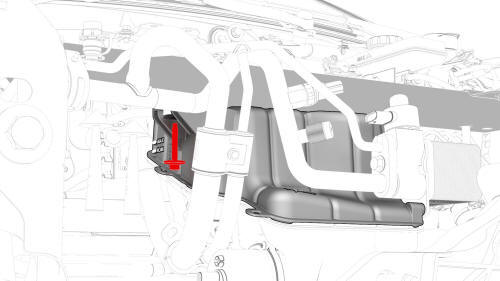
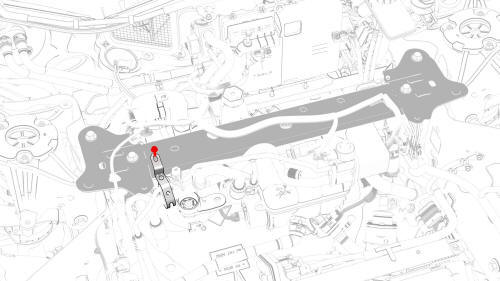
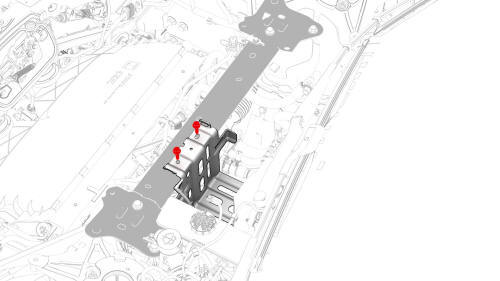
- Remove the bolt that attaches the superbottle to the brace.
 Torque 8 Nm
- Remove the nuts that attach the superbottle to the brace.
 Torque
8 Nm
Torque
8 Nm
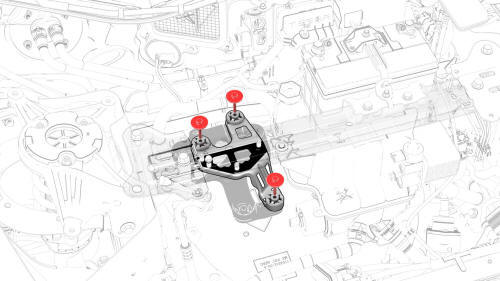
- Remove the bolts that attach the battery bracket to the shock tower
brace.
 Torque 15 Nm
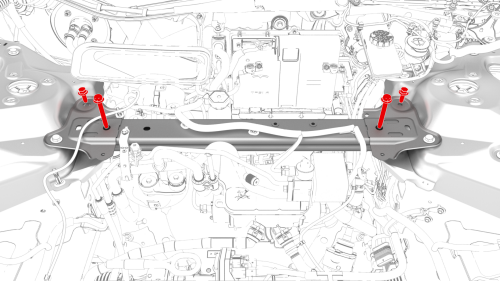
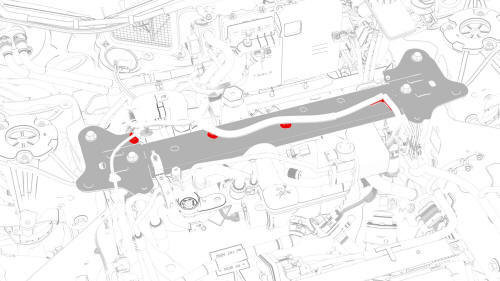
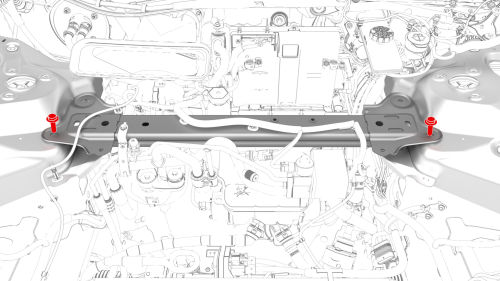
- Remove the LH and RH bolts that attach the shock tower brace to the body.
 Torque 67 Nm
 Torque
67 Nm
Torque
67 Nm
- Remove the LH and RH outer bolts that attach the shock tower brace to
the body, and then remove the shock tower brace from the vehicle.
 Torque 62 Nm

- Remove the bolts that attach the compressor bracket to the shock tower
brace, and then remove the bracket from the brace.
 Torque
10 nm
Torque
10 nm
Install
Installation procedure is the reverse of removal.
READ NEXT:
 Bracket - Crash Can - LH (Remove and Replace)
DRAFT
Warning:
This procedure was derived from pre-production computer models, and
might not reflect the real-world situation. Warnings and cautions might be
missing. Follow safety requirements
Carrier - Front End (Remove and Replace)
Carrier - Front End (Remove and Replace)-
Remove
Remove
Raise and support the vehicle.
Remove the rear underhood apron.
Remove the cabin intake duct.
Remove the hood latch cover.
Remove t
SEE MORE:
Brake Lines - Master Cylinder to ABS (Remove and Replace)
Brake Lines - Master Cylinder to ABS - Remove
SPECIAL TOOLS
Flare nut crowfoot set (1079041-00-A)
Remove
Caution: Brake fluid dissolves paint. Have c
Cover - Rear Suspension - LH (Remove and Replace)
Remove
Remove the bolt that attaches the rear suspension cover to the LH lower
rear control arm assembly.
Torque 6 Nm
Release the tabs (x2) that attach the rear suspension cover to the LH
lower rear control arm assembly, and then remove the rear suspension cover
from the vehicle.
I
© 2019-2026 Copyright www.tmodel3.com
