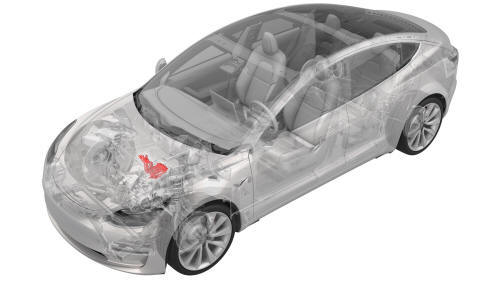
Tesla Model 3: Bracket - 12V Battery (Dual Motor) (Remove and Replace)
Tesla Model 3 2017-2026 Service Manual / Electrical / 12V Battery and Fuses / Bracket - 12V Battery (Dual Motor) (Remove and Replace)
Remove
- Remove the 2nd row lower seat cushion. See Seat Cushion - Lower - 2nd Row (Remove and Replace).
- Remove the rear underhood apron. See Underhood Apron - Rear (Remove and Replace).
- Remove the cabin intake duct. See Duct - Cabin Intake (Remove and Replace).
- Remove the underhood storage unit. See Underhood Storage Unit (Remove and Replace).
- Remove the LH and RH wiper arms. See Wiper Arms (Remove and Replace).
- Remove the LH and RH shock tower covers. See Cover - Shock Tower - LH (Remove and Replace).
- Remove the cowl screen panel. See Panel - Cowl Screen (Remove and Replace).
- Disconnect 12V power. See 12V Power (Disconnect and Connect).
- Remove the 12V auxiliary battery. See Battery - 12V (Remove and Replace).
- Remove the front body controller module. See Module - Body Controller - Front (Dual Motor) (Remove and Replace).
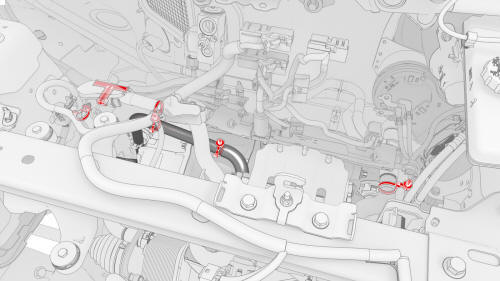
- Release the clips that attach the coolant hoses and electrical harnesses to the 12V battery beam.
.jpg)
- Remove the bolts that attach the 12V battery beam to the vehicle.
.jpg) Torque 9 Nm
Torque 9 Nm
.jpg)
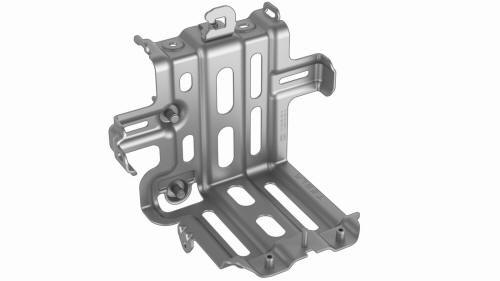
- Remove the 12V battery bracket and 12V battery beam from the vehicle.
Note: Carefully slide the beam toward the RH side of the vehicle, and then lift the LH side of the beam to remove the assembly.
.jpg)
- Remove the bolts that attach the 12V battery beam to the 12V battery
bracket, and then set the beam aside.
.png) Torque 9 Nm
Torque 9 Nm
Install
Installation procedure is the reverse of removal, except for the following:
- Replace all nyloc nuts.
- Replace all patchbolts.
READ NEXT:
 Bracket - 12V Battery (RWD) (Remove and Replace)
Bracket - 12V Battery (RWD) - Remove
Remove
Remove the 2nd row lower seat cushion. See
Seat Cushion - Lower - 2nd Row (Remove and Replace).
Remove the rear underhood apron. See
Underhood Apron -
SEE MORE:
DC Input Assembly - HV Battery (Remove and Replace)
DC Input Assembly - HV Battery- Remove
SPECIAL TOOLS
Ratchet, 1/4" Sq Dr, HV Insulated (1057602-00-A)
Skt, 1/4" Sq Dr, 13mm, HV Insulated (1057606-00-A)
Magnet, Flexible, HV Insulated, 18" (1057607-00-A)
Skt, 1/4in Dr, 5-Lobe Torx Plus External (1059330-00-B)
Resistance meter, microohm, Hioki RM 354
Skull Cap - Door Mirror - LH (Remove and Replace)
Remove
Outside Edge of Skull Cap
Inside Edge of Skull Cap
Pull outward to release the clips that attach the rear of the LH door
mirror skull cap to the LH door mirror.
Pry up along the inside and outside edge of the LH door mirror skull cap,
working toward the front of the skull cap
© 2019-2026 Copyright www.tmodel3.com
