Tesla Model 3: Brake Fluid Bleed / Flush
SPECIAL TOOLS
Brake System Servicing Equipment (1054715-01-A)

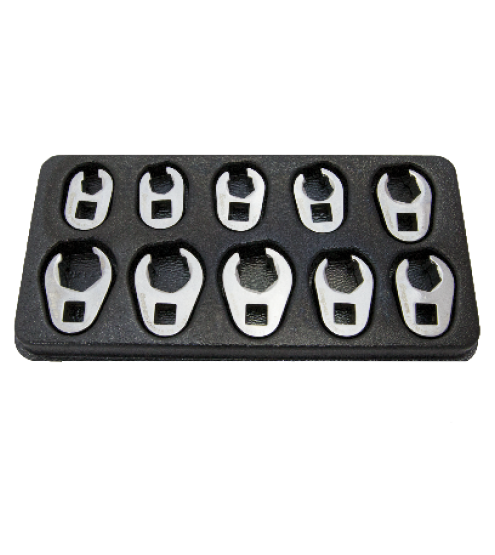
Flare nut crowfoot set (1079041-00-A)
Adapter, Brake Bleeder, PowerProbe TS04 (1080578-00-B)
Catch Bottle (1086618-01-A)
Procedure
Caution: Brake fluid dissolves paint. Have clean towels and plenty of water standing by to wash spilled brake fluid off painted surfaces.Note: Dispose of used brake fluid in a manner consistent with local environmental codes.
- Review the bleeder service tool profile.
- Raise the vehicle and remove all four wheels. See Wheel (Remove and Install).
- Lower the vehicle to a working height.
- Connect the vehicle to Toolbox 3.
- In Toolbox, type "bleed" into the search field and click Actions.
- Remove the rear underhood apron. See Underhood Apron - Rear (Remove and Replace).
- Clean the area around the brake fluid reservoir breather cap and remove the cap.
- Add clean brake fluid to the MAX level in the reservoir.
- Attach the pressure cap to the reservoir.
- Set the pressure to 30 PSI.
- Bleed the front LH brake caliper first.
- Remove the caliper outer bleed valve cap and attach the catch bottle to the valve.
Note: Hang the bottle by the wire hook, not by the hose.
- In Toolbox, start the task for the particular caliper.
- For the front LH and rear RH calipers, run PROC_ESP_FRONT-L-REAR-R_BRAKE_BLEED.
- For the front RH and rear LH calipers, run PROC_ESP_FRONT-R-REAR-L_BRAKE_BLEED.
- Open the outer bleed valve and watch the fluid as it flows out of the caliper.
- Use the crowfoot extension to close the bleed valve when the pump stops, or when clean fluid without bubbles flows out of the caliper.
- Make sure that the reservoir does not go empty, or that the catch bottle does not overfill.
Note: If the reservoir goes empty, you must refill the reservoir and repeat the entire procedure from step 9.
- Repeat step 13 through step 16 until clean fluid without bubbles flows out of the caliper.
- Remove the catch bottle and install the bleed valve cap.
- Repeat step 12 through step 18 for the inner bleed valve, and again for the outer bleed valve.
- Tighten the bleed valves.
.png) Torque 18.5 Nm
Torque 18.5 Nm - Refill the reservoir to MAX, and properly dispose of the catch bottle contents.
- Repeat step 12 through step 21 for the front RH brake caliper.
- Bleed the rear RH brake caliper next.
- Remove the caliper bleed valve cap and attach the catch bottle to the valve.
Note: Hang the bottle by the wire hook, not by the hose.
- In Toolbox, start the task for the particular caliper.
- For the front LH and rear RH calipers, run PROC_ESP_FRONT-L-REAR-R_BRAKE_BLEED.
- For the front RH and rear LH calipers, run PROC_ESP_FRONT-R-REAR-L_BRAKE_BLEED.
- Open the bleed valve and watch the fluid as it flows out of the caliper.
- Use the crowfoot extension to close the bleed valve when the pump stops, or when clean fluid without bubbles flows out of the caliper.
- Make sure that the reservoir does not go empty, or that the catch bottle does not overfill.
Note: If the reservoir goes empty, you must refill the reservoir and repeat the entire procedure from step 9
- Repeat step 25 through step 28 until clean fluid without bubbles flows out of the caliper.
- Remove the catch bottle and install the bleed valve cap.
- Tighten the bleed valve as follows:
.png) Torque Brembo Rear Caliper 14 Nm
Torque Brembo Rear Caliper 14 Nm
.png) Torque Mando Rear Caliper 10 Nm
Torque Mando Rear Caliper 10 Nm - Refill the reservoir to MAX, and properly dispose of the catch bottle contents.
- Repeat step 24 through step 32 for the rear LH brake caliper.
- Remove the pressure cap from the reservoir and install the breather cap.
- Press the brake pedal several times to verify proper feel and action.
- In Toolbox, type "stiffness" into the search field and click Actions.
- Run the IBST Stiffness Test - Burnished - Pressure test.
- If the Pressure_P100 value in the test results is less than 55 bar, repeat the bleed procedure from step 5.
- Install all four wheels and lower the vehicle. See Wheel (Remove and Install).
- Repeatedly press the brake pedal until firm.
- Perform a road test using a series of panic stops to make sure there is proper pedal feel and brake performance.

