Tesla Model 3: Cover - Airbag - Knee - Front Passenger (Remove and Replace) - Install
Tesla Model 3 2017-2026 Service Manual / Instrument Panel / Cover - Airbag - Knee - Front Passenger (Remove and Replace) / Cover - Airbag - Knee - Front Passenger (Remove and Replace) - Install
Install
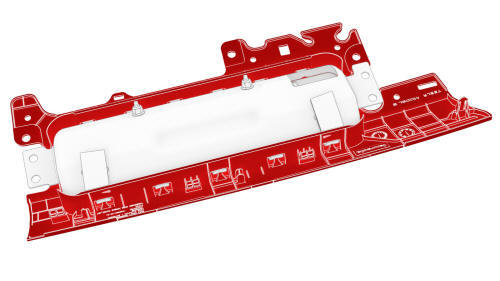
- Install the passenger knee airbag into the airbag cover by installing the rear tabs first, and then press down against the airbag while pushing upwards on the edge of the cover.
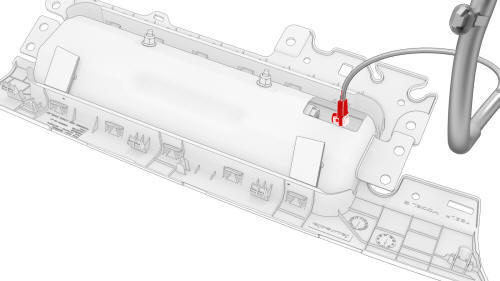
- Install the electrical connector to the airbag.
Caution:
Support the front passenger knee airbag cover during installation.
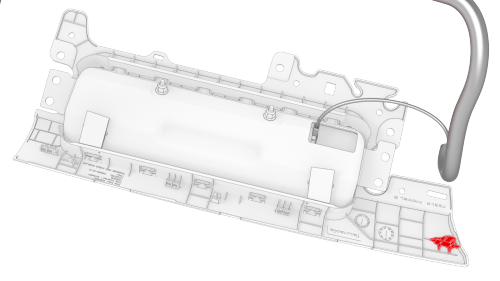
Take care when installing the highlighted clip
- Position the front passenger knee airbag cover on the vehicle.
Note: Carefully install the corner clip, as it can be easily damaged.
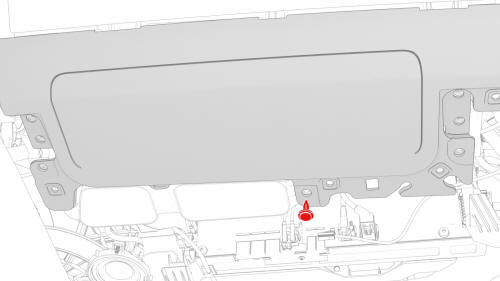
- Install the clip that attaches the front passenger knee airbag cover to the vehicle.
Note: Make sure that the clips on the rear edge of the front passenger knee airbag cover engage the IP carrier
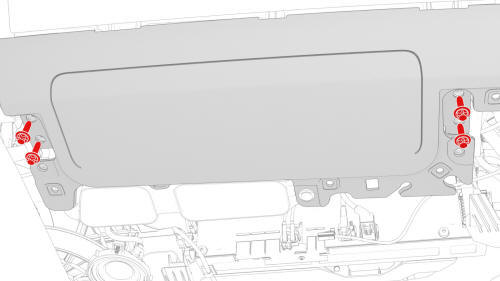
- Install the new T30 patchbolts (x4) that attach the front passenger knee
airbag cover to the vehicle.
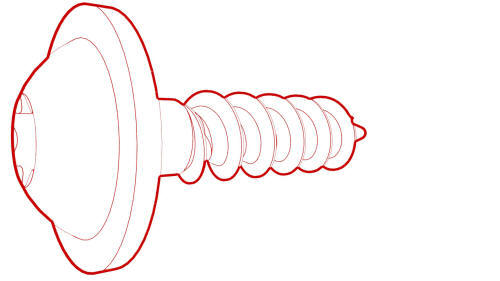 Torque 2.3 Nm
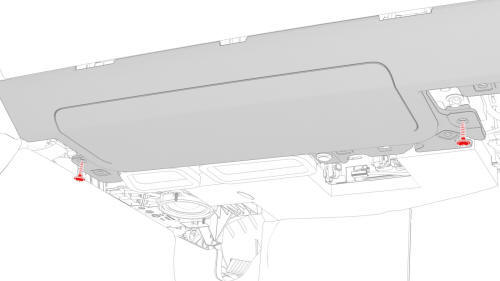
- Install the T20 bolts (x2) that attach the front passenger knee airbag
cover to the vehicle.
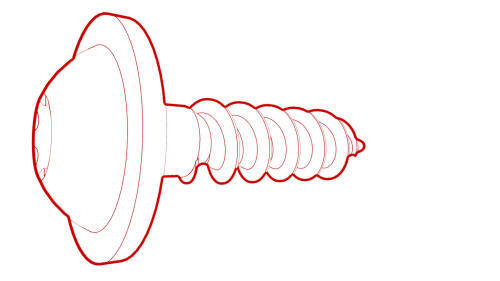 Torque 2 Nm
 - Install the passenger footwell cover. See Cover - Footwell - Passenger (LHD) (Remove and Replace).
- Reconnect 12V power. See 12V Power (Disconnect and Connect).
READ NEXT:
 Cover - Footwell - Driver (Remove and Replace)
Remove
Release the clips and remove the screw that attach the driver footwell
cover to the vehicle.
Torque
2.5 Nm
Disconnect the electrical connector from the puddle light, and then
Cover - Footwell - Passenger (LHD) (Remove and Replace)
Remove
Release the clips that attach the passenger footwell cover to the
vehicle.
Disconnect the electrical wiring harness connectors from the puddle
light and emergency speaker.
Damper - Glove Box (Remove and Replace)
Remove
Remove the glove box. See
Glove Box (LHD) (Remove and Replace).
Remove the pin that attach the glove box damper to the glove box using
needle nose pliers.
Fully open the glove bo
SEE MORE:
Interior Overview & Exterior Overview
Interior Overview
Door open button
High beams, turn signals and wipers and washers
Horn
Gear selector, Traffic-Aware Cruise Control and Autosteer
Touchscreen
Driver dome light
Cabin camera
Hazard warning flashers
Passenger dome light
Clim
Contacting Tesla Roadside Assistance
Tesla Roadside Assistance is available to you, 24 hours a day, 365 days a
year, for the duration of
your warranty period.
When contacting Tesla Roadside Assistance, please provide:
The Vehicle Identification Number (VIN). The VIN is displayed when you
touch the Tesla "T" at
© 2019-2026 Copyright www.tmodel3.com
